


44 C1695M (8/06)
Initial DVR5100 Configuration
About Setting Up the DVR5100 for the First Time
This section provides a basic checklist for setting up your DVR5100 for the first time. You should perform the steps in this checklist immediately
after you have installed the DVR5100 according to the steps described in Hardware Installation on page 14. The DVR5100 front panel controls are
used to configure the DVR. You can use an optional KBD5000 keyboard or a USB PC keyboard and mouse to perform some setup tasks more
efficiently. Refer to Understanding DVR5100 Controls and Menus on page 31 for a comparison on using any of these devices to work with the on-
screen menus.
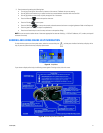
1. Install the DVR5100 hardware: For information about hardware installation, refer to Hardware Installation on page 14.
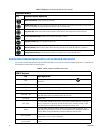
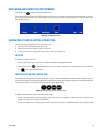
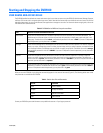
2. Turn on the DVR: You are not required to log on to the DVR5100 to set up the primary monitor. You must log on to the DVR5100 as an
administrator user (admin) to access the configuration setup dialog menu. For information about user groups and access roles, refer to
Table K, below.
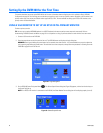
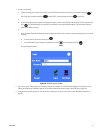
3. Select a primary monitor: (Optional) By default, the DVR5100 monitor format is set to VGA. If you plan on using a VGA monitor, no setup
steps are required to configure the primary monitor before using the DVR5100. In this case, you can skip the section on setting up a primary
monitor and go directly to the section that describes how to set up a spot monitor.
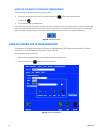
4. Configure the DVR5100: After selecting a primary monitor, you configure the DVR5100 as follows:
a. Set the system date and time: You must configure the system date and time.
b. Configure the primary monitor: (Optional) If the system defaults are acceptable, there are no other steps to be performed to
configure the primary monitor.
c. Configure the spot monitor: (Optional) If a spot monitor is install, perform the configuration steps.
d. Configure the applicable DVR5100 features/options: