


C1695M (8/06) 97
ENABLING PRUNING
By default, system log entries that are older than 30 days are deleted from the log.
TIP: You can use an optional KBD5000 keyboard or a USB PC keyboard and mouse to perform some setup tasks more easily. Refer to
Understanding DVR5100 Controls and Menus on page 31 for a comparison on using any of these devices to work with the on-screen menus.
To enable pruning and select the pruning period:
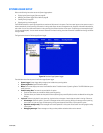
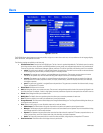
1. If it is not already open, select the Configuration tab for the system logger from the Devices tab on the Setup window. For information about
displaying system logger settings, refer to Displaying the System Logger Options on page 96.
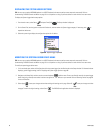
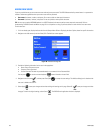
2. Navigate to the Enable Pruning After check box and select it.
3. Navigate to the Enable Pruning After field, and then select the pruning period in days.
4. Select Apply to save your changes and continue working with settings on this page. Select OK to save your changes and close
the page. To retain the original settings, select Cancel . The DVR5100 main application window is displayed.
SELECTING THE LOG LEVEL
TIP: You can use an optional KBD5000 keyboard or a USB PC keyboard and mouse to perform some setup tasks more easily. Refer to
Understanding DVR5100 Controls and Menus on page 31 for a comparison on using any of these devices to work with the on-screen menus.
To determine how much information is written to the log file:
1. If it is not already open, select the Configuration tab for the system logger from the Devices tab on the Setup window. For information about
displaying system logger settings, refer to Displaying the System Logger Options on page 96.
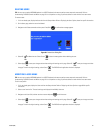
2. Navigate to the Log Level list, and then select the log level. Choices are All messages, Operating messages only, and Debugging messages
only.
NOTE: Choose a message level that balances system performance with your ability to track issues through the system log. Writing more
information to the log consumes more system resources and can appear to slow down the system.
3. Select Apply to save your changes and continue working with settings on this page. Select OK to save your changes and close
the page. To retain the original settings, select Cancel . The DVR5100 main application window is displayed.