


86 C1695M (8/06)
Setting Up Motion Detection Zones
NOTE: Use the front panel controls or a USB PC keyboard and mouse to set up motion detection zones.
1. If it is not already open, select the Motion tab for a camera from the Devices tab on the Setup window. If this tab is not available, select the
Configuration tab, and then select the “Enable 24 hour motion recording” service. After you save the changes, the DVR5100 displays the
Motion tab. This can take a few minutes.
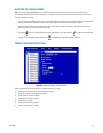
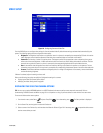
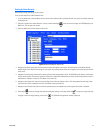
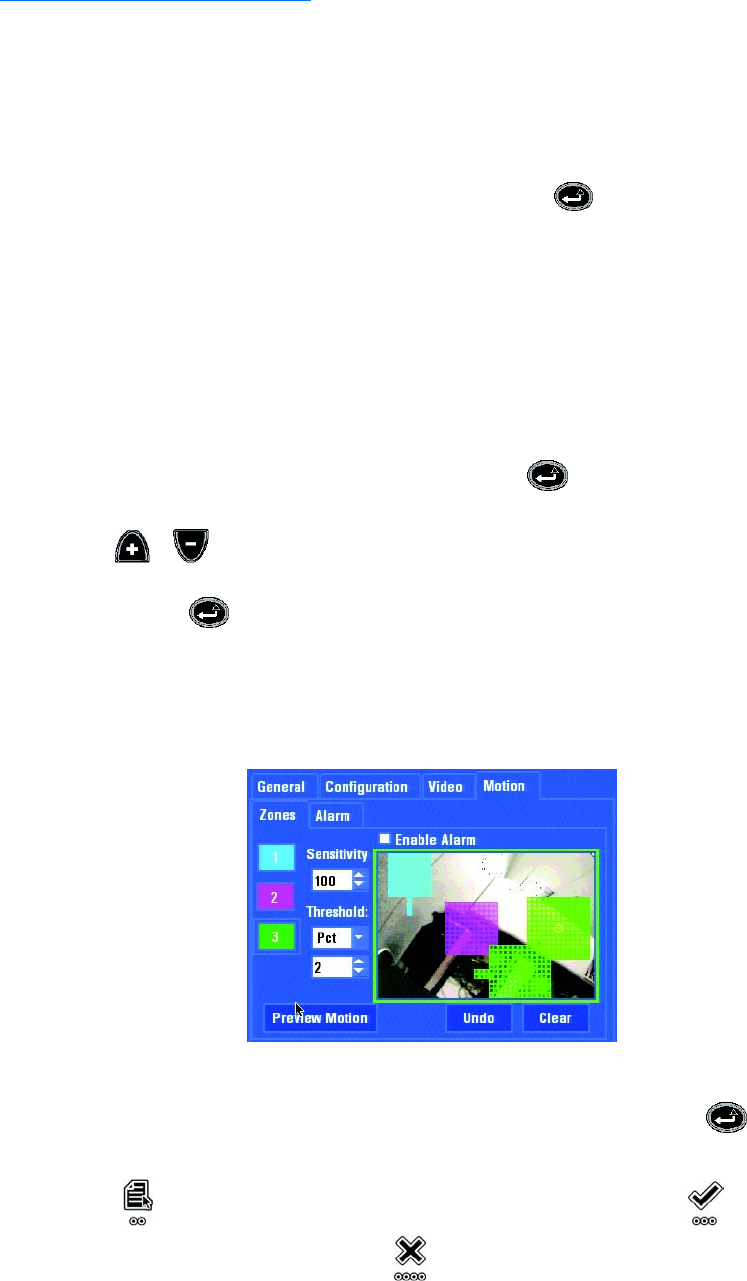
2. Select the Zones tab if it is not already displayed. (Figure 72)
3. Select the button of the zone you want to configure, and then press Enter/Shift . You can configure a maximum of three zones. The
currently selected zone button is surrounded by a pale square border.
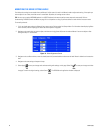
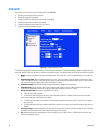
4. Navigate to Sensitivity, and then set the sensitivity level. It is recommended that the sensitivity of the zone be set between 80 and 99.
5. Navigate to Threshold, and then set the threshold for the zone. You can select to measure the threshold by a percentage of the area or by
blocks in the frame.
6. (Optional) If applicable, check the “Enable Alarms” box to ensure that an alarm is triggered by motion detection within the zone. Follow the
steps at Setting Up Alarm Severity on page 87 to set up the alarm. Clear this check box if you do not want to associate an alarm with the
motion detection settings.
7. Create or edit a zone as follows:
• Tap the joystick to enter the preview pane, and then press Enter/Shift .
• Tap the joystick up, down, right, or left to move to the area you want to include in the zone.
• Press or to add or remove a block from the motion detection zone. Press these buttons repeatedly without moving to
another block to increase or decrease the size of the block quickly.
• Press Enter/Shift after the zone is completed.
• Select the Undo command to revert back to the original settings.
• Select the Clear command to delete all of the defined motion detection zones.
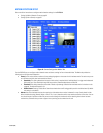
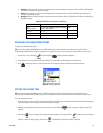
As you create a zone, the blocks change color to indicate the zone in which they are included. The color for blocks included in zone 1 is blue,
in zone 2 the color is pink, and in zone 3 the color is green.
Figure 73. Setting Up Motion Detection Zones
8. To preview the results of your motion settings, navigate to Preview Motion, and then press Enter/Shift . The motion zones flicker in
the preview pane wherever motion is detected in the camera’s field of view.
9. Select Apply to save your changes and continue working with settings on this page. Select OK to save your changes and close
the page. To retain the original settings, select Cancel . The DVR5100 main application window is displayed.