103CLEARVU10
SVAT ELECTRONICS
now you can see
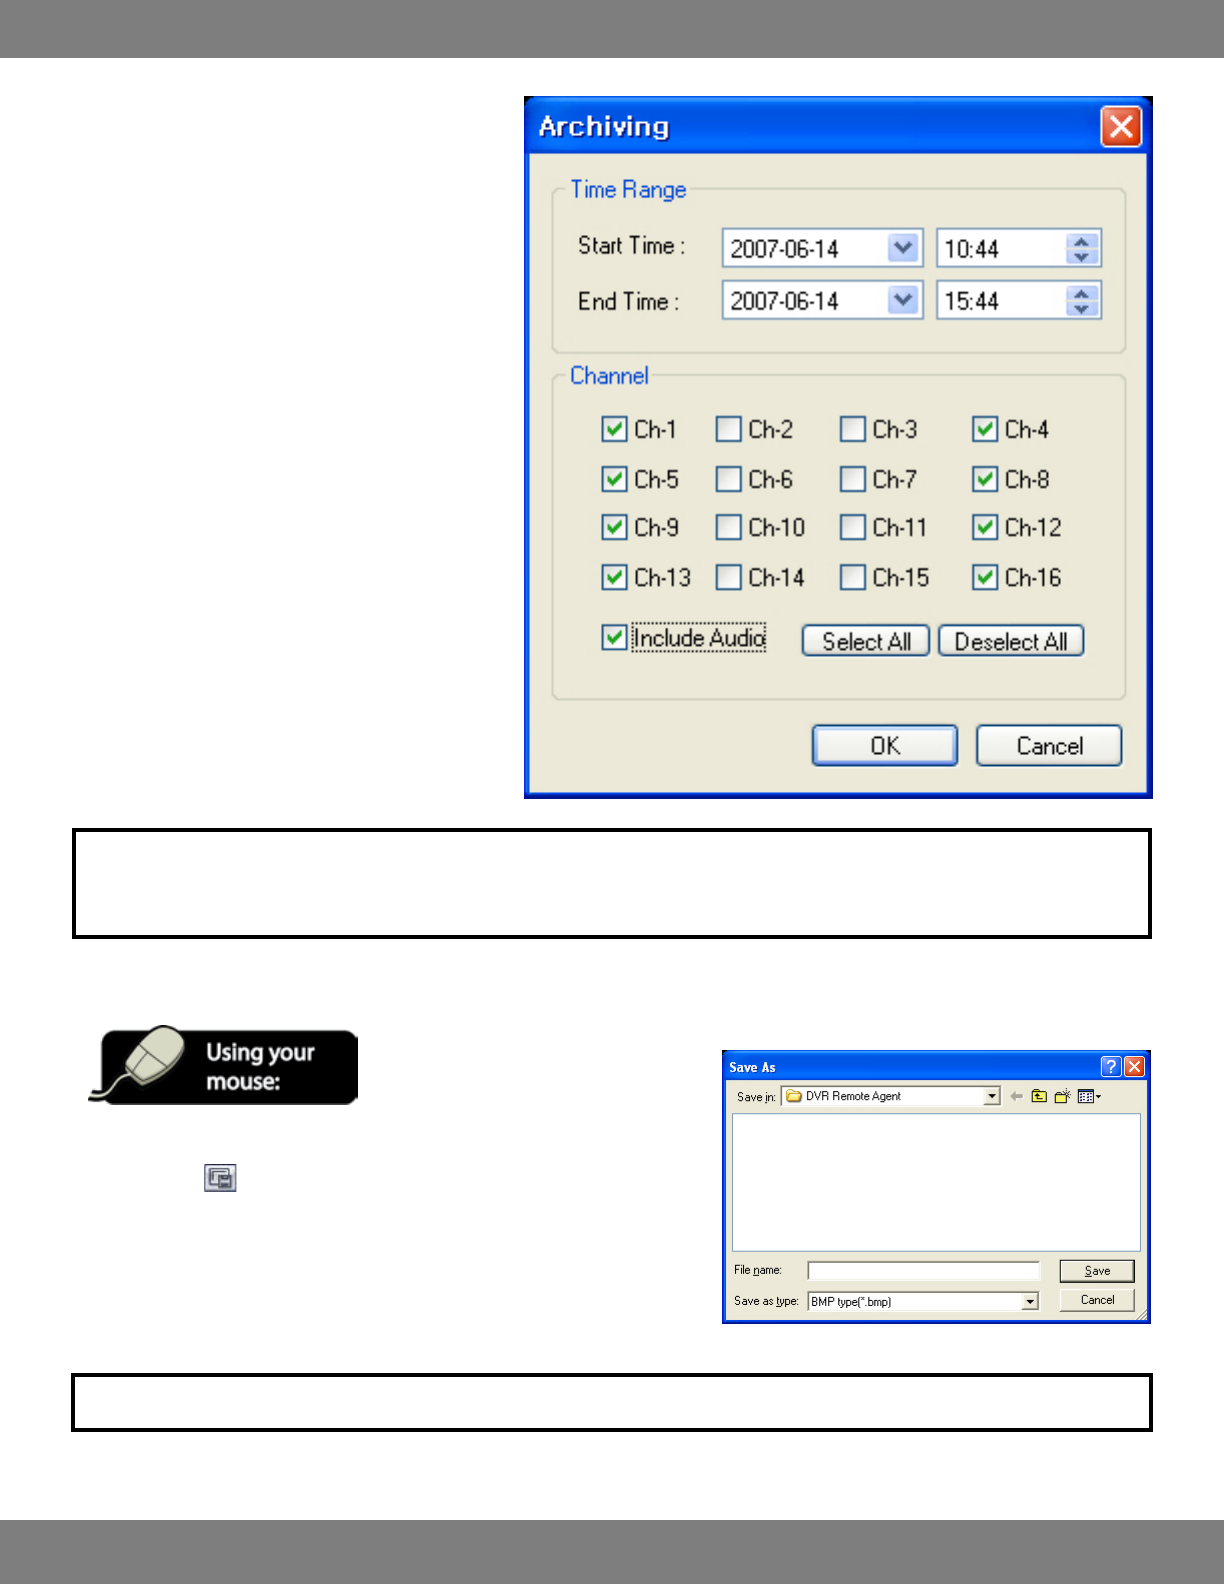
2. The archiving screen will pop up.
3. Use the dropdown menus to choose the start and end
time of the footage you would like to archive. In the
example (see right), footage between 10:44 am and
15:44 (3:44pm) will be archived.
4. Choose which cameras you would like to archive by
checking the boxes accordingly. If you would like
footage from all cameras to be archived, click “Select
All”. “Deselect All” will clear all checked boxes.
5. If you have audio equipped cameras (not included)
and would like the audio to be archived with the video,
check the box next to “Include Audio”.
6. ClickOK,andtheselectedfootagewillwritetothehard
drive.
NOTE: All footage will write to the directory listed under Settings>Conguration>Save Directory. For instructions on how to change the
Save Directory, please refer to step 7 of SAVING DIRECTORY, pg.82.
SAVING STILL SHOTS (SCREEN CAPS) TO YOUR PC
1. During playback, you can save a still shot to your local hard drive by clicking the
SNAPSHOT
button.
2. A Window asking you where you would like to save the le and the preferred le
format will pop up.
3. Specify the le location, le name, and choose .BMP or .JPG le format.
4. Click “Save”. The still shot is now saved to your computer.
NOTE: The still shot is saved in the same style as the current screen display. For example, quad screen single screen, etc.
