78CLEARVU10
SVAT ELECTRONICS
now you can see
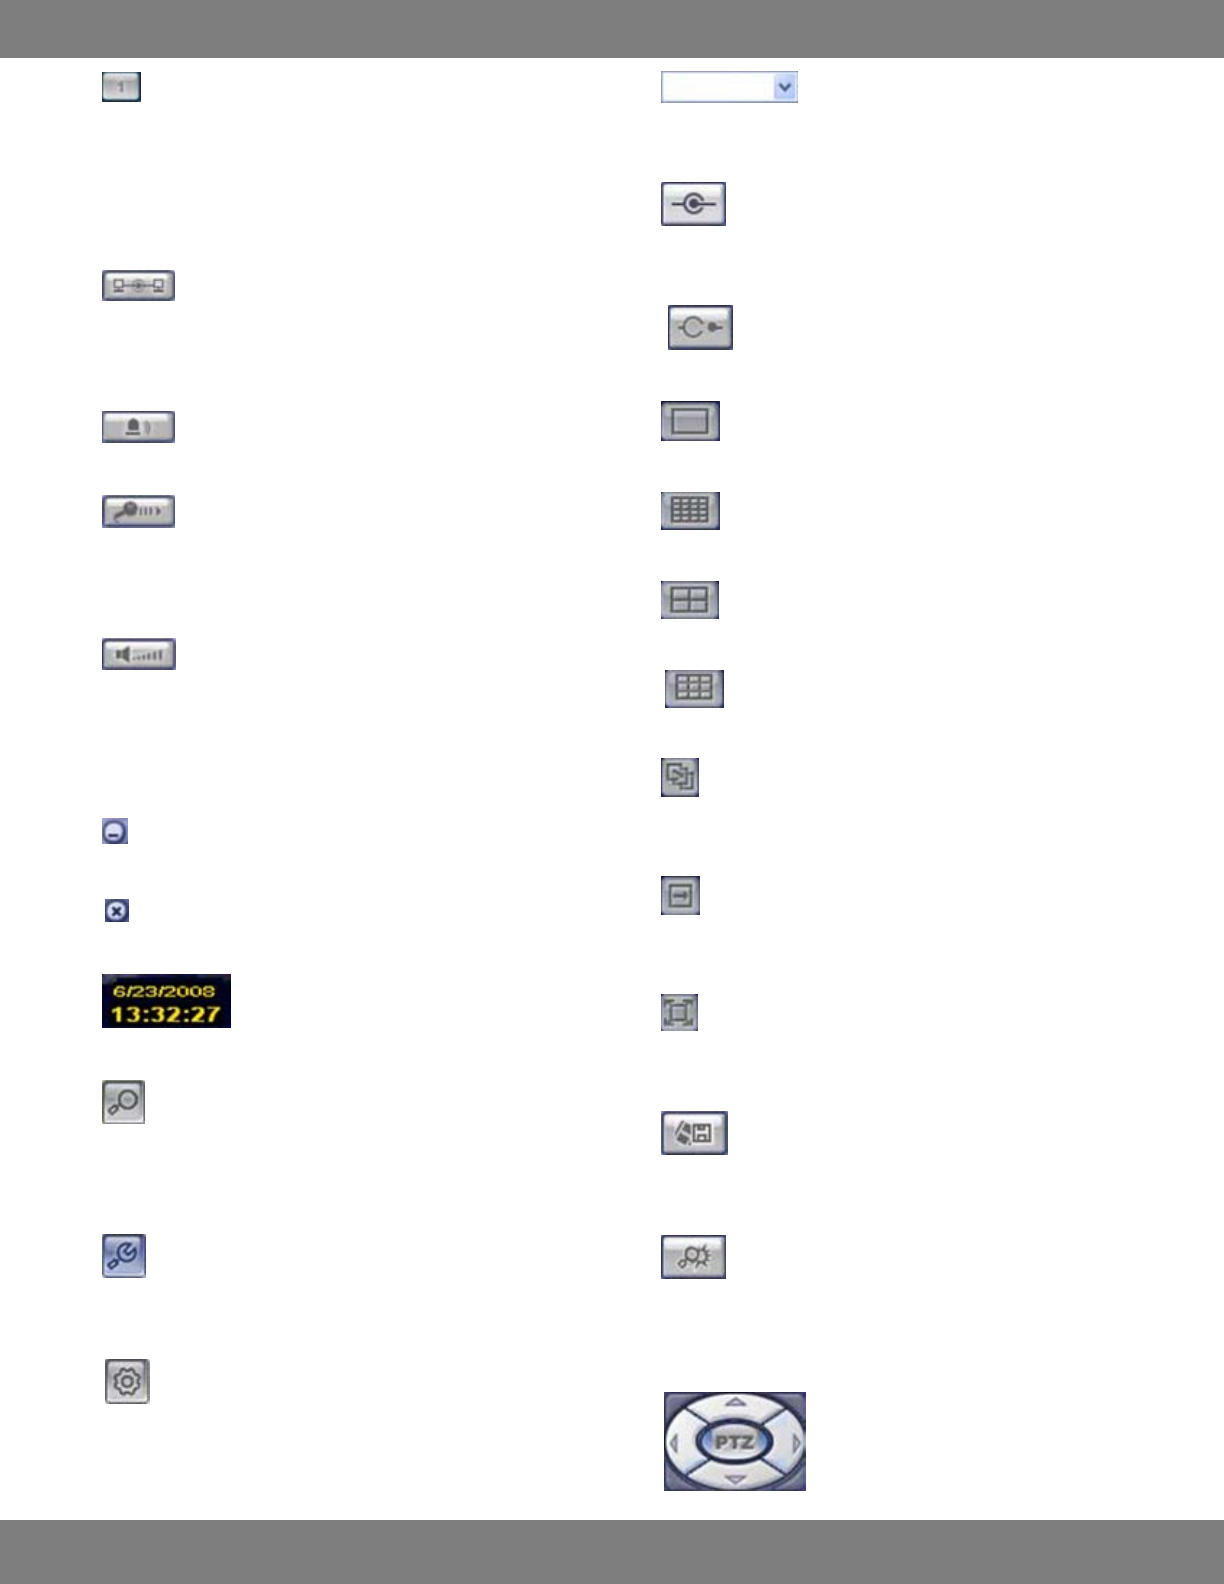
1 CHANNEL SELECTION BUTTONS
These buttons work in the same way as the DVR’s button panel in
Live Display Mode. When in full screen mode, you can click each
number to see that camera in full screen. Also, when Sequence
mode is selected in the software, the buttons will turn blue when
its camera is displayed on screen.
2
STATUS BUTTON
Indicates the connectivity status of the DVR. If connected, the
button will be light blue. If you are not connected to the DVR, the
button will be grey.
3
ALARM BUTTON
Controls the alarm outputs.
TALKBACKBUTTON
Allows you to communicate with your DVR via the remote
software. Press and hold this button while speaking into your PC’s
connected microphone to send audio to the DVR’s internal speaker.
AUDIO BUTTON
Can be turned ON or OFF by clicking. When ON, you will be able to
hear live audio from audio equipped cameras (not included) and
the DVR (if a microphone is connected, not included). Note that
only one channel can be listened to at a time.
4 MINIMIZE BUTTON
Minimizes the remote viewer to your computer’s taskbar.
5
EXIT button
Closes the window and ends the remote viewing session.
6
DATE/TIME STATUS
Displays the current date and time.
7
SEARCH BUTTON
Clicking this button enters the Search mode of the DVR, allowing
you to play back previously recorded footage. For more information
on Search Mode, see USING THE REMOTE, pg.100.
SETUP BUTTON
Enters the Connect Management and Conguration Areas so that
the PC can access the DVR.
DVR SETUP BUTTON
Accesses the setup menu and allows you to make changes to the
Record, Camera, Sound, Event/Sensor, and System menus.
8 DVR DROP DOWN LIST
Select the DVR you wish to view from a list of your personal DVR
systems.
9
CONNECT BUTTON
After choosing a DVR from the dropdown list, choosing
CONNECT loads the DVR into the Remote Viewer software.
DISCONNECT BUTTON
Clicking DISCONNECT will end your DVR viewing session.
10 FULL SCREEN DISPLAY BUTTON
Displays the selected camera in full screen mode.
16 SCREEN GRID DISPLAY BUTTON
Separates the screen into a 16 screen grid.
QUAD SCREEN DISPLAY BUTTON
Displays up to 4 cameras simultaneously.
9 SCREEN GRID DISPLAY BUTTON
Displays up to 8 cameras simultaneously.
11 SEQUENCE BUTTON
Automatically cycles through the cameras one at a time and
displays each on screen for a set period of time.
MANUAL SWITCH BUTTON
When in a multi-screen display, pressing the button allows you to
manually change the camera arrangement of the live view screen.
FULL SCREEN BUTTON
Enlarges the live display to t the width and height of the
computer monitor.
12 SAVE TO AVI BUTTON
Saves the live video occurring on screen as an .avi le and places it
in the designated Save folder.
EVENT VIEWER BUTTON
Displays all events which have occurred (motion, video loss) since
logging on to the program. You can choose an event from the list
and replay that specic footage.
13 PTZ CONTROL BUTTONS
Pressing the centre PTZ button allows you
to control the movement of a Pan/Tilt/Zoom
camera (not included with the system).


