83CLEARVU10
SVAT ELECTRONICS
now you can see
CONNECTING VIA A D-LINK ROUTER (EXAMPLE)
Youwillneedtoenabletheportsbylocatingtheportrangeforwardingscreen.WithsomeD-LINKrouterstheportforwardingscreenislocated
within the Applications & Games or Filters tab; in others it is located in the Advanced Tools tab.
1. Open your web browser. Enter the ROUTER IP address in the address bar and press ENTER.
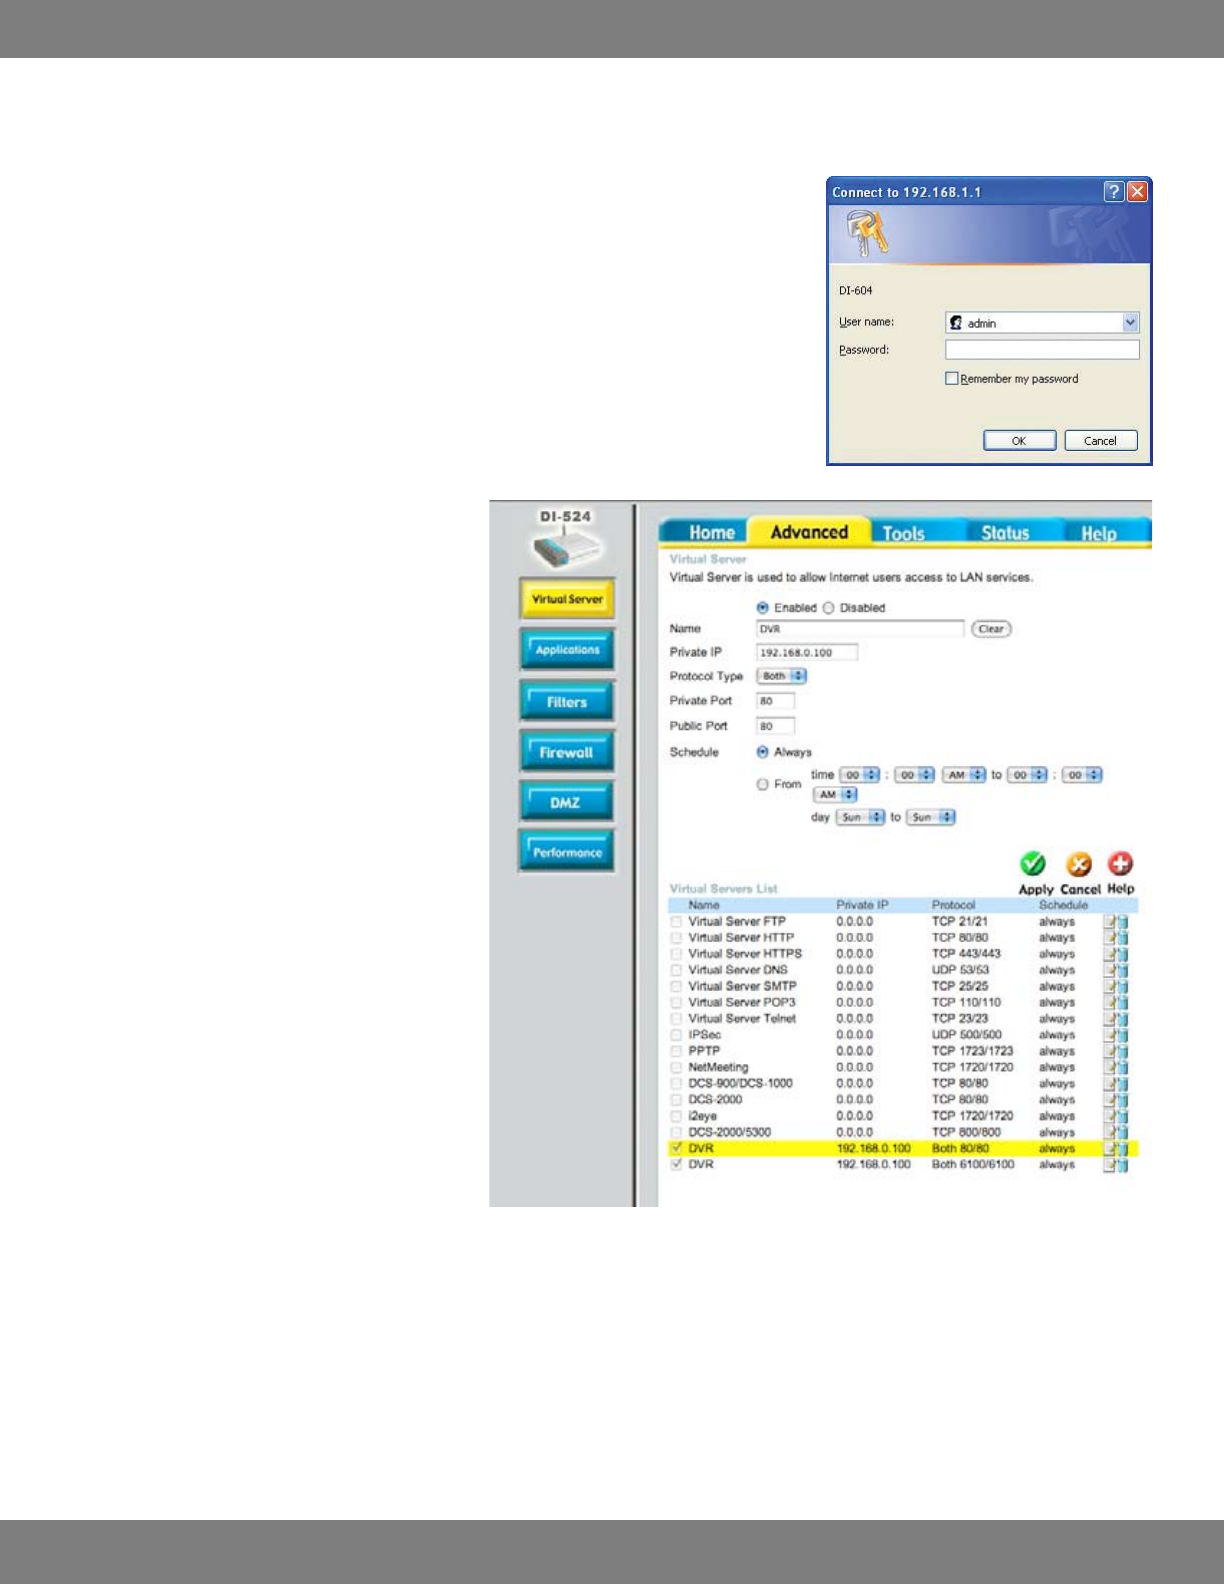
2. Entertheusernameadmin.LeavethepasswordblankfollowedbypressingtheOKbutton
(unless you have set up a user name and password for your router)
3. Select the Advanced tab.
4. Select the Virtual Server tab.
• EnabletheVirtualserver
• IntheNameeldtypein“DVR”
• InthePrivateIPeldentertheDVR’sIP
address.
• IntheProtocoleld,select“Both”(Thiswill
enable both TCP and UDP).
• InthePrivateportentertheportnumberyou
need to forward. By default this DVR is set to
port 80. Use port 80 unless you have a reason
to change the DVR to another port (not
recommended).
• InthePublicportre-entertheportnumber
you entered in the private port eld (e.g. 80).
• UnderSchedule,select”Always”.
• EnsurethattheVirtualServer(orforwarding
that is being set-up) is set to ENABLED.
5. Repeat all instructions listed in Step 4 (above),
except enter port 6100 instead of port 80.
6. When complete, select the “Apply” button located
at the bottom of the page to save your changes.
7. Port forwarding is now complete!


