66CLEARVU10
SVAT ELECTRONICS
now you can see
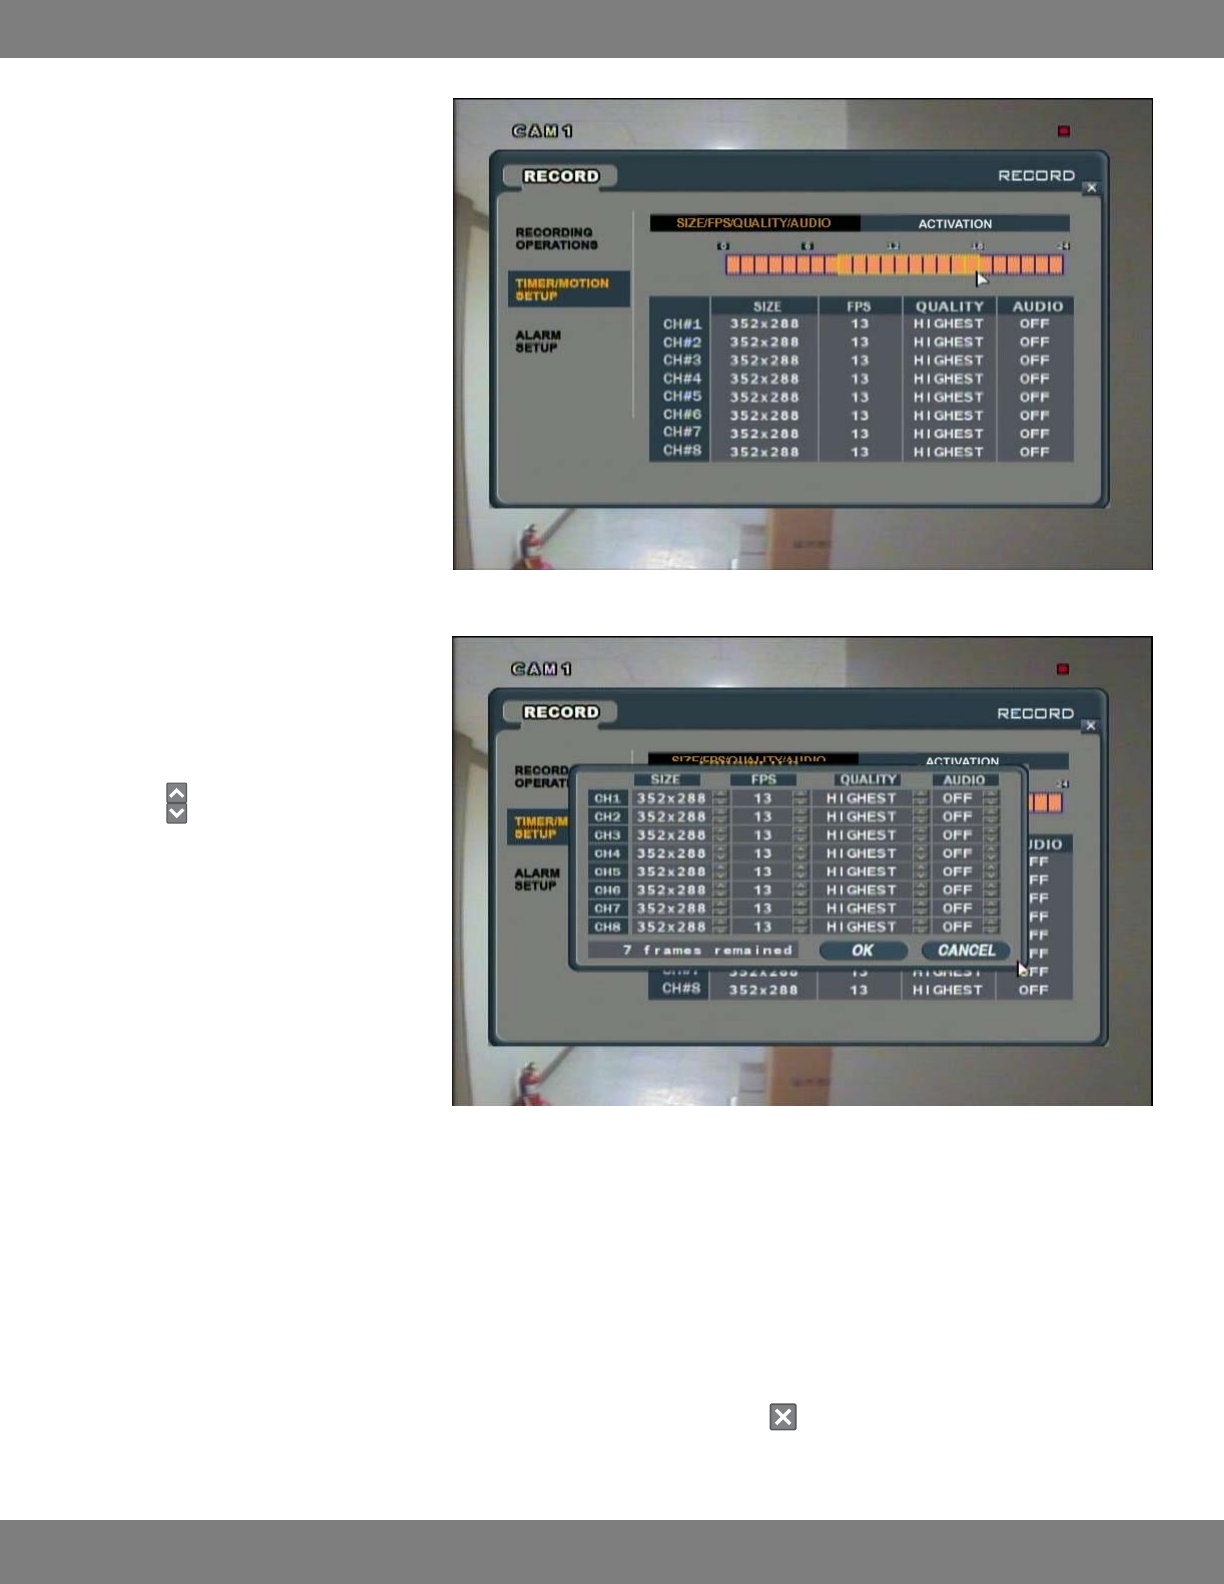
4. Use the mouse to click the rst block of the
time period you wish to set on the Time
Selection bar. The time selection bar is
displayed as a 24 hour clock, with the rst
block (0) representing 12 – 1 AM and the
last block (23) representing 11 PM – 12AM .
5. Hold down the mouse and drag along the
screen to the last block of the time period
you wish to set. The outline around the
blocks will be yellow. Everything within this
yellow border will have the same setting.
6. When you have decided on the end period,
let go of the mouse button. A menu screen
will pop up with CH1-8 listed, FPS,
QUALITY, and AUDIO.
7. Use the
buttons to choose the preferred
settings. Descriptions of these settings are
as follows:
SIZE: Sets the onscreen resolution size, can be
704x480, 704x240, 352x240.
FPS: Allows you to raise and lower the
smoothness and uidity of video, can be
30, 15, 7, 3, 2 or 1.
QUALITY: Can be set to Highest, High, Standard, Low. Higher qualities have less compression, resulting in larger le sizes (but clearer footage),
while lower qualities take up less hard drive space (but are not as clear).
AUDIO: If audio equipped cameras (not included) are connected to the system, you can decide whether or not you want the DVR to record audio
during this time period. Note that only channels 1-4 are able to record audio.
8. Afteryouhavecompletedchangingthesettings,clickOK.
9. Repeat these settings for any other time periods for the day, or week day, as needed.
10. When you have made all the desired changes to the TIMER/MOTION SETUP menu, click the
in the top right corner of the window. You will
be asked whether you want to save or cancel your changes.


