


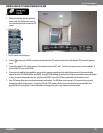

42CLEARVU10
SVAT ELECTRONICS
now you can see
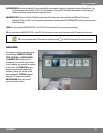
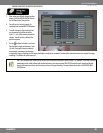
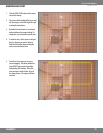
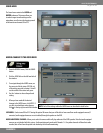
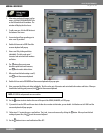
6. Continue to click and drag until all desired
areas are within blue areas on the grid.
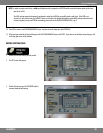
7. To exit this screen, right click the mouse
anywhere on the screen. A menu will pop
up with the options SELECT ALL, DELETE
ALL, CANCEL, and SAVE & EXIT.
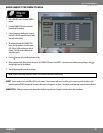
8. SELECT ALL will cover the entire screen
with orange squares, completely enabling
motion activated recording. DELETE ALL will
cover the entire screen with blue squares,
disabling motion activated recording on
the entire monitoring area. CANCEL will
disregard any changes you have made and
return to the MOTION SENSOR menu.
Clicking SAVE & EXIT will save your changes and
take you back to the MOTION SENSOR menu.
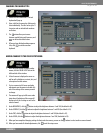
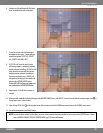
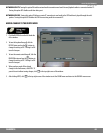
9. Repeat steps 1-8 for all other cameras, as
needed.
10. When you have made all the desired changes to the MOTION SENSOR menu, click APPLY. If you wish to exit without saving changes, click
in
the top right corner of the window.
11. After clicking APPLY, click in the top right corner of the window to exit the CAMERA menu and return to the GENERAL menu screen.
12. You will be prompted to save these changes
NOTE: In order for these settings to take eect, you must create a motion detection schedule for each camera in the RECORD menu. Please
refertoMAKINGCHANGESTOTHEACTIVATIONMENU,pg.67formoreinformation.