


Configuration
Rev 3.01 55 Document 900.0315
10/05
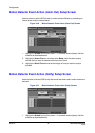
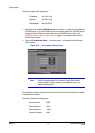
2. Highlight the Notify box and then press # . This toggles between On and Off.
When it is On, the DVR notifies the remote site when it has text input from a text-in
device based on a defined schedule.
Note For the Notify action to work, the DVR should be registered in the
RAS (Remote Administration System).
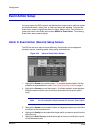
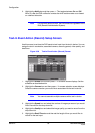
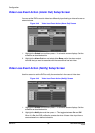
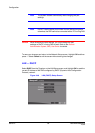
Video Loss Event Action (Record) Setup Screen
Use this screen to set the DVR to react to video loss from a camera differently. Each
camera can be assigned a schedule, associated camera, recording speed, video
quality and dwell time.
Figure 3-41 Video Loss Event Action (Record) Screen
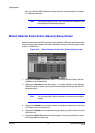
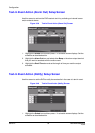
1. Highlight the Sched box and then press # . A schedule screen displays. Set the
schedule as described earlier.
2. Highlight the Camera box and then press # . A camera selection screen displays.
Select the camera number you would like to associate with the camera that has
lost video.
Note You can associate multiple cameras with a camera that has
detected a loss of video.
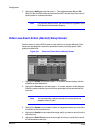
3. Highlight the Speed box and select number of images per second you would like
to record from the drop-down list.
4. Highlight the Quality box and select the image quality you want to record from the
drop-down list.
5. Highlight the Dwell Time box and set the length of time you would like to record
for the associated video loss.