17
Selecting a View
1
Press the [PTZ/PRESET] button until the [PTZ/
PRESET] indicator blinks.
2 Press the [ZOOM IN/ENTER] or [ZOOM OUT/
CANCEL] button to select a view.
Note
If you connect a mouse, you are able to select a view in two
ways:
• By selecting the required view in the [Views] section.
• By selecting the required view from the [Views] list located
in the upper part of the window.
Searching for a Recorded Image
You can search for and play back images by specifying a
date and time.
●Using the [SEARCH] button on the front panel
1 Click the [SEARCH] button in the [Browse]
window.
The date and time input window will appear.
[Date and time input] window
2
Use the keypad to enter the search date and time.
Select the entry field with the [SKIP] button (7 or 6) and
input the date and time.
3 Press the [ZOOM IN/ENTER] button.
The view in the image display window on the right will jump
to the selected date and time.
●Using the mouse
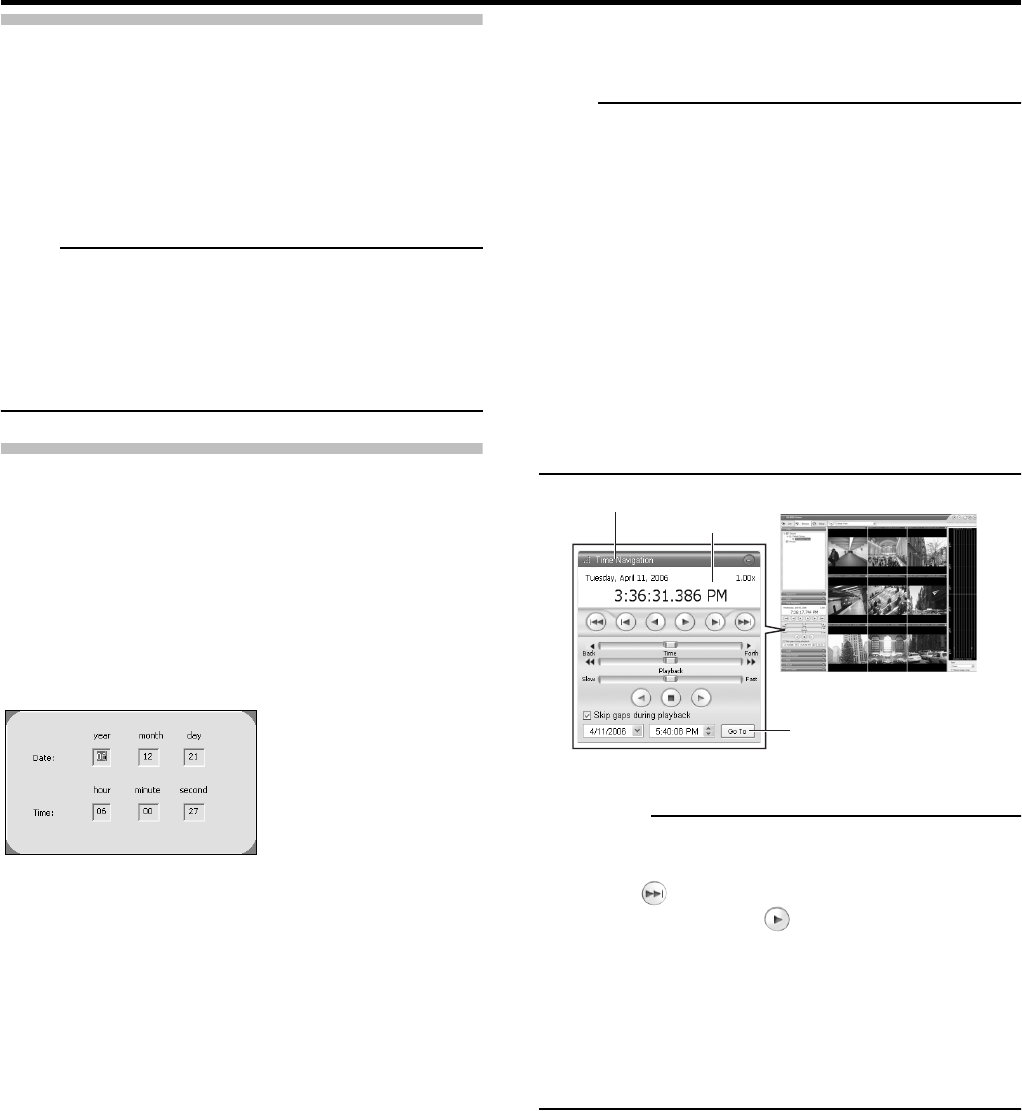
Use [Time Navigation] section in the [Browse] window.
1 Double-click the [Time Navigation] bar in the
[Browse] window.
2 Enter the
search
date and time in the boxes on
the left of the [Go To] button at the bottom of
the window.
Specify the date in the left-hand box and the time in the
right-hand box.
3 Click the [Go To] button.
The view in the image display window on the right will jump to
the specified date and time.
The specified date and time will appear in the [Master Time]
area.
Note
• The [Master Time] area displays the recording date and
time of the selected playback images. The master time is
the time to which all the cameras are linked, and when
you specify a time, all the images you see in the [View]
will be from exactly the same point in time.
• Some cameras may only record if motion is detected. Also,
there may be no recorded images from one or more
cameras in the view matching the specified point in time.
When this is the case, the last image in the camera’s
database prior to the specified point in time will be displayed
in the view. (Recorded images are saved to the database.)
• The [Master Time] area also displays the current selected
playback speed.
CAUTION
• The [Master Time] area may display an exceeded record
date and time of the latest recorded image. In this case,
click the button and move to the latest recorded
image, and then click the button.
• When [Skip gaps during playback] is selected in the [Time
Navigation] section, playback may stop when it exceeds
the end of the recording while recording and playback
simultaneously. In this case, deselect the [Skip gaps
during playback] checkbox. If the playback stops, please
click the play button again.
[Master Time] area
[Go To] button
[Time Navigation] section
[Browse] window
[Time Navigation] bar
