27
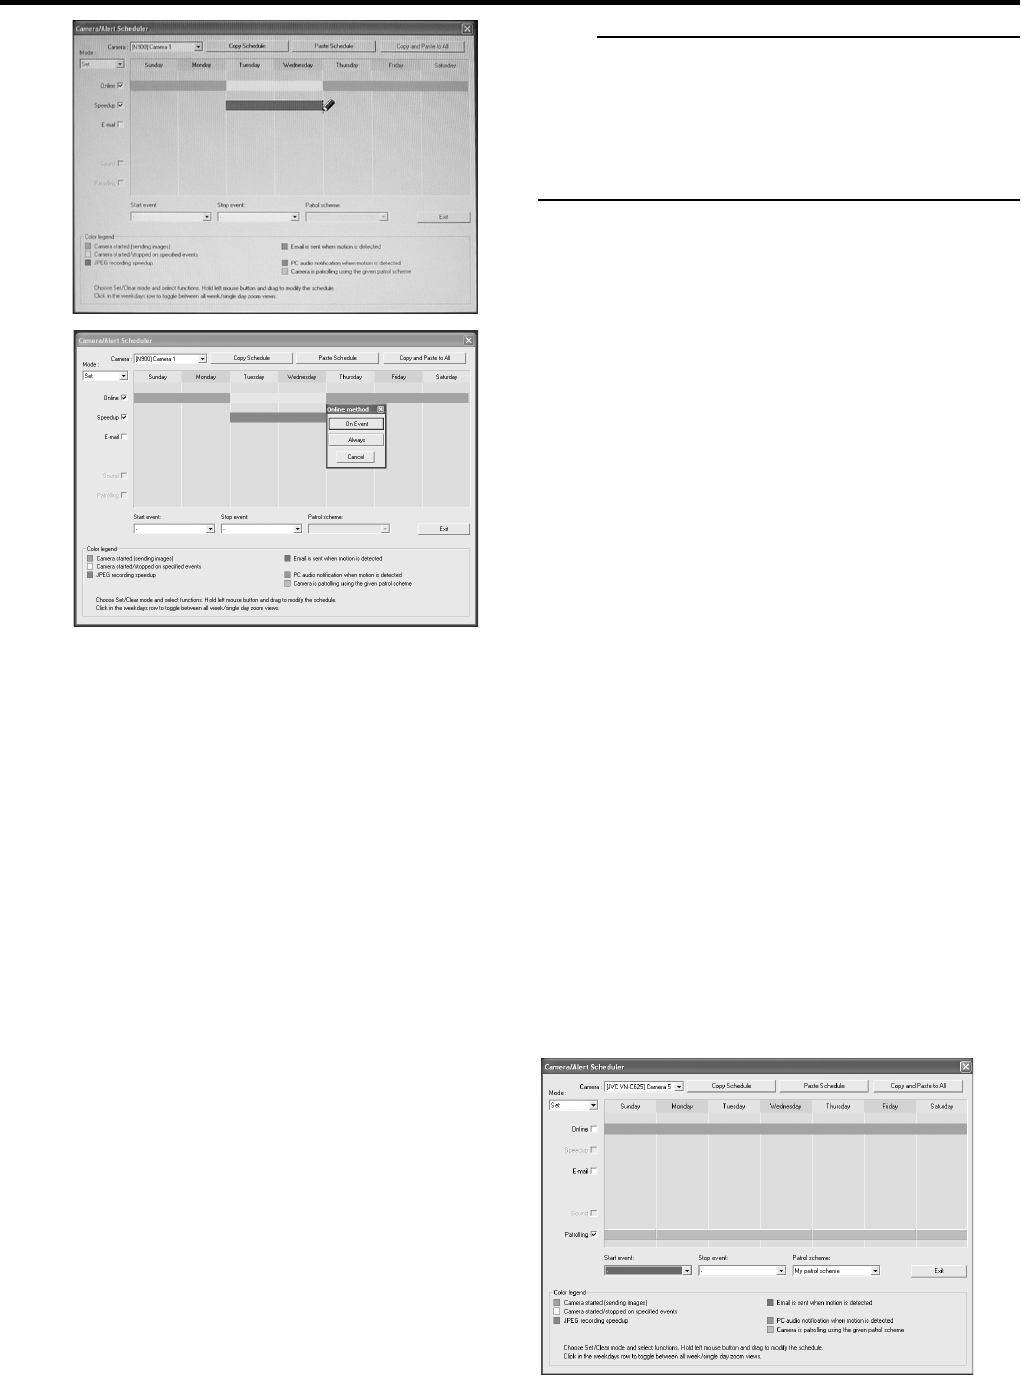
5 Select the [Online] check box, move the mouse
pointer while left clicking the mouse in the
calendar section, then set a period.
You can set the following options by selecting [E-mail],
[Patrolling] and [Speedup]:
[E-mail]:
Select this check box to set the period when the e-mail
alert has been selected triggered by an event or motion.
( Page 47)
[Patrolling]:
Select this check box to set the period when the
patrolling has been selected. Make sure to select the
one set in the patrol scheme.
( Page 45)
[Speedup]:
Select this check box to set the period when [Enabled]
has been selected from the [Speedup] in the [Camera
Settings].
[Audio]:
You cannot select this check box.
6 Select the following as the [Online Method]
screen appears:
• Select from [Always] or [On Event].
• If you select [On Event], you will have to specify the start
and stop events.
Note
• To cancel the period, select [Clear] from [Mode] at the top
left, select the check box you want to cancel ([Online],
[E-mail] or [Patrolling]), then move the mouse pointer
while left-clicking the mouse on the period in the calendar
section.
●Buttons
Copy Schedule:
Lets you copy the schedule displayed in the calendar
section.
Paste Schedule:
Lets you paste a copied schedule in the Copy Schedule
for use with the selected camera.
Copy and Paste to All:
Lets you copy the schedule displayed in the calendar
section and paste it to all Cameras at once.
Exit:
Closes the [Camera/Alert Scheduler] window.
●The calendar uses colored bars to indicate active
periods for each option (Online, E-mail, Patrolling.):
■ Online bar
Pink:
Indicates the period in which the VR-N900U always
obtains images from the selected camera.
Yellow:
Indicates the period in which the VR-N900U obtains
images from the selected camera when the specified
event is input to the VR-N900U.
■ E-mail bar
Active periods are indicated in blue.
■ Patrolling bar
Active periods are indicated in gray. The Patrolling bar is
only available if you have selected a PTZ camera which has
at least one patrol scheme. When several patrol schemes
have been set up and are used successively, changes
between the schemes are indicated by a thin vertical line.
☞
☞


