


Getting Started
6
8
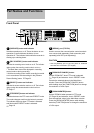
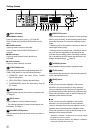
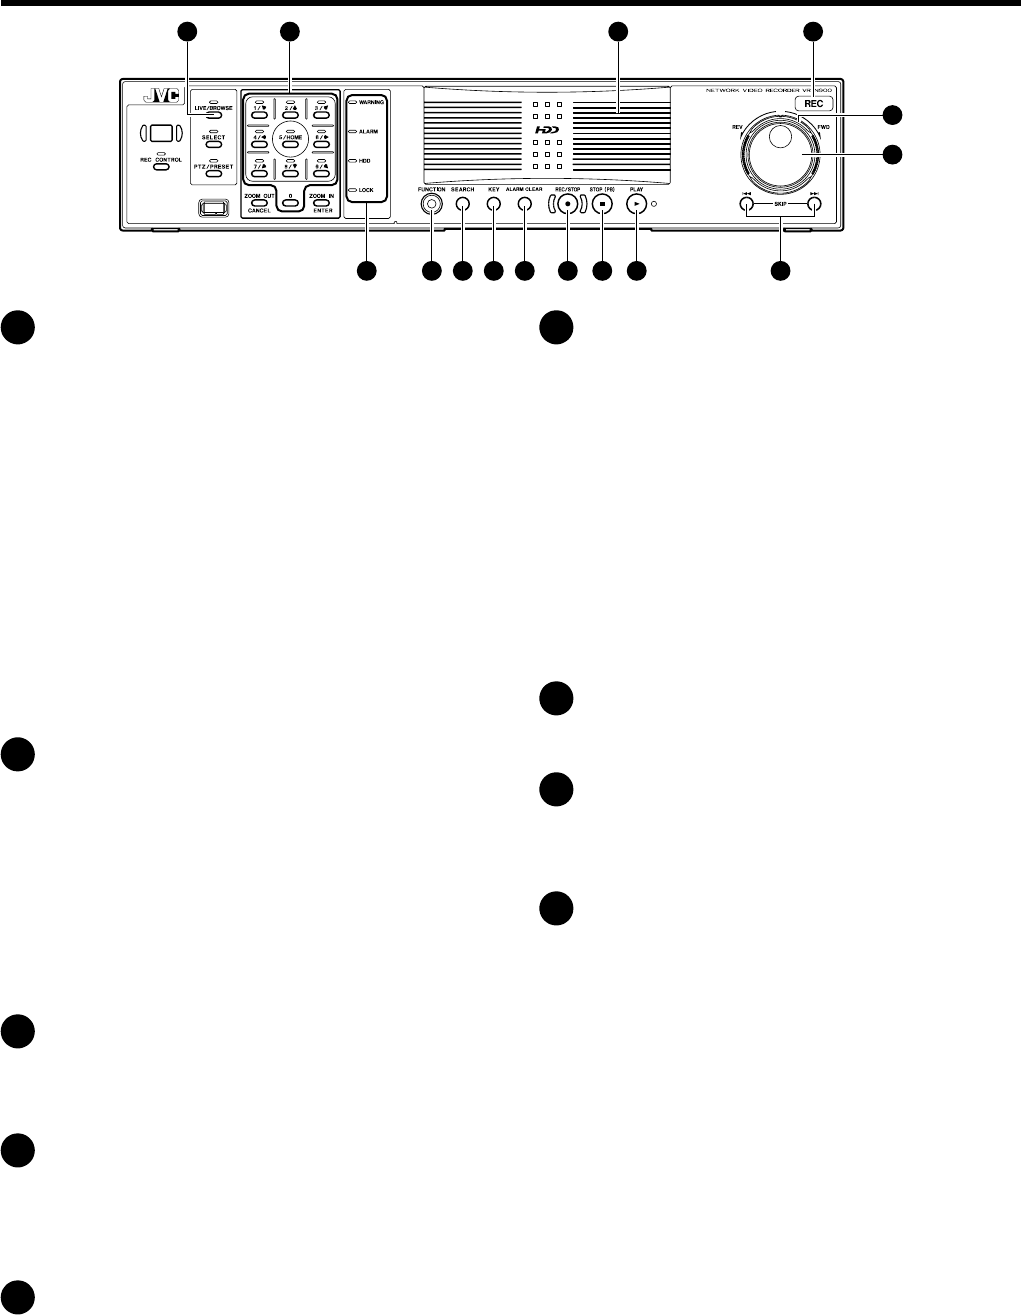
Status indicators
■ WARNING indicator
Lights up when an error occurs. ( Page 89)
Goes off when the [ALARM CLEAR] button is held
down.
■ ALARM indicator
Lights up when an alarm is activated.
Goes off when the [ALARM CLEAR] button is
pressed.
■ HDD indicator
Lights up when the built-in hard disk drive is
accessed.
■ LOCK indicator
Lights up when operation is locked.
9
[FUNCTION] button
Press the following buttons while holding down the
[FUNCTION] button to use the following features.
➀ [OPERATE] (press and hold down): Forcibly
reboots the system.
➁ [REC CONTROL]: Displays the Main Menu.
➂ [LIVE/BROWSE] (press and hold down): Logs off
the system.
10
[SEARCH] button
Displays the date and time search screen in playback mode.
Page 22
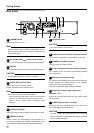
11
[KEY] button
Press to display or close the software keyboard.
* The software keyboard is used to enter figures and
characters. Page 11
12
[ALARM CLEAR] button
Cancels the alarm when an event occurs or motion is
detected.
13
[REC/STOP] button
Press to start recording in all cameras. Press and hold
down to stop recording. In the recording control mode,
press and hold down to cancel the recording control
mode.
* Recording will not be started in cameras to which no
video signal is being input.
* With the forced recording mode, recording is carried
out in all cameras regardless of the settings in the
[Camera Record Setting] menu. Recording is carried
out in accordance with the frame rate selected in the
[Image storage settings]. Page 15
14
[STOP(PB)] button
Stops playback when pressed in playback mode.
15
[PLAY] button
Plays back at the speed and in the direction specified
by the Shuttle Dial position.
16
[SKIP] button
■
6
Press to move the option highlight in the reverse
direction in the menu windows or setup windows.
Jumps to the beginning of the previous sequence on
the selected camera when pressed in playback mode.
Press and hold down to jump to the first image in the
database of the selected camera.
■
7
Press to move the option highlight in the forward
direction in the menu windows or setup windows.
Jumps to the beginning of the next sequence on the
selected camera when pressed in playback mode.
Press and hold down to jump to the last image in the
database of the selected camera.
• “Sequence” indicates a certain block of recorded images
triggered by an event or motion.
• Recorded images are stored in the database. “Database”
means the recorded data in this unit.
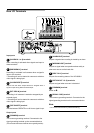
22 21 20 19
18
17
8 9 10 11 12 13 14 15 16
☞
☞
☞
☞