Applications
42
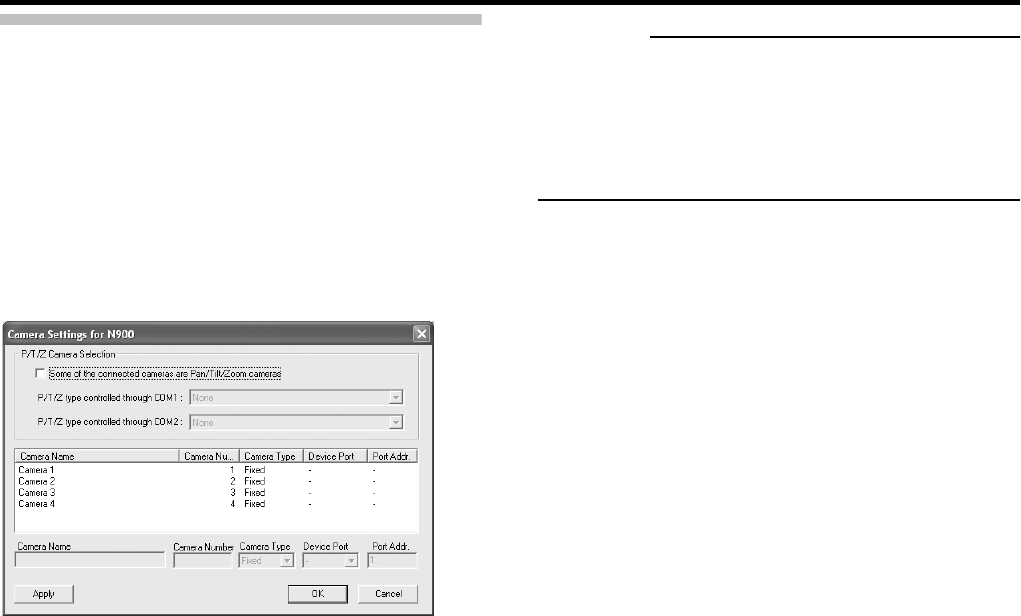
[Camera Settings for Device Name]
window
The [Camera Settings for Device Name] window lets you
specify certain information about cameras. The number of
settings available in the [Camera Settings for Device Name]
window may be limited if cameras are not PTZ cameras or
device connected to a network encoder (IP video server).
To access the [Camera Settings for Device Name] window,
click the [Camera Settings] button in the [Edit device
settings] window.
The following items can be specified.
● [P/T/Z Camera Selection] Section
Some of the connected cameras are Pan/Tilt/Zoom
cameras:
Select check box if any of the cameras attached to the
network encoder (IP video server) device is a PTZ
camera.
If the check box is not available, PTZ is not supported for
the device.
P/T/Z type controlled through COM1:
If a PTZ camera is controlled through the COM1 port on
the network encoder (IP video server), select the control
method which conforms to the required PTZ camera from
the list.
If no PTZ cameras are controlled through the COM1 port,
select [None].
● [Camera List]
The camera list contains a line for each camera number on
the device.
First line from the top corresponds to camera number 1,
second line from the top corresponds to camera number 2,
etc.
To change camera settings, select the required camera
number from the list, specify required information in the
following fields, and click the [Apply] button:
Camera Name:
Name used to identify the selected camera. Camera
names must be unique for each device.
Camera Number:
Let you specify the camera number.
CAUTION
• It is highly recommended that you use a unique camera
number for each camera.
• “Camera Name” is not the name which is set to the
camera itself, the name is set to identify the cameras on
VR-N900U.
Camera Type:
Lets you select whether the camera on the selected
camera number is [Fixed] or [Moveable]:
Fixed:
Camera mounted in a fixed position
Moveable:
PTZ camera
Device Port:
Available only if [Moveable] is selected in the [Camera
Type] field.
Lets you select which control port on the network encoder
(IP video server) should be used for controlling PTZ
functionality on the camera.
Port Address:
Available only if [Moveable] is selected in the [Camera
Type] field.
Lets you specify port address of the camera. The port
address would normally be 0 or 1.
If using daisy chained PTZ cameras, the port address will
identify each of them, and you should verify your settings
with those recommended in the camera manuals.
● [CAMERA CONTROL] terminal on the rear panel
The VR-N900U is considered a network encoder (IP video
server) in the system and a device name [N900] has been
set. The [CAMERA CONTROL] terminal on the rear panel is
displayed as [COM1] on the [Camera settings for N900]
screen.
[Camera Settings for Device Name] window


