


Applications
64
4 Select the required cameras for which the
archiving function should apply.
CAUTION
• Recorded images may be lost in the recording performed
while archiving.
Note
• If audio is enabled while recording, audio data from the
device will also be archived.
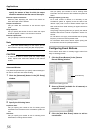
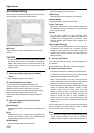
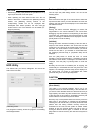
● Fields, checkboxes and buttons
Enable Archiving:
This function is not available.
Delete databases in the backup directory older than:
Lets you specify how many days you want to keep
archived images.
Automatic delete old archives if space is needed:
This function is not available.
Send email on archive error:
Select this check box to send an e-mail alert if archiving
fails.
Recording may be disrupted for at most 1 second during
start of archiving.
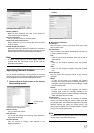
Daily archiving times:
Lists specified archiving times. Archiving will take place
every day at the specified time.
Time to add:
Specify the archiving time.
Add:
Adds the archiving time specified in the [Time to add] field
to the [Daily archiving times] list.
Delete:
Removes a selected archiving time from the [Daily
archiving times] list.
Select cameras for which the archiving function should apply:
If the [Enable Archiving] check box is selected, this
section lists cameras for which archiving is possible.
To specify that archiving should apply for a specific
camera, select the check box next to the name of the
required camera.
Set all:
Selects the check boxes for all cameras.
Clear all:
Clears the check boxes for all cameras.
Set all paths:
This button is enabled.
CAUTION
• When other operations (i.e. startup of Live Viewing, etc.)
overlap with the startup of the archive process, up to 3
seconds of the recording may be lost.
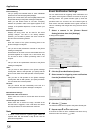
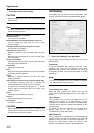
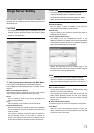
Unit Setting
Unit Setting lets you specify account configuration, error
recovery, serial port and other VR-N900U-related settings.
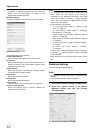
1 Select [Unit Setting] in the Main Menu.
This will open the [Unit Setting] window. You can set the
following items.
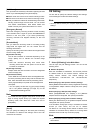
[Password]
To edit the VR-N900U login password, enter the current
password, then enter the new password in the [New
Password] field. Enter the new password once again for
confirmation purposes. Click the [Change] button to enable
the settings.
Note
• To log in automatically when the VR-N900U is switched
on, select the [Auto Login] check box.
[Live Viewing Auto start]
Select the [Live Viewing Auto Start] check box, live
images are automatically displayed when the system is
started.
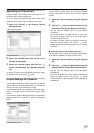
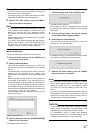
[Error Report]
Lets you select how you want to be notified if an error is
detected in the system. If you select [Dialog], an error
message will be displayed in the window. If you select [Mail],
an e-mail will be sent to the preset e-mail address to alert
the abnormality.
For details on errors and measures to be taken when
warning LEDs go on, refer to the instructions in
“Troubleshooting” in the startup guide.
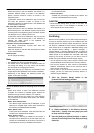
[Mail Send List]
Lets you specify the e-mail address if you selected [Mail] for
the [Error Report]. To add an e-mail address, type the e-mail
address in the entry field and click the [Add] button. To
remove an e-mail address, select the required e-mail
address in the address list and click the [Delete] button.
[Unit Setting] window