Chapter 8 Using the Remote Programs
82
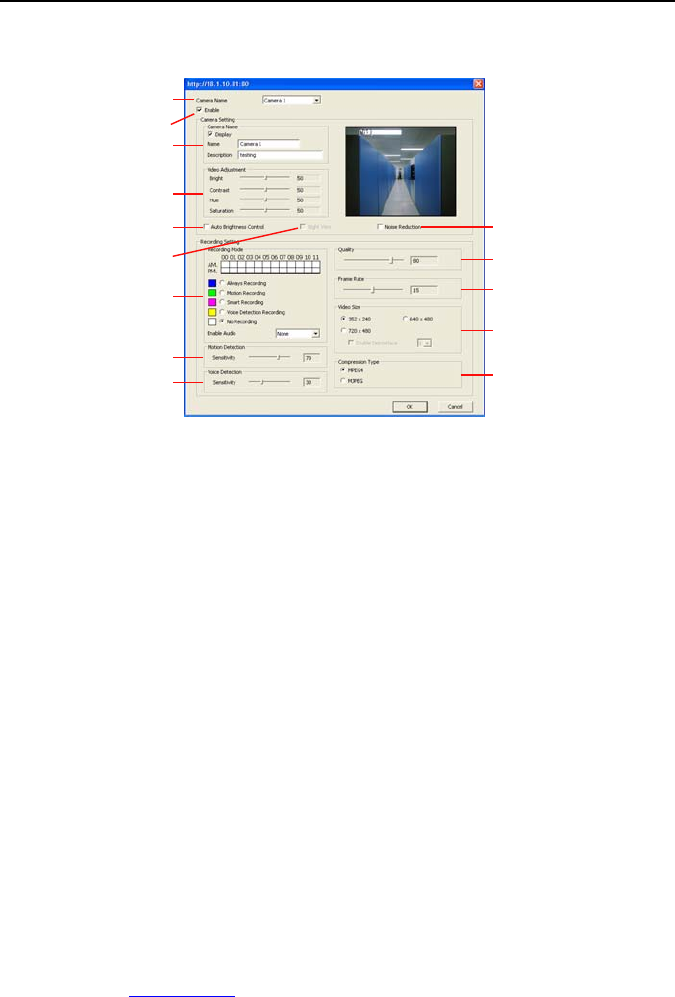
8.1.1 To Setup Remote System Setting
Click OK to exit and save the setting and Cancel to exit without saving the setting. The setting
here applies to Remote DVR only.
(11)
(12)
(13)
(14)
(10)
(1)
(9)
(8)
(7)
(6)
(5)
(4)
(3)
(2)
(1) Camera Name
Select the camera you want to adjust the settings.
(2) Enable
Set to enable/disable the selected camera. When there is no video source on the camera, we
suggest disabling it so that the system won’t detect it as video loss error.
(3) Camera Setting
- Display
Enable/disable to show the video. Even if the video of the selected camera is hidden
you can still record the video and preview it in playback mode.
- Name
Change the camera name.
- Description
Add a short comment.
(4) Video Adjustment
Adjust the Brightness, Contrast, Hue and Saturation of the selected camera.
(5) Auto Brightness Control
Automatically adjust the brightness.
(6) Night View
Automatically adjust the exposure to make the image more visible especially when the site is
dark. You can only use this function when the Auto Brightness Control is enabled.
(7) Recording Mode
The blocks from 00 to 11 (AM & PM) represent the time in 24-hour clock. To record in full 24
hours, select the recording mode and click the ~ button. If you want to only record at a
particular time, click the colored block beside the recording mode then click on the time blocks.
When the system starts recording a red triangle mark would appear at the upper left corner of
the screen. The recording modes are listed below:
- Always Recording
Record the video from the selected camera and save it to the designated storage path
(see also
Chapter 5.1 #1).
