42
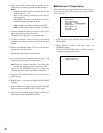
4. Select the preset position number to be assigned in the
PRE column by pressing the - or + button.
5. Repeat steps 2 to 4 above to assign other terminal
numbers.
Note: The same channel number can be assigned to
multiple alarm terminals.
In this case, different preset positions can be
assigned, but when alarm occurs at these positions,
the camera movHes to the preset position where
the most recent alarm occurred.
6. Press the [SET UP/ESC] button to execute the settings
and returns to the previous SYSTEM SETUP menu.
■ Playback Mode
This item lets you select the ID code for playback of record-
ed videotape.
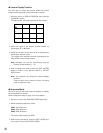
1. Move the cursor to the PLAYBACK MODE parameter in
the SYSTEM SETUP menu.
2. Select either FIELD or FS10.
FIELD: Normally set to this position.
FS10: Enables playback of the videotape that is record-
ed with the WJ-FS10.
The factory default setting is FIELD.
■ Data Mode
This item lets you select an external controller from the
DATA port.
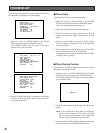
1. Move the cursor to the DATA MODE parameter in the
SYSTEM SETUP menu.
2. Select either CU or PC.
CU: Enables control from the specified System
Controller.
PC: Enables control from a PC.
The factory default setting is CU.
■ RS-232C Mode
This item lets you select the RS-232C port for control of the
VCR, or for external control of the system from a PC.
1. Move the cursor to the RS-232C MODE parameter in
the SYSTEM SETUP menu.
2. Select either VCR or PC.
VCR: Enables use as VCR control port.
PC: Enables use as external control port from a PC.
The factory default setting is VCR.
Note: Be sure to select PC in this menu if you plan
to use the REMOTE OUT connector for control-
ling the VCR.
■ Communication Port Setup
This item lets you set the parameters for communication
between the ports and the connected appliances.
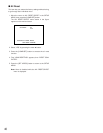
1. Move the cursor to COM PORT SETUP in the SYSTEM
menu, then press the [HOME/SET] button.
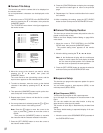
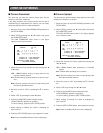
The COM PORT SETUP table shown in the figure
appears on the monitor screen.
2. Move the cursor to the port column you want to edit by
pressing the C, D, A or B button.
The table indicates the factory default settings.
3. Select the desired delay time for DELAY by pressing
the - or + button.
4. Select the desired transmission speed (bits per sec-
ond) for BAUD RATE by pressing the - or + button.
COM PORT SETUP
RS-232C DATA RS-485
DELAY OFF OFF OFF
BAUD RATE 9600 9600 19200
WAIT TIME OFF 100 OFF
DATA BIT 7 8 8
PARITY ODD EVEN NONE
STOP BIT 1 1 1
XON/XOFF - OFF OFF
FULL/HALF - - FULL
↔ OFF ↔ 10 ↔ 20 ↔ 40 ↔ 60 ↔ 80 ↔ 100 ↔
↔ 1 200 ↔ 2 400 ↔ 4 800 ↔ 9 600 ↔ 19 200 ↔


