SEARCHING FOR RECORDED VIDEO5
English 31
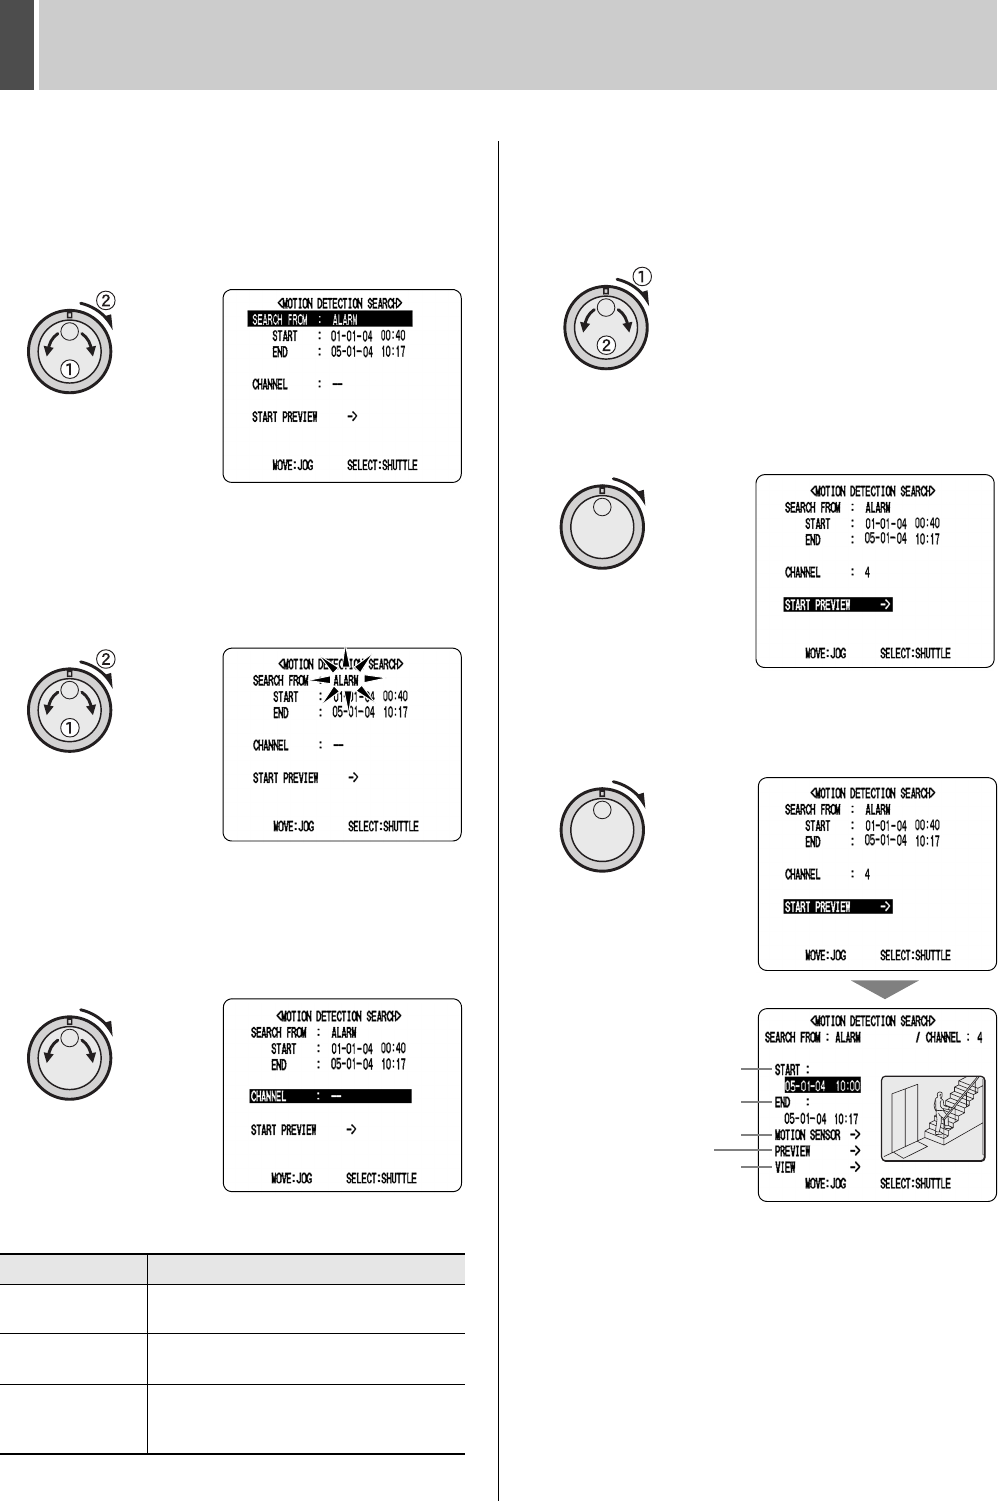
2 Turn the jog dial to select “MOTION
DETECTION SEARCH”, and then turn
the shuttle dial clockwise.
The <MOTION DETECTION SEARCH> screen is
displayed.
3 Turn the jog dial to select “SEARCH
FROM”, and then turn the shuttle dial
clockwise.
The ALARM indicator starts to flash.
4 Turn the jog dial to select a search area,
and then turn the shuttle dial clockwise.
(Example: Normal)
The cursor moves to “CHANNEL”.
[Settings] (indicates the default setting)
5 Turn the shuttle dial clockwise, and
then turn the jog dial to select a camera
number.
(Selection example: 4)
6 Turn the shuttle dial clockwise.
The cursor moves to “START PREVIEW”.
7 Turn the shuttle dial clockwise.
The screen changes and the preview screen for Camera
No. 4 appears.
(1) START:
Indicates the date and time of recording of the first
image in the selected recording area(s).
(2) END:
Indicates the date and time of recording of the final
image in the selected recording area(s).
(3) MOTION SENSOR:
Indicates the motion sensor setting.
(4) PREVIEW:
Displays the selected start image.
(5) VIEW:
Plays the selected recording on the full screen.
Setting Description
ALARM
Searching will only be performed for
recordings in the alarm recording area.
NORMAL
Searching will only be performed for
recordings in the normal recording area.
ALARM &
NORMAL
Searching will be performed for recordings
in the alarm recording area and normal
recording area.
(1)
(2)
(4)
(5)
(3)
e00_l8hbe_xe_7.book Page 31 Tuesday, April 27, 2004 10:35 AM
