GENERAL SET4
English 81
3 Press the [EXIT] button.
The setting procedure is ended and the display returns to
the normal screen.
1 With the normal monitoring screen
displayed, press the [SHUTTLE HOLD]
button for approximately 3 seconds.
The LOCK indicator on the front panel lights up and a
buzzer sounds to indicate activation of the security lock.
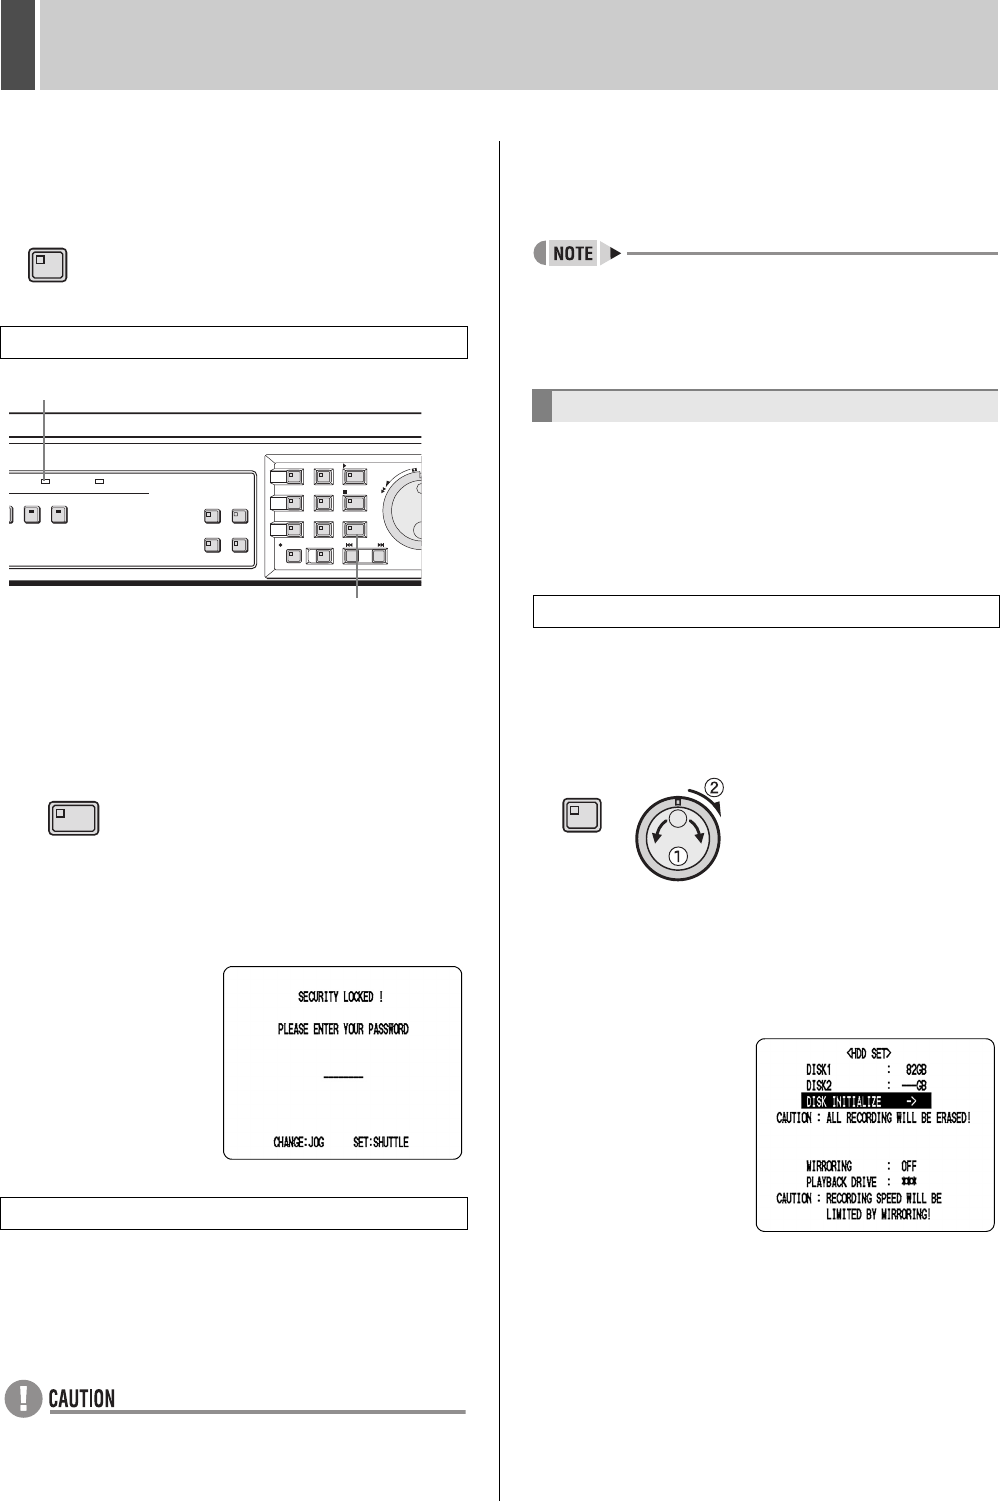
2 To confirm activation of this function,
press the [MENU] button.
A password entry screen appears for about 5 seconds.
3 Enter your password while the
password entry screen is displayed.
Use the jog dial and the shuttle dial to perform this
procedure.
z Enter the password set for administrators or users
(such as “123456AB”).
Be sure to enter the correct password for the operation
(s) to be carried out. (JP.79)
4 Turn the shuttle dial clockwise.
The security lock is cancelled and the display returns to
the normal screen.
z If an administrator password was entered, the security
lock is cancelled and the indicator is turned off.
z If a user password was entered, the security lock is
partially cancelled and the indicator remains lit.
This section describes how to initialize and expand the
hard disk.
When a single hard disk is installed, the hard disk capacity
is displayed for DISK 1; when two hard disks are installed,
the capacity is displayed for “DISK 1” and “DISK 2”.
1 Press the [MENU] button and turn the
jog dial to select “3. GENERAL SET”,
and then turn the shuttle dial clockwise.
The <GENERAL SET> screen is displayed.
2 Turn the jog dial to select “4. HDD SET”,
and then turn the shuttle dial clockwise.
The <HDD SET> screen is displayed.
The cursor moves to “DISK INITIALIZE”.
Setting the security lock
Canceling the security lock
EXIT
LOCK indicator
[SHUTTLE HOLD] button
SHUTTLE HOLD
Setting and initializing the hard disk
Initializing the hard disk
MENU
e00_l8hbe_xe_7.book Page 81 Tuesday, April 27, 2004 10:35 AM


