RECORD SET3
54 English
SETTINGS
(1) When the number of cameras detected using
“CAMERA DETECT” is greater or less than the number
of cameras previously stored in the digital video
recorder.
(2) When the setting for “PRE-ALARM RECORDING” from
the <ALARM REC MODE SET> screen is changed.
(3) When menu settings are loaded from a CompactFlash
card.
(4) When a new easy setup setting operation is carried out.
(5) When setting values are changed for normal recording
or timer recording.
(6) When the area is changed using the <RECORDING
AREA SET> screen.
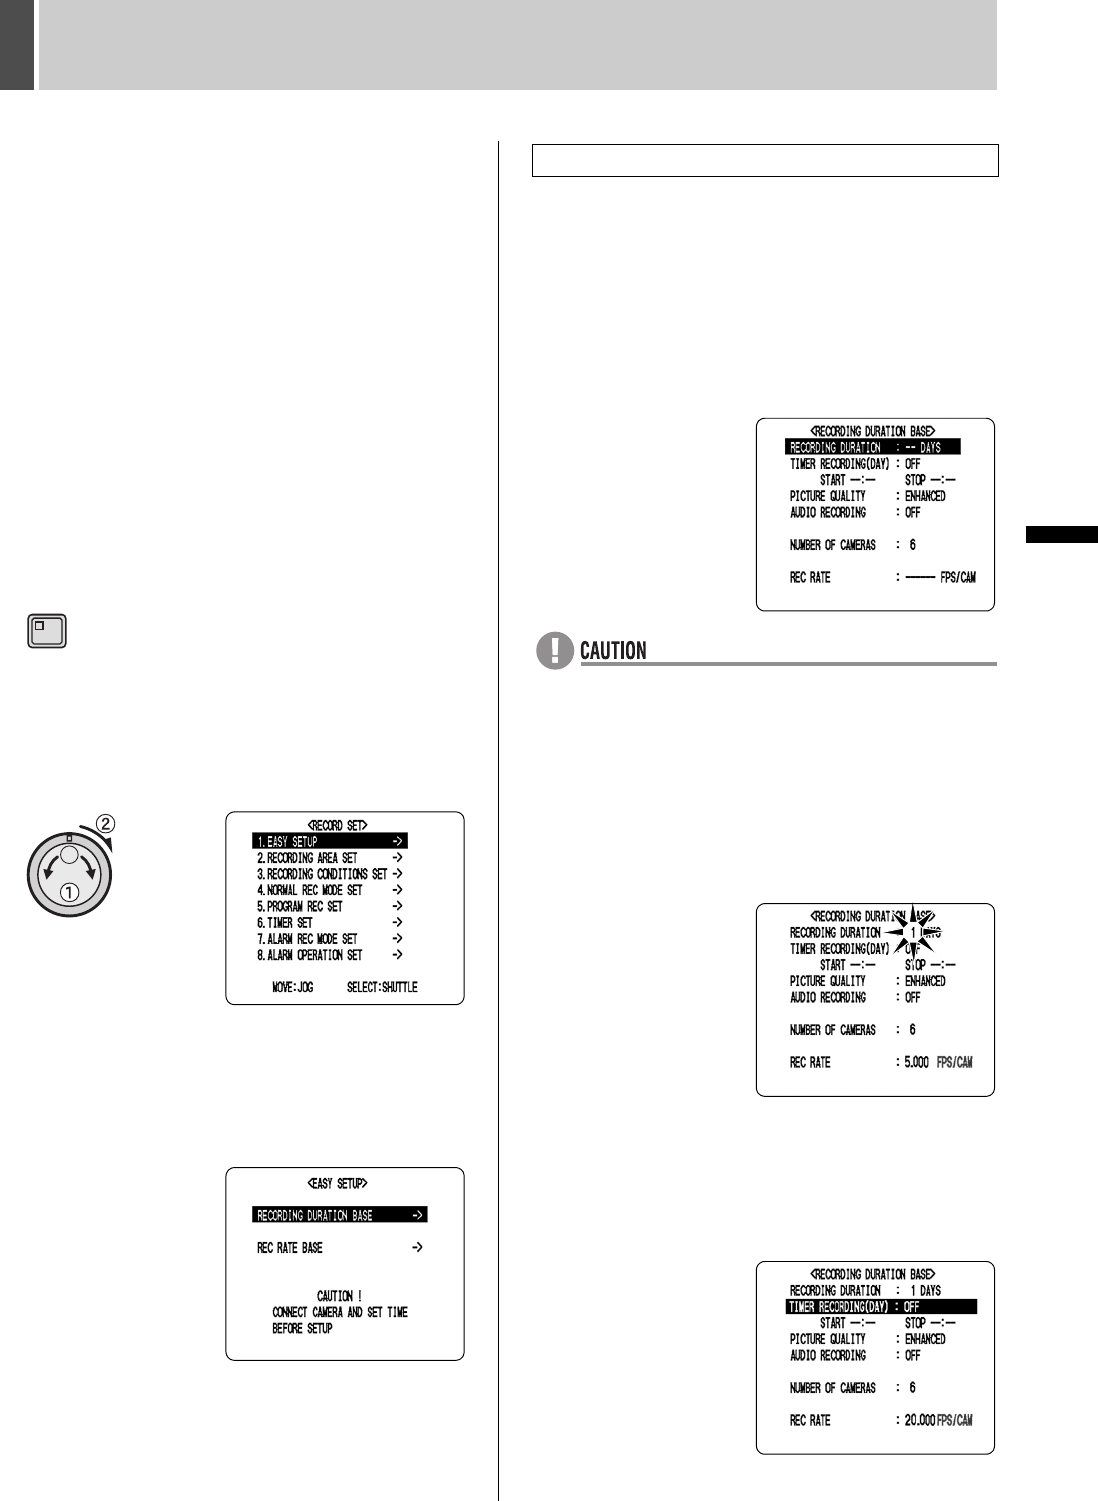
1 Press the [MENU] button.
The MENU indicator lights up and the <MAIN MENU> is
displayed.
2 Turn the jog dial to select “2. RECORD
SET”, and then turn the shuttle dial
clockwise.
The <RECORD SET> screen is displayed.
3 Turn the jog dial to select “1. EASY
SETUP”, and then turn the shuttle dial
clockwise.
The <EASY SETUP> screen is displayed.
4 Turn the jog dial to select “RECORDING
DURATION BASE”, and then turn the
shuttle dial clockwise.
The <RECORDING DURATION BASE> screen is
displayed with the cursor positioned on “RECORDING
DURATION”.
The number of detected cameras is indicated by
“NUMBER OF CAMERAS”.
z Confirm that the number of cameras connected to the
digital video recorder is the same as the number of
displayed recording cameras. If this is not the case,
check the wiring between cameras and the digital video
recorder and then carry out “CAMERA DETECT”.
(JP.46)
5 Turn the shuttle dial clockwise.
“1” flashes.
6 Turn the jog dial to select “RECORDING
DURATION”, and then turn the shuttle
dial clockwise.
The cursor moves to “TIMER RECORDING (DAY)”.
MENU
Setting based on recording days
e00_l8hbe_xe_7.book Page 54 Tuesday, April 27, 2004 10:35 AM


