


Operation
118
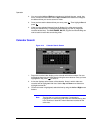
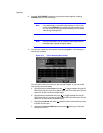
6. You can search video from the first to last recorded images, or you can set the
start and stop times and dates:
• Highlight the box beside From and press to toggle between On and Off.
When set to Off, you can enter a specific Date and Time. When set to On, the
search will be from the first recorded image.
• Highlight the box beside To and press to toggle between On and Off.
When set to Off, you can enter a specific Date and Time. When set to On, the
search will be from the last recorded image.
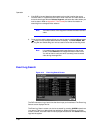
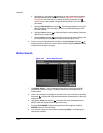
7. Highlight the box beside Channels and press . You can select the cameras
that you would like to include in your video clip.
8. Highlight the box beside Password and press . A virtual keyboard appears
allowing you to enter a password for reviewing the video clips.
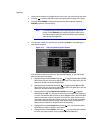
9. Highlight the box beside Dest. and press . You can select the storage device
on which you would like to record the video clip. You can choose from Internal
CD-RW, Internal DVD RW, USB Storage and USB CD-RW.
Caution The USB device for clip copy must be FAT16 or FAT32 format.
Note While copying video clips to the CD-RW or DVD RW, the
recording speed might decrease.
Note While copying video clips to the CD-RW or DVD RW, the DVR will
stop archiving video data until clip copying is finished.
Note When the error message Firmware update of the
optical drive is required displays, update the firmware
of the installed CD-RW drive or DVD RW drive. Please follow the
instructions described in System Information, page 39.
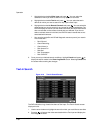
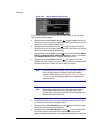
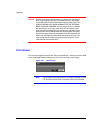
10. The DVR automatically assigns a file name to the video clip. However, you can
give the video clip file a different name. Highlight the box beside File Name and
press . A virtual keyboard appears. Enter a file name for the video you are
backing up and select Close. The DVR will automatically add the camera number
(for example, 01) and .exe to the file name. If you want to save the file in a specific
folder, enter the folder name followed by a “/”. For example: “folder/filename”.