


Configuration
Document 900.0856 Rev 3.00 45
11/07
Note You can use the domain name instead of an IP address if you
already set up the DVRNS Server when setting up the LAN.
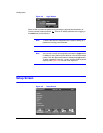
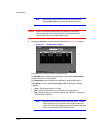
14. Highlight the box beside Interval and press . Set the time interval for
synchronization from 30 minutes to 1 day at various time intervals.
Last Sync-Time displays the last time the DVR was synchronized with the time
server.
15. Highlight Run as Server and press . Pressing toggles between On and
Off. When it is On, the DVR you are setting up will run as a time server.
16. You can save your changes by highlighting Save and pressing . Selecting
Cancel exits the screen without saving the changes.
Storage Screen
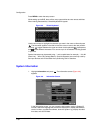
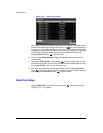
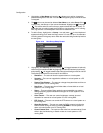
1. Highlight Storage in the System menu and press . The Storage setup screen
(Figure 3-14) appears and displays information about the DVR’s storage devices.
Figure 3-14 Storage Information Screen
The information in the Type column describes the storage device.
The capacity of the storage device is displayed in the Capacity column.
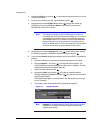
The Format column displays whether the device is used for recording (Record) or
archiving (Archive). Not Using indicates the device is not used for either
recording or archiving. Not formatted indicates the device is not formatted.
indicates when the device has temporary space set aside so that video clips can
be saved on a CD-RW or DVD RW.
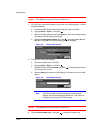
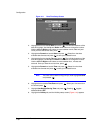
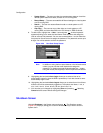
2. Highlight the box in the Format column for the desired storage device and press
. You will be able to format the device for recording or archiving. When
selecting Not Using from Use As and highlighting Format, the device will not be
used for either recording or archiving. You can also set aside space to store
temporary files for CD or DVD burning by selecting Partition – CD/DVD Burn.