17
Setting the satellite
controller
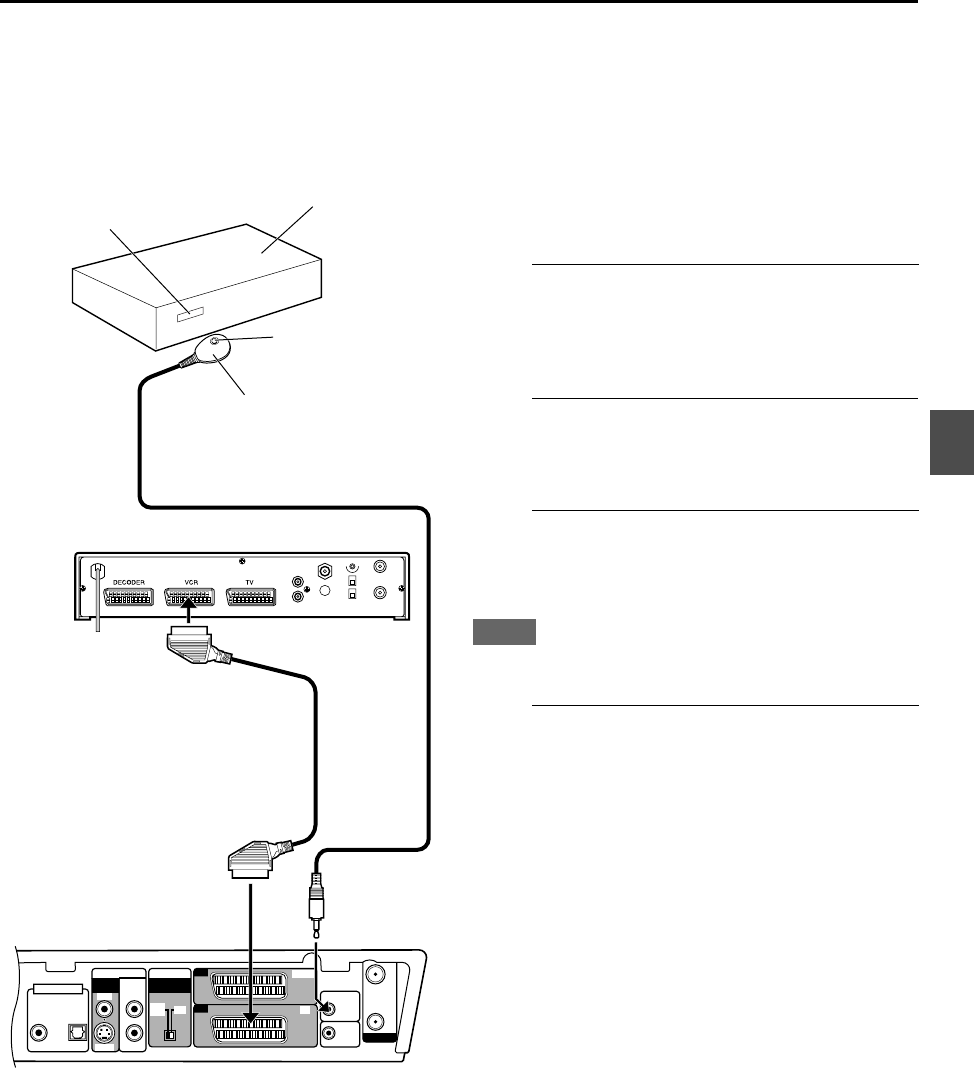
The following procedure is required if you receive
satellite programmes through a satellite receiver.
Approximately 20 seconds before a timer recording
starts, the unit sets its input mode to “L-2” (or “SAT”) and
automatically changes the programme position numbers
on the satellite receiver by sending a signal to your
satellite receiver.
Installing satellite controller
1
Situate the satellite controller.
Place the satellite controller so that the path between its
transmitter and the remote sensor on the satellite receiver
is unobstructed.
2
Attach the satellite controller.
Fix securely using the adhesive strip attached on the back
of the satellite controller.
3
Make connections.
Be sure to connect the L-2 IN connector on the rear to the
21-pin SCART connector on the satellite receiver.
NOTE
When connecting your satellite receiver, refer to its instruction
manual.
4
Connect the satellite controller to the unit.
Connect the satellite controller to the SAT
CONTROL
connector on the rear.
ANTENNA
L-1
VIDEO SIGNAL
SELECTOR
VIDEO
OUT
AUDIO
OUT
L-2
OUT
IN
/
OUT
DVDDVD
/
HDD
SAT CONTROL
AV
COMPU LINK
IN
OPTICALCOAXIAL
DVD DIGITAL OUT
PCM / STREAM
LEFT
RIGHT
IN
Y
/
C
COMP.
/
RGB
S-VIDEO
VIDEO
Satellite receiver
Suggested location of
the satellite controller
Transmitter
21-pin SCART cable
(not supplied)
Satellite controller
(Supplied)
XV-DDV1SL
Remote sensor
Satellite receiver


