


Main code Sub code Content
46 01 Exposure level adjustment
Used to set the copy density (copy lamp output voltage) in each exposure mode.
When this simulation is executed, warm-up is started and the currently set manual (ME) upper limit value is
displayed on the copy quantity display.
When warm-up is completed, the ready lamp lights up. When the PRINT button is pressed, copying is performed
in the currently set exposure mode.
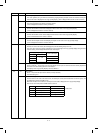
Since there are two or more display items, the third digit is used to make distinction between the light reception
level and the original judgment level, and the lower two digits are used to display the data.
The display is selected by the magnification ratio key, the exposure key, or the density select key.
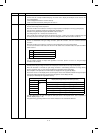
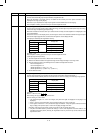
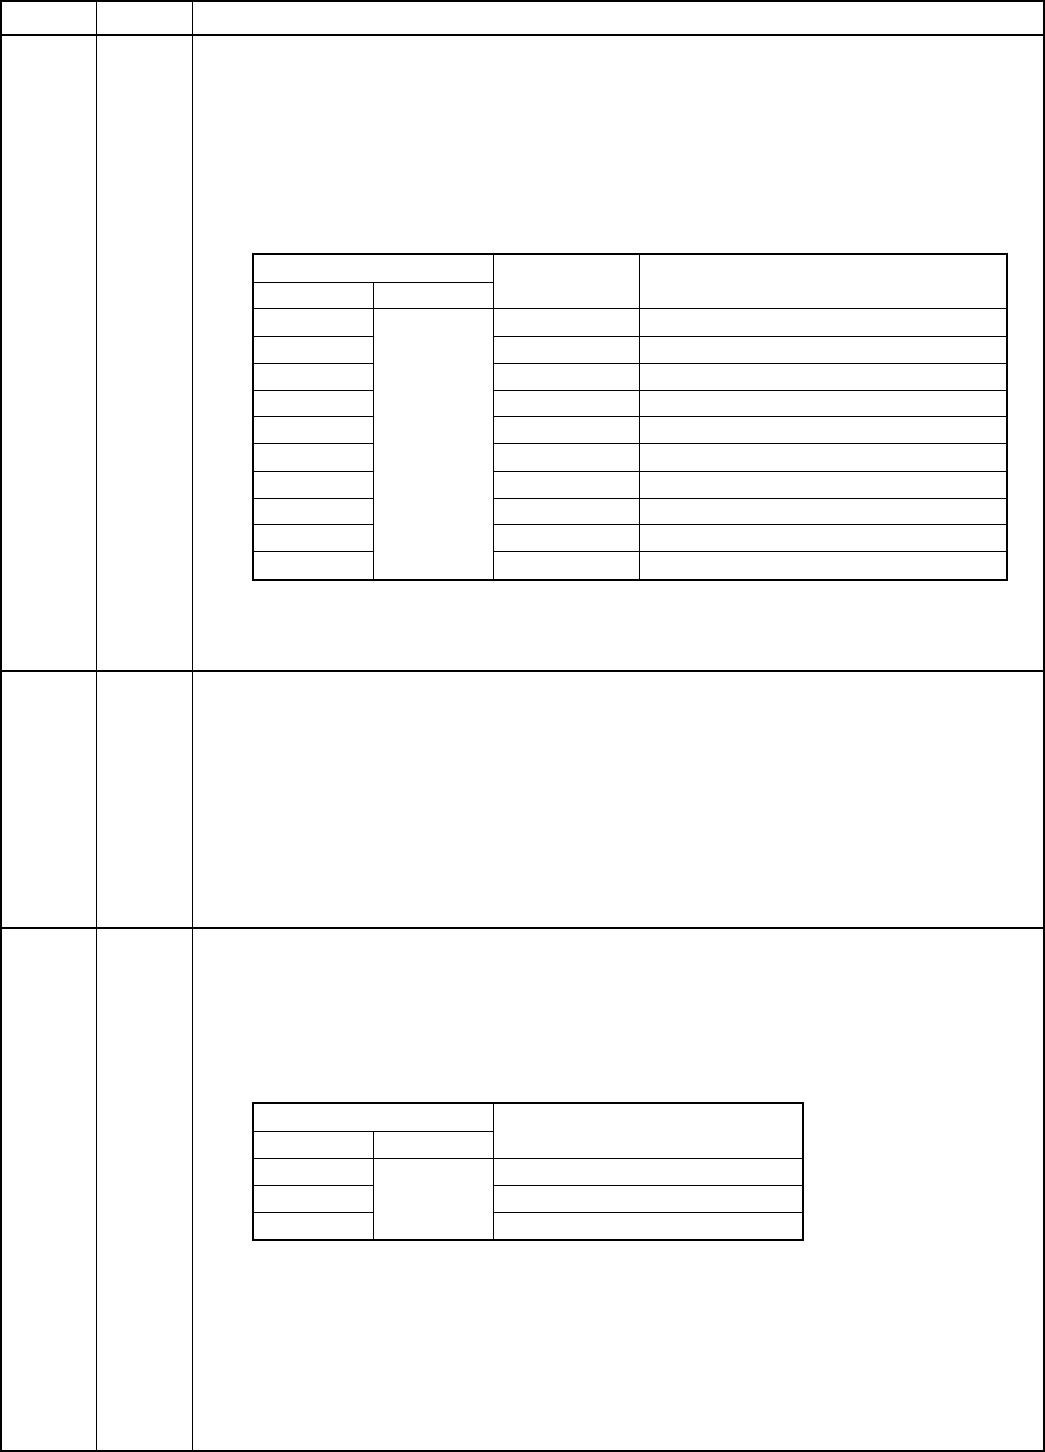
Copy quantity display
Exposure section
display
Display data
3rd digit 2nd, 1st digits
A1 ∼ 99 ME exp. 1 Manual (ME) upper limit value
b ME exp. 5 Manual (ME) lower limit value
C ME + PE exp. 1 Manual (ME) toner save upper limit value
d ME + PE exp. 5 Manual (ME) toner save lower limit value
E PE exp. 1 Photo (PE) upper limit value
F PE exp. 5 Photo (PE) lower limit value
G AE exp. 1 Auto (AE) slant
H AE exp. 5 Auto (AE) lower limit value
I AE + PE exp. 1 Auto (AE) toner save slant
J AE + PE exp. 5 Auto (AE) toner save lower limit
The setting range is 1 ∼ 99. The greater the set value is, the brighter the copy density is.
After completion of setting, press the CA key to cancel the adjustment mode.
(Note) Auto (AE) slant and auto (AE) toner save slant must be set to 0.
47 — AE sensor characteristics measurement
Used to read the E sensor input value when the copy lamp is lighted at the specified voltage and to set the AE
sensor gain.
When this simulation is executed, the mirror base is initialized and fed to the measurement position. After
completion of feeding, the previously measured AE sensor input value is displayed on the copy quantity display
and the ready lamp is lighted.
Press the PRINT button, and the copy lamp is lighted at the specified voltage interval. The AE sensor input value
at that time is read and stored. After completion of reading, the copy lamp is turned off and the measured AE
sensor is displayed on the copy quantity display.
At that time, the AE sensor gain is automatically adjusted.
(Note) Place 4 or 5 white sheets on the table glass during execution of this simulation.
48 01 Front/rear direction magnification ratio adjustment
Used to set the vertical (front/rear direction) copy magnification ratio.
When this simulation is executed, warm-up is started and the currently set normal correction value is displayed on
the copy quantity display.
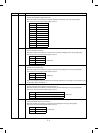
Since there are two or more display items, the third digit is used to make distinction between the light reception
level and the original judgment level, and the lower two digits are used to display the data.
The display is selected by the magnification ratio key.
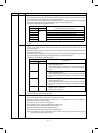
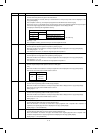
Copy quantity display
Display data
3rd digit 2nd, 1st digits
A1 ∼ 99 Normal correction value
b Zooming correction value (reduction)
C Zooming correction value (enlargement)
The setting range is:
normal correction range; 1 ∼ 99 (initial value: 50)
zooming correction value; 10 ∼ 90 (initial value: 50)
After completion of setting, press the CA key to cancel the adjustment mode.
8 – 17