


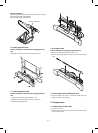
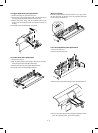


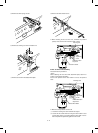
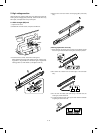
3 Fix the mirror base wire to the pulley with the mirror base wire
fixing screw.
4 Return the 9th winding tip of the mirror base wire to the original
position. (Perform the same procedure for the front frame side and
the rear frame side.)
(Note) After replacing the mirror base drive wire, perform the vertical
skew adjustment, the focus adjustment, and the horizontal
skew adjustment.
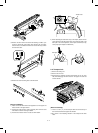
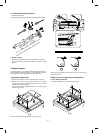
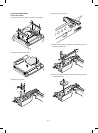
3) No. 2/3 mirror unit (mirror base B) installation
(Mirror base B positioning)
This is to adjust the parallelism of mirror base B and the drum surface
and the original surface.
This adjustment must be performed in the following cases:
• When the mirror base drive wire is replaced.
• When mirror base A or mirror base B is replaced.
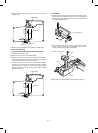
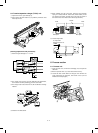
1 Manually turn the mirror base drive pulley to bring the mirror base
B in contact with the mirror base positioning plate. If the front side
and the rear side of the mirror base B make contact with the
mirror base positioning plate simultaneously, the parallelism of the
mirror base B is proper, and there is no further adjustment.
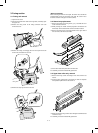
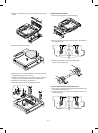
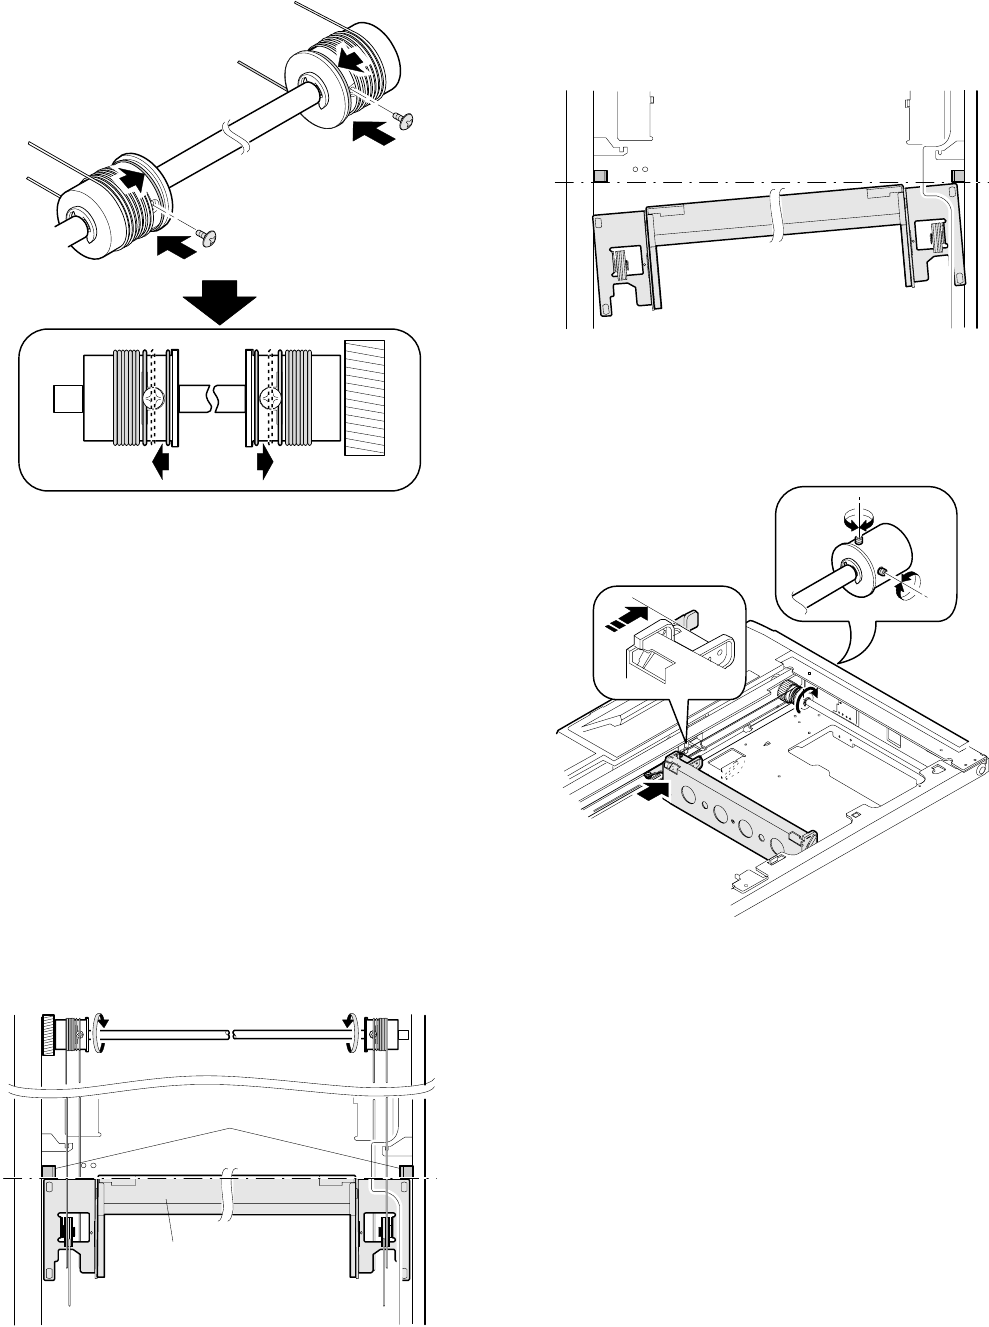
2 If the parallelism of the mirror base B is improper as shown in the
figure below (one side of the mirror base B is in contact with the
positioning plate and the other side is not in contact), perform the
following procedure.
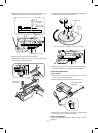
3 Loosen the mirror base drive pulley fixing screw on the side where
the mirror base B is not in contact with the positioning plate.
4 Manually rotate the mirror base drive pulley on the side where the
mirror base B is not in contact with the positioning plate to bring
the mirror base B into contact with the positioning plate.
5 Tighten the mirror base drive pulley fixing screw.
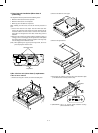
6 Manually rotate the mirror base drive pulley to separate the mirror
base B from the mirror base positioning plate once, then bring it
into contact with the positioning plate.
Check that the front side and the rear side of the mirror base B
make contact with the positioning plate simultaneously.
7 If the condition of 6 is not satisfied, repeat procedures 3
through 6 until the condition is satisfied.
2
3
4
Mirror base positioning plate
No.2/3 mirror unit
3
6 – 10