Wireless (for ISA550W and ISA570W only)
Configuring a Captive Portal
Cisco ISA500 Series Integrated Security Appliances Administration Guide 224
5
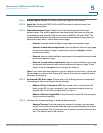
STEP 1 Enable Captive Portal: Click On to enable the Captive Portal feature.
STEP 2 Apply On: Choose the SSID, VLAN, or DMZ interface on which to apply the
Captive Portal settings.
STEP 3 Web Authentication Type: Choose one of the following methods for web
authentication. The security appliance can authenticate the users by using the
local database and external AAA server (such as RADIUS, AD, and LDAP). The
authentication method is derived from the user authentication settings that you
specified in the Users > User Authentication page.
• Internal: Uses the default HotSpot Login page and requires a login.
• Internal, no auth with accept button: Uses the default HotSpot Login page
and does not require a login. A user simply clicks the Accept button to
access the Internet.
• External: Uses a custom HotSpot Login page on the specified external web
server and requires a login.
• External, no auth with accept button: Uses a custom HotSpot Login page
on the specified external web server and does not require a login. A user
simply clicks the Accept button to access the Internet.
Note: If you chose Internal or External, you will need to use the Users > Users and
Groups page to create a User Group with Captive Portal service enabled, and to
add users to the group.
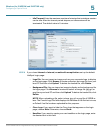
STEP 4 Redirected URL After Login: Choose one of the following options to determine
what happens after a user leaves the portal page:
• Redirect Client to Customer URL: Directs the users to a particular URL
(such as the URL for your company). If you choose this option, enter the
desired URL in the field, including http:// or https://.
• Redirect Client to Original URL: Directs the users to the URL that they were
trying to access originally.
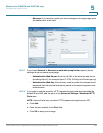
STEP 5 Configure the timeout settings, or keep the default values.
• Session Timeout: Enter the maximum number of minutes that a wireless
session can remain connected. After the timeout period elapses, the session
will be terminated. Enter 0 to allow a user to remain connected without any
limit. The default value is 60 minutes.


