Getting Started
Getting Started with the Configuration Utility
Cisco ISA500 Series Integrated Security Appliances Administration Guide 26
1
Logging in to the Configuration Utility
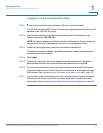
STEP 1 Connect your computer to an available LAN port on the back panel.
Your PC will become a DHCP client of the security appliance and will receive an IP
address in the 192.168.75.x range.
STEP 2 Start a web browser. In the address bar, enter the default IP address of the
security appliance: 192.168.75.1.
NOTE: The above address is the factory default LAN address. If you change this
setting, enter the new IP address to connect to the Configuration Utility.
STEP 3 When the login page opens, enter the username and password.
The default username is cisco. The default password is cisco. Usernames and
passwords are case sensitive.
STEP 4 Click Login.
STEP 5 For security purposes, you must change the default password of the default
administrator account. Set a new administrator password and click OK.
STEP 6 If you can access the Internet and a newer firmware is detected, the Firmware
Upgrade window opens. Follow the on-screen prompts to download and install
the firmware. See Upgrading your Firmware After your First Login, page 33.
STEP 7 If you cannot access the Internet or you are using the latest firmware, the Setup
Wizard will now launch. Follow the on-screen prompts to complete the initial
configuration. See Using the Setup Wizard for the Initial Configuration, page 36.


