HD24/96 Technical Reference 19
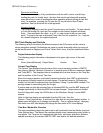
Take View and Active Take Number Buttons
The Active Take is the one that you’ll hear in playback or to which you’ll record. Since
only one virtual take can be active at a time, the number displayed in the Active Take
button indicates which of the eight takes is currently active. Clicking on a track’s Active
Take button pops up a list box allowing you to select the active take. The number within
the button changes accordingly to match the selected take.
The Take View and Take Number buttons work hand in hand. When clicking on the
Take View button, the track expands downward so that all takes are displayed. Clicking
on a take’s ACTIVE button makes that the active take. Each take has the boring default
name of “Take ‘n’”, but this can be modified by clicking on the yellow Take Name field
when the takes are visible on screen.
When the virtual takes are expanded, the Take Number button to the left of the ACTIVE
button functions in the same manner as the Track Number button. For example, clicking
on a Take Number button selects that Take as the destination for a Paste operation.
When collapsing back to the one-take-pre-track view, the currently selected active take
is displayed in the track region.
Note: The active take selection is only updated when the transport is stopped. You can’t
jump among takes on the fly.
Tip: The active take on multiple tracks may be changed by first selecting a group of
tracks. Use the I-Beam tool and Ctrl-click on each track or Shift-click to select a range
of tracks. Then Ctrl-click on the take number button on any of the selected tracks to
make that the active take on all the tracks in the group. Handy when you have 10 tracks
of drum kit overdubs.
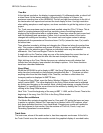
Solo and Mute buttons
Track Solo and Mute (the S and M buttons) are output monitor functions. Mute turns off
the output of the selected track. Solo mutes everything but the selected track. Clicking
on these buttons activates the function and highlights the button. Note that when one
track is placed in Solo, all the other tracks are placed in Mute. These are toggle buttons
- click them to turn the function on or off. See the Monitor section (page 41) for further
details.
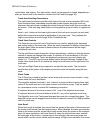
Track Name
The rightmost field in the Track Control area contains the name of the track. Default
names out of the box are simply “Track N”, where N is the track number. Tracks can be
renamed using conventional text entry procedures - click and type, then press the Enter
key or click outside the field to complete the entry.
Regions within a track inherit the name of the track at the time they are recorded. If you
label a track “Lead Guitar” before you record the lead guitar part, its regions will carry
that name. If you record with the name “Track 19” and then think to change it afterward,
your initial lead guitar recording (that’s always the one that’s the best) will have a
number, not a name.
Your pet track names can be saved as a template using the
File | Save as a New Template
command from the main menu. Once a template is saved, the next time you open a new
project, its tracks will carry the saved names. This is a useful feature if you regularly


