89
3. Rename...................................................................
Press the “Rename” button to access the dialog box,
and modify the song name. A name of up to sixteen
characters can be input. (→p.21)
4. New........................................................................
This creates a new song following the last song of
the currently selected drive.
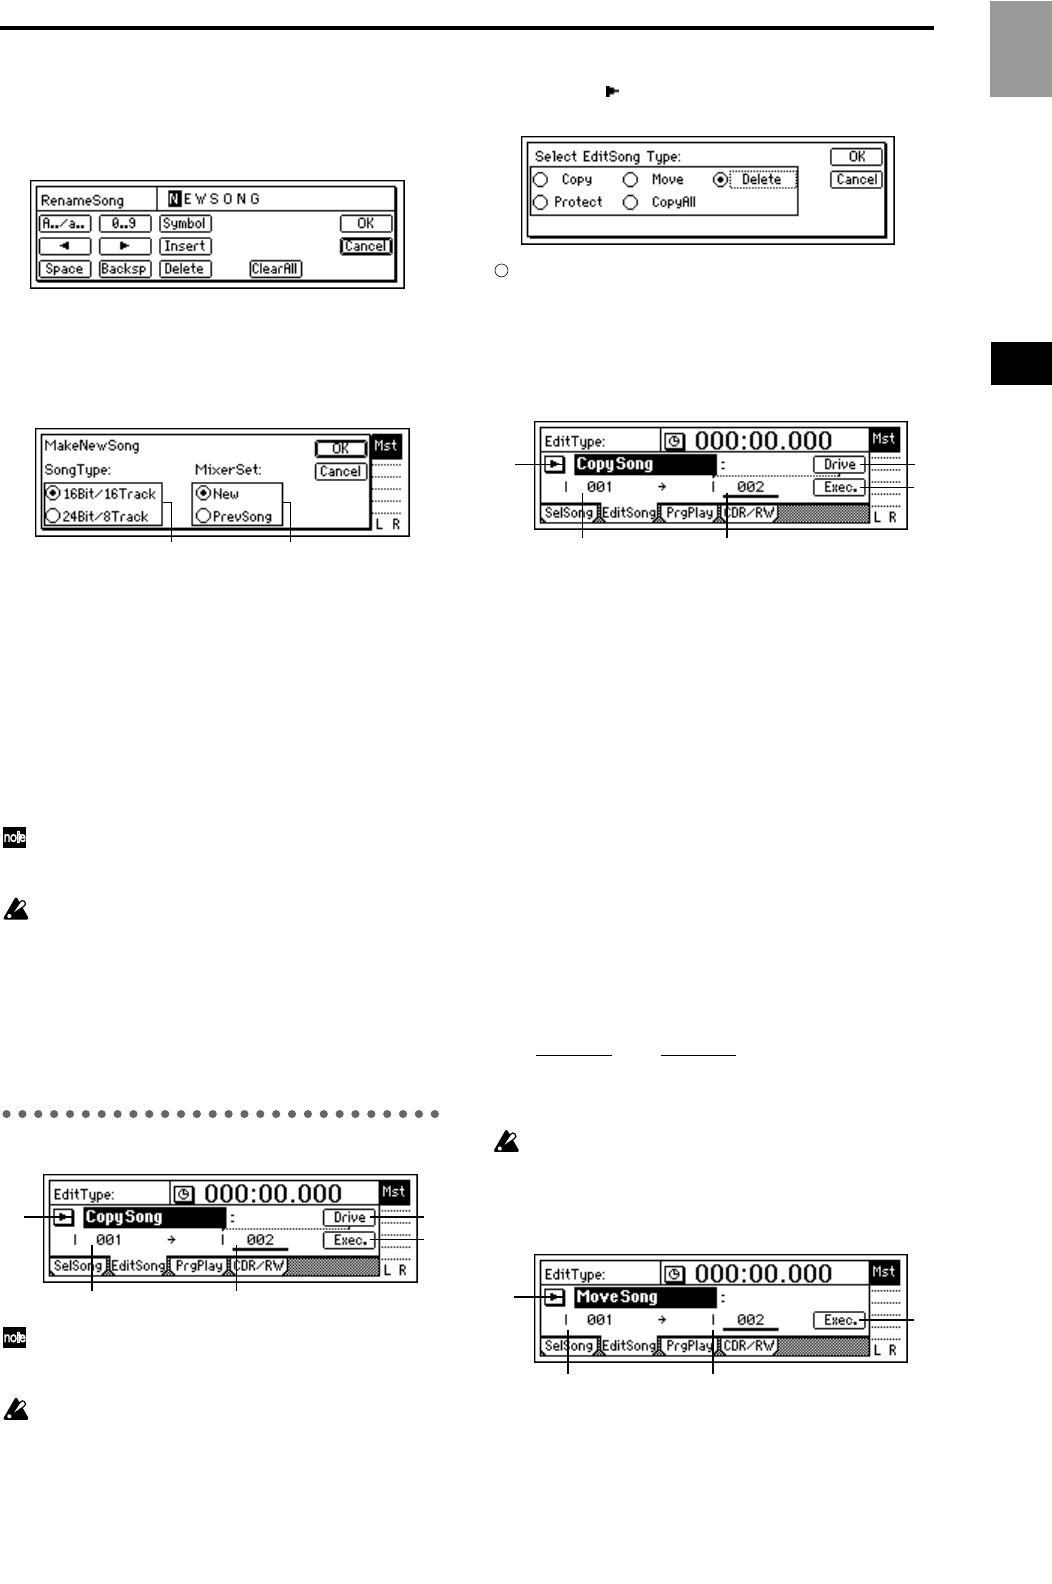
Press the “New” button to access the dialog box.
Set “SongType” and “MixerSet,” and press the
“OK” button, to create the new song. If you press
the “Cancel” button, no song will be created.
4a. SongType .............[16Bit/16Track, 24Bit/8Track]
16Bit/16Track: Create a song for 16 bit recording/
playback. Tracks 1–16 can be used. A maximum of
eight tracks can be recorded simultaneously.
24Bit/8Track: Create a song for 24 bit recording/
playback. Tracks (1–8) can be used. Tracks 9–16 are
not available. A maximum of four tracks can be
recorded simultaneously.
When audio data is transferred to a 16 bit song
(→p.82 EditType: “CopyTrack”), it will be handled
as 16 bit data.
The “SongType” (Bit/Track) setting can be changed
only when creating a new song.
4b. MixerSet...................................[New, PrevSong]
Select the mixer settings for the new song.
New: New settings will be used.
PrevSong: The mixer settings of the currently
selected song will be used.
P2 EditSong: Song editing
The song affected by editing will be the currently
selected song. (However the “CopyAllSong” oper-
ation will affect all songs.)
Undo is not available after these operations.
1. EditType ...............................[CopySong, MoveSong,
DeleteSong, ProtectSong, CopyAllSongs]
Select the song editing operation.
Press the “ ” button, and you will be able to select
an editing operation from the following dialog box.
On this and the following pages, the items in the
screen are explained separately for each of these
types.
EditType: “CopySong”
The currently selected song will be copied to the drive
and song number you specify.
2. SourceSong ...............................(I, A...G/001...100)
This displays the copy source drive and the song
number.
If you wish to change this, use the [SONG] “Sel-
Song” tab page to make your selection.
3. DestSong.................................[(I, A...G/001...100)]
This displays the copy destination drive, and lets
you select the song number.
You can select song numbers “001”–“existing song
numbers + 1”. Use “Drive” to select the drive.
4. Drive ..........................................................[I, A...G]
Select the copy destination drive.
When you press this button, a dialog box will
appear. Select the drive, and press the “OK” button.
(→p.22)
5. Exec. (Execute)........................................................
Execute the copy operation.
When you execute the operation, the source song
will be copied to the destination song number
(“DestSong
”). If “DestSong” is an existing song
number, songs at and following that number will be
renumbered upward by one; no songs will be over-
written.
Undo is not available for this operation.
EditType: “MoveSong”
The currently selected song will be moved to a different
song number within the same drive.
2. SourceSong ...............................(I, A...G/001...100)
This displays the move source drive and the song
number.
4b4a
1
5
2 3
4
1
5
2 3
4
1
4
32
Reference
SONG


