22
English
INITIAL SETUP (SETUP WINDOW) (User Level: ID4)
1
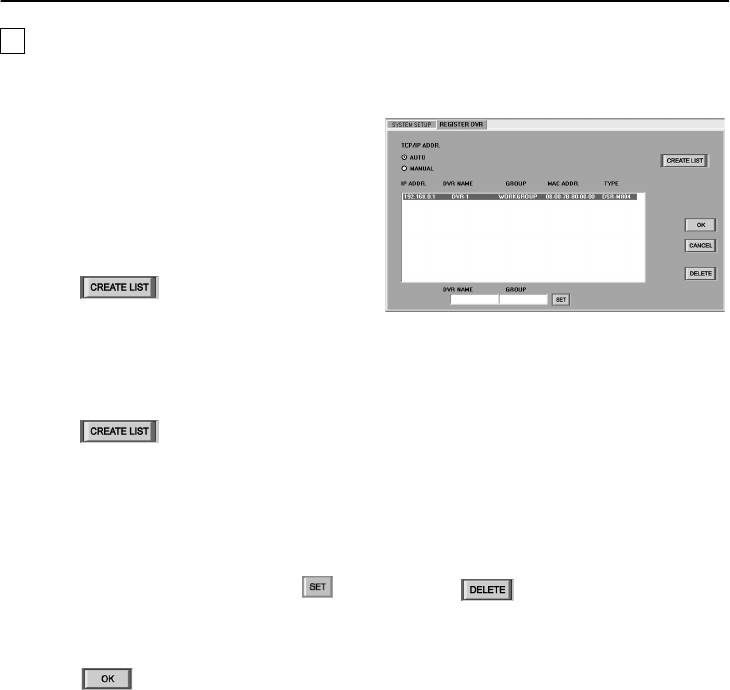
Select “MANUAL” in the “TCP/IP ADDR.”
box.
The manual setting mode for addresses will
be enabled.
2
Manually set “IP ADDRESS” using the
“NETWORK SET” menu for the DVR.
Enter a number between 001 and 250 for
the last three digits of the address.
3
Click .
The buttons in the window will be locked.
4
Registration list display
The “TCP/IP Address”, “MAC Address” and
“DVR Type” that have been set manually
will be displayed in the registration list.
5
Click .
The buttons will be unlocked.
Select the address that is displayed (in blue)
in the registration list and then double-click
the address.
6
Type the DVR name and attribute group
into the “DVR NAME” and “GROUP”
boxes respectively, and then click .
The DVR name and attribute group that
have been typed in will be displayed in the
registration list.
7
Click .
The selected DVR will then be registered by
the computer, and the “DVR Name” and
“Attribute Group” settings will be applied to
the DVR.
Repeat the above procedure to register
other new DVRs.
(Only capital letters can be entered.)
●
Deleting a DVR registration
Follow the procedure below to delete a DVR
registration.
1
Specify the address of the registration to
be deleted.
If you click on the address line of the
registration list to be deleted, the display
color will change to blue.
2
Disconnect the connection cable from
the DVR to be deleted from the
registration.
If you try to delete the DVR’s registration
while the DVR is still connected to the
network, an error will occur.
3
Click .
A dialog box asking you to confirm the
registration deletion will be displayed. Click
[OK] to confirm the deletion.
The registration for the specified DVR will
be deleted from the registration list.
Repeat the above procedure to delete other
DVR registrations.
B
Manual setting method
(A maximum of 250 devices can be set.)
