50
English
RECORDING IMAGES
●
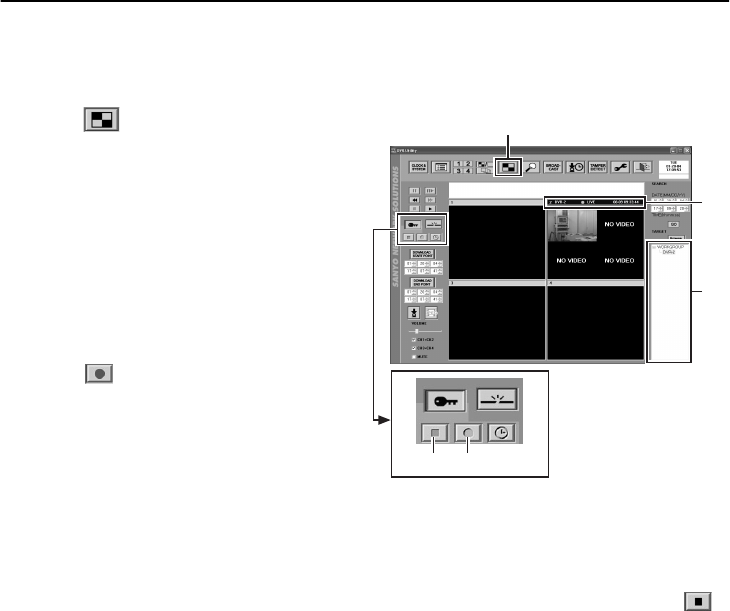
Normal recording from the multi screen
Images from multiple DVRs can be recorded at the same time from the multi screen. The operations for
each window are the same as for the quad screen.
1
Click (1
11
1) on the toolbar.
The multi screen will be displayed.
2
Click the title bar (2
22
2) of the recording
window.
The title bar will change to blue.
3
Double-click a DVR in the “TARGET”
window (3
33
3).
Live images from the selected DVR will be
displayed in the window. The title bar will
change to blue and image mode (LIVE) will
be displayed.
4
Click (4
44
4) on the recording control
panel.
The REC indicator on the DVR will
illuminate and recording of the live images
will start.
A b (red) mark will be displayed in the title
bar while recording is in progress.
5
Recording in a maximum of four
windows is possible using the same
procedure.
6
To stop recording in a window, click the title bar to select the window and then click
(5
55
5).
The REC indicator on the selected DVR will switch off and recording will stop.
●
Recording images that are not displayed
When normal recording is being carried out, it is not necessary to have the live images displayed in any
window on the screen. Once the DVR has been specified in the “TARGET” window on the screen, the
commands made using the recording control panel will be valid regardless of the display status of the
images.
•
The “TARGET” window and the recording control panel will be displayed in the main screen, and
normal recording will be possible.
•
The “BROADCAST” window can be used to transmit recording start and stop commands all at once
for all registered DVRs.
1
3
2
5 4


