English
5
TCP/IP SETTINGS
TCP/IP (Transmission Control Protocol/Internet Protocol) is a standard protocol that is used for the
Internet and intranets. When using the software on a network, you should first change the TCP/IP
settings as required in accordance with the operating systems (OS) of the various computers that on the
network that are to be used. (Operation is only guaranteed under Windows XP)
■ For Windows XP
1
Click the Network Connections icon in
the Control Panel.
The “Network and Internet Connections”
window will be displayed.
2
Click “Local Area Connections”.
The “Network Connections” window will be
displayed, and the settings for the LAN card
(Ethernet adapter) being used will appear in
the “LAN or High-Speed Internet” column.
3
Right-click on the LAN card (Ethernet
adapter) being used, and then select
“Properties (R)” from the pop-up menu.
The “General” tab window in the “Local Area
Connection Properties” window will be
displayed.
4
Check that “Internet Protocol (TCP/IP)”
is selected in the list of components
used by the Ethernet board that appears
in the “This connection uses the
following items: (O)” box.
If “Internet Protocol (TCP/IP)” is not
selected, select it.
5
Click [Properties (R)].
The “General” tab window in the “Internet
Protocol (TCP/IP) Properties” window will
be displayed.
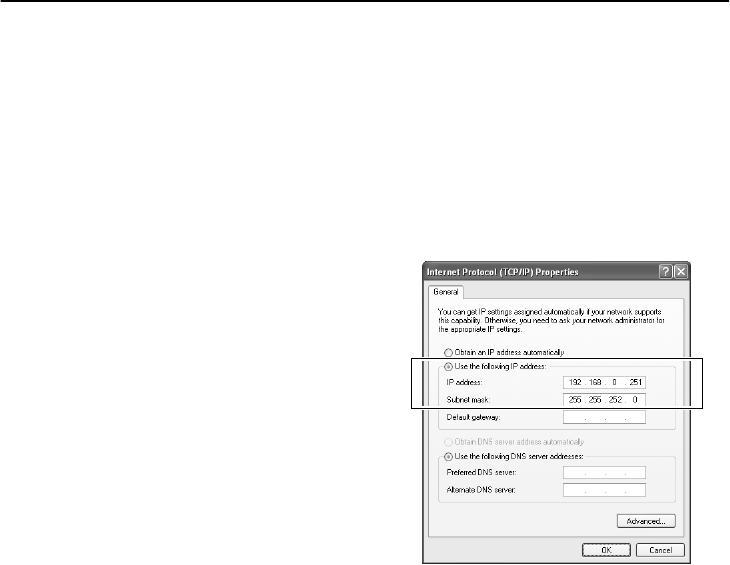
6
Select “Use the following IP address:
(S)” and then type in the IP address and
the subnet mask.
Type in “255.255.252.0” as the subnet mask
as shown in the illustration.
7
Check the settings, and then click [OK].
The display will return to the “Local Area
Connection Properties” window.
8
Click [OK].
This completes the TCP/IP settings.
