


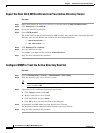

6-26
User Guide for Cisco Digital Media Manager 5.2.x
OL-15762-03
Chapter 6 Authentication and Federated Identity
Procedures
Step 3 Click Update.
The authentication settings that you changed are now in effect.
Step 4 Stop. You have completed this procedure.
What to Do Next
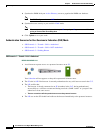
• OPTIONAL—Would you like to associate attribute names in DMS-Admin and Active Directory?
If so, proceed to the “Manage LDAP Attributes” section on page 6-26.
• OPTIONAL—Should Cisco DMS expect that your Active Directory server uses factory-preset attribute
names? If so, proceed to the “Manage LDAP Attributes” section on page 6-26.
• OPTIONAL—Should Cisco DMS expect that your Active Directory server uses custom attribute
names? If so, proceed to the “Manage LDAP Attributes” section on page 6-26.
Related Topics
• Define LDAP Bookmarks, page 6-24
• Elements to Schedule Synchronization, page 6-35
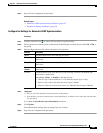
Manage LDAP Attributes
Before You Begin
• Choose LDAP or SSO as your authentication method.
• Define LDAP filters.
• Define LDAP bookmarks.
• Configure the LDAP synchronization schedule.
Procedure
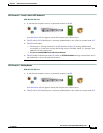
Step 1 Click Administration > Security > Authentication > Manage Attributes.
Tip Is the Manage Attributes tab disabled (dimmed), so that you cannot click it? If so, refresh your browser.
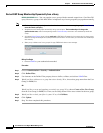
Step 2 Use elements on the Manage Attributes property sheet to:
• Set the associations between DMS-Admin attribute names and their corresponding Active Directory
attribute names.
• Use the predefined and typical names for Active Directory attributes (shown in grey text) or edit
those attribute names so they match the names that your Active Directory server uses.
• Enter the values to use by default in DMS-Admin when a user account attribute is not defined on
your Active Directory server.
You must enter a value for each mandatory attribute. You cannot enter a value to use by default for user
names, because each user name is unique.
Step 3 Click Update.
The authentication settings that you changed are now in effect.