68
Functions for Enhancing Projection
User’s Guide
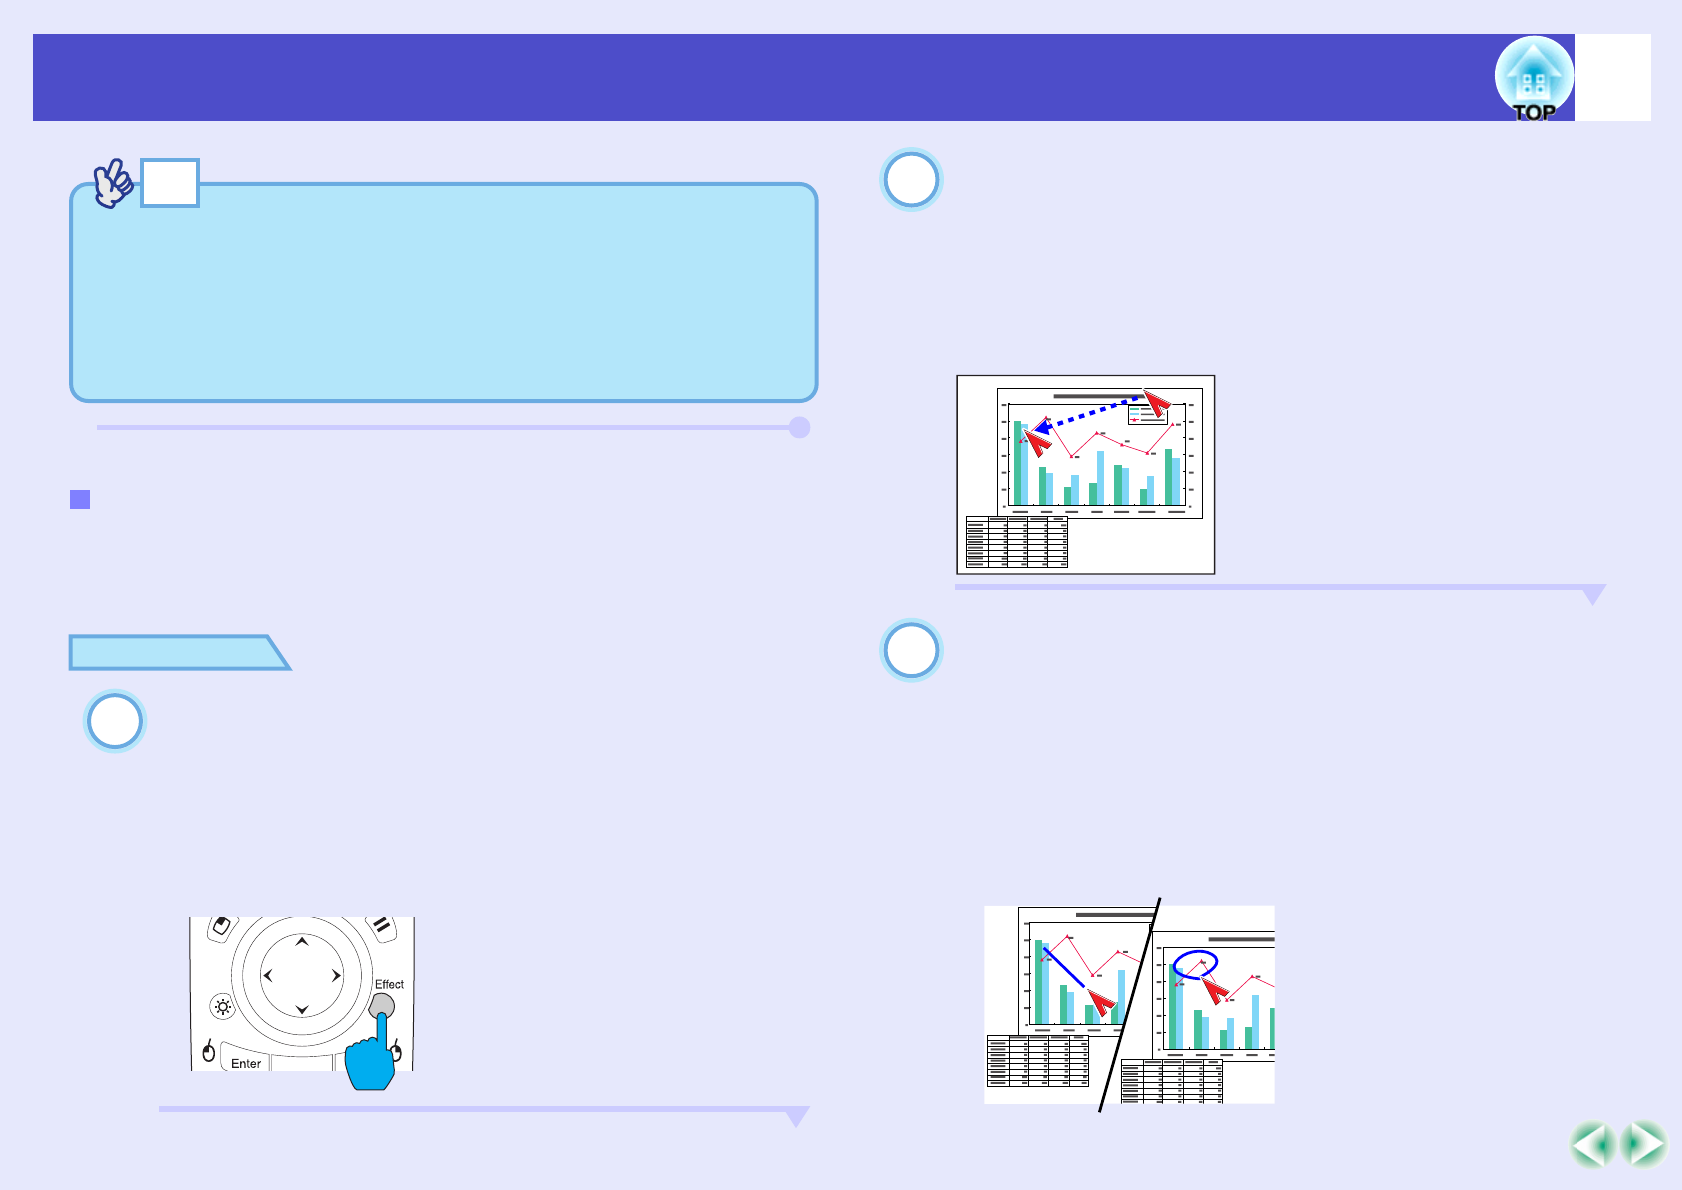
You can draw straight lines to emphasise aspects of an image, and draw
freehand lines to circle parts of the image at times such as when giving
presentations.
PROCEDURE
Press the [Effect] button on the remote control.
The pointer icon will appear in the middle of the projection area.
The pointer icon will change to the icon set for "Pointer/Line1",
"Pointer/Line2" and "Pointer/Line3" in that order each time the
[Effect] button is pressed, and you can then select the type of
line that has also been set for that pointer type.
Set the starting point for the line.
Straight line: Move the pointer icon to the starting point for the
line and press the [Enter] button.
Curved line : Move the pointer icon to the starting point for the
line and hold the [Enter] button down for
approximately 1.5 seconds to start drag mode.
The [Enter] button will light.
Set the ending point for the line.
Straight line: Move the pointer icon to the ending point for the
line and press the [Enter] button.
Curved line : Move the pointer icon to the ending point for the
line. The path moved by the pointer icon will
appear as a line drawn on the screen.
Press the [Enter] or [ESC] button. The light for
the [Enter] button will turn off.
Drawing Straight and Curved Lines
The last pointer icon type used will remain as the current pointer icon
until the projector's power is turned off, so that when the Effect
function is used, that pointer icon will appear. When the projector's
power is turned off, the pointer icon that has been saved using the
"Pointer/Line1" command will be the first pointer icon to be
displayed the next time the Effect function is used.


