


Clarity Visual Systems
September 1999
14
Optical Alignment
Tools
Required
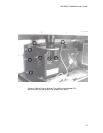
: 3/32 inch Allen-hex driver
3/8 inch socket driver
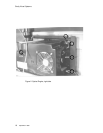
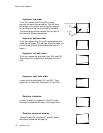
Optical Alignment means to the adjust the size and position of the image and
to correct for keystoning and rotation. Before installing a display, check it to
verify that the image is optically aligned.
When thinking about the optical calibration process, here are some things to
remember:
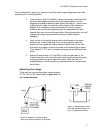
• The critical dimension during calibration is the distance from the
projection lens to each corner of the screen. If these distances are
equal, from lens to mirror to screen, the image will be a rectangle.
• The light path from lens to screen is expanding. If the path of one
corner is a little longer, that part of the image will expand more; if
shorter, that part will be smaller.
• Work on one thing at a time and in this order:
1. Make the image rectangular. Don’t worry at first about size or
placement. Just make it have four square corners.
2. Adjust rotation, so that the edges of the image are parallel with the
edges of the screen.
3. Adjust size, making the image fill the screen. In standard mullion
screens, this means hiding three pixels behind each mullion. With
Ultra-Thin Mullion screens, hide one pixel at each edge.
4. Adjust position, left and right, up and down.
• In most cases, only slight adjustments are required, usually just
position. Don’t try to adjust anything that doesn’t need it.