


Clarity Visual Systems
September 1999
70
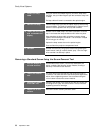
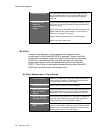
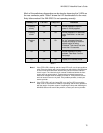
6. Remove the lamp
Push the lamp to the left (into the optical engine) while
turning counterclockwise. The lamp will rotate about an
eighth of a turn before it can be pulled to the right and
removed.
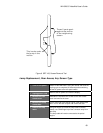
7. Install the new
lamp and
reassemble the
display
Reinsert a UHP 100W lamp in the same orientation. Push
the lamp in (to the left) and rotate the lamp clockwise until
it locks into place.
When attaching the lamp cable, pinch the connector clamp
together while inserting the connector. The connector is
keyed so it will only go on one way.
Replace the lamp access door on the optical engine.
Replace the rear access cover.
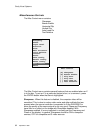
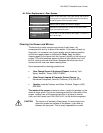
Air Filter
Length of time between air filter replacements depends on the
environment in which the WN-5230-S is operated. Check the air filter
periodically and replace it when it is dirty, but don’t use it for more than
8,000 hours. An excessively dirty air filter can block air flow to the
optical assembly and cause excessive heat buildup inside the WN-
5230-S. The air filter is most easily accessed from the rear of the WN-
5230-S by first removing the rear access cover.
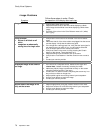
Air Filter Replacement, Front Access
1. Turn off the power
Switch off the WN-5230-S using the remote and allow the
cooling cycle to complete (30 seconds) before switching
off the AC power at the rear-panel switch.
2. Unplug power cord
Remove the AC power cord from the display.
3. Follow appropriate
steps for screen
removal
Follow the steps outlined for Lamp Replacement to remove
the Standard Screen. If the screen is Ultra-Thin Mullion or
Blackscreen, the air filter must be replaced from the rear.
4. Open the projector
compartment hood
There are two spring latches on the projector compartment
hood. Pull these latches towards each other and pull the
hood towards the front of the display to open it.
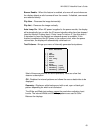
5. Replace the air
filter
The air filter is located behind the two cooling fans on the
right. Use a flat blade screwdriver to pry the filter to the left.
When the filter has cleared the bracket, carefully (to avoid
dropping dust) remove it from the display.