WN-5230-S VideoWall User’s Guide
29
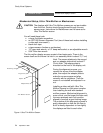
screen IN (away from you) by 1/32nd of an inch
(0.8 mm).
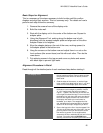
E. Hang the screens again and check your work.
F. With the screens in place on the bottom row, put
the screens on the next row above. “Flatten” this
row in the same way, paying attention to how
these fit with the bottom row as well as with their
neighbors to the left and right.
7. Put retaining screws in the top
row and cover holes and seams
with black tape to prevent light
leaks.
A. When all the screens are aligned with each other
to make a flat, square video wall, put the screws
in the top row of screens to hold them in place.
B. The finger holes and the space between the
screen and the adapter plate can be a source of
light leaks, allowing stray light to hit the back of
the screen and wash out some of the picture. To
prevent this, cover the finger holes in the top row
of displays with black cloth tape. “Gaffer” tape
does a nice job of this. Masking tape is
sometimes difficult to remove cleanly. You can
check for light leaks during the video setup
process. Select “Curtain” from the main menu and
verify that the whole screen is black. It is best to
do this in the actual lighting that will be on when
the wall is used.


