


Clarity Visual Systems
September 1999
48
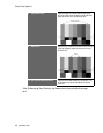
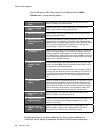
Use the White and 50% Gray internal Test Patterns from the Misc
Control menu, not an external pattern.
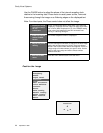
1. Display an all-white
image
On each display in the video wall, open the Misc Control menu,
select Test Pattern and choose White.
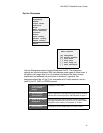
2. Open the COLOR
menu
Press the Color button on the remote control, or choose Color
Balance from the main menu and press Enter.
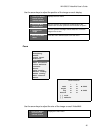
3. Maximize
all
settings
Adjust the WHT setting of all the displays to 031; adjust the GRY
setting of all displays to 007.
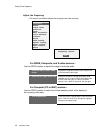
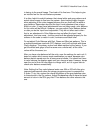
4. Identify the least-
bright display in the
system
The least bright display is already as bright as it can be. This
display will serve as a baseline to which the other displays will be
adjusted. Note: The baseline display does not have to be the middle
one. It should be the darkest one, wherever it is in the wall. The
darkest display is called the “baseline” display.
5. Luminance match
the displays
Select one of the displays next to the baseline display. This will be
called the “variable” display. Turn off the Color Balance menu to all
displays except the variable display. In the Color Balance menu on
the variable display, highlight the arrows under the Wht. Use the left
arrow to reduce the brightness until the variable display is the same
brightness as the baseline display.
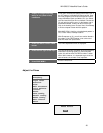
6. Color balance the
displays – white
mode
On the variable display, adjust the amounts of RED, GREEN, and
BLUE in the white (Wht) column to achieve the best match in color
and luminance to the baseline display.
If a color needs to be increased, but that color is already as high as
it can go, then the other two colors can be reduced. For instance, if
you need the white to be have more red, but red is already at 031,
reduce the green and blue. This will make the display look more
red.
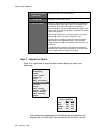
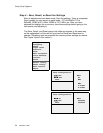
7. Adjust the next
display
When the variable unit matches the baseline, in can serve as a new
baseline unit for its neighbors. Continue to work outward from the
original baseline display, one cube at a time. Do not go to the next
step of adjusting for Gray until you are satisfied that all the displays
look the same for a white image. It is not important to obtain pure
white; it is only important that all the displays look the same.
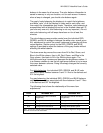
8. Display a 50% gray
image
On each display in the video wall, open the Misc Control menu,
select Test Pattern and choose 50% Gray.
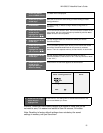
9. Identify the least
bright unit again
Find the unit that looks the darkest. This may not be the same one
that was the darkest one with a White test pattern. This is the
baseline unit for Gray.
10. Color balance the
displays – 50% gray
mode
Using the same technique of adjusting a variable display to the
baseline display, match the color and brightness of all cubes,
working with one cube at a time and working outward.
A helpful technique to use when adjusting the colors and gray shades is to
“overshoot” as you adjust to emphasize the effect that the current adjustment