


Configuration
64
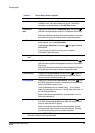
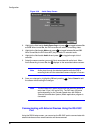
2. Press to toggle between On and Off. When On, the DVR deletes video
recorded earlier than user-defined period.
3. Highlight the second field beside Auto Deletion, and press to select the
length of time recorded data is kept, ranging from 1 to 99 Days.
Note When the End Of Disk is set to Stop, the DVR does NOT restart
recording even when the video recorded earlier than
user-defined period is deleted.
4. Save your changes by highlighting OK and pressing . Select Cancel to exit
the screen without saving the changes.
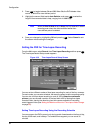
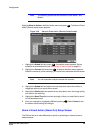
Setting the DVR for Time-Lapse Recording
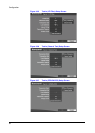
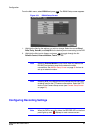
From the Main menu, select Record, then Time-Lapse Recording and then press .
The Time-Lapse Record Setup screen appears.
Figure 3-33 Time-Lapse Record Setup Screen
You can set two different modes of time-lapse recording for each of the four cameras.
For each mode, you can set a schedule, the recording speed, and the recording quality.
You can also turn time-lapse recording on and off. Using Keep the continuous
pictures, you can allocate a portion of the hard disk drive for storing time-lapse
recorded video, leaving the remaining hard drive space available for recording
event-triggered video (see Setting the Maximum Amount of Time-Lapse Video Storage
on page 66).
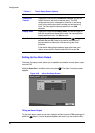
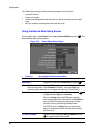
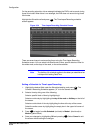
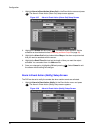
Setting Time-Lapse Recording Using the Recording Schedule
You can program the DVR to record only during certain times based on the time of day,
the day of the week, and holidays. The smallest time segment you can use is 30
minutes.