Configuration
Document 800-00919 Rev F 65
02/08
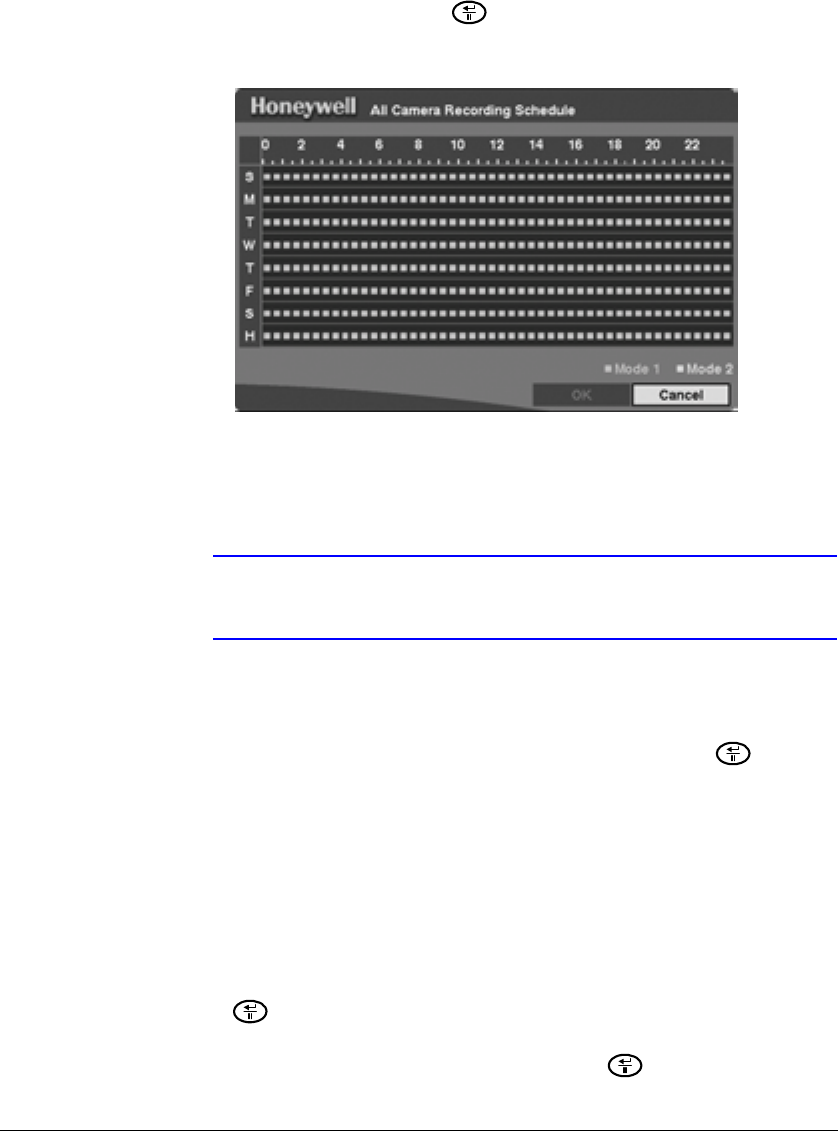
On the recording schedule, a blue rectangle indicates the DVR is set to record during
those 30 minutes. When there is no rectangle, the DVR does not record during those
30 minutes.
Highlight the Schedule cell and press . The Time-Lapse Recording schedule
screen appears.
Figure 3-34 Time-Lapse Recording Schedule Screen
There are several ways to set recording times using the Time-Lapse Recording
Schedule screen. You can select individual blocks of time, specific blocks of time for
the whole week, entire days of the week, or the entire calendar.
Note The Holiday (H) schedule applies to the dates you established as
holidays when setting Date/Time.
Setting a Schedule for Time-Lapse Recording
1. Highlight the desired field under the Schedule heading, and press . The
Camera X Recording Schedule appears (“X” is for the camera number).
2. Select a time by doing one of the following:
Select a specific block of time by highlighting it.
Select an entire day by highlighting the day of the week or Holiday on the left of
the screen.
Select an entire block of time by highlighting the time at the top of the screen.
Select the entire screen by highlighting the empty box in the upper left corner of
the screen.
3. Press to toggle from No Schedule (no block) to Mode 1 (blue block) to
Mode 2 (yellow block).
4. Save your changes by highlighting OK and pressing . Select Cancel to exit
the screen without saving the changes.


