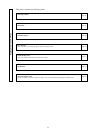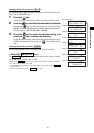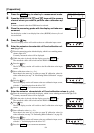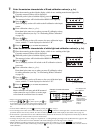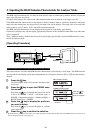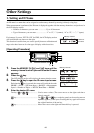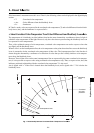
112
Break-
down
No.
Action
Symptom
Check Point
Ref.
7
8
9
10
11
12
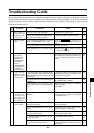
Odd measured
values are dis-
played.
Analog display
does not change.
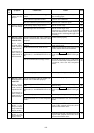
During com-
munication
with RS-232C
Data output
from the instru-
ment cannot be
imported to PC.
Commands or
data cannot be
input from PC to
the instrument.
During com-
munication
with USB
Data output
from the instru-
ment cannot be
imported to PC.
Commands or
data cannot be
input from PC to
the instrument.
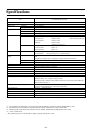
“DATE ER-
ROR” is dis-
played continu-
ously in the LCD
display section.
“MEMORY ER-
ROR” is dis-
played in the LCD
display section.
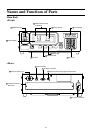
Is the receptor of the measuring probe
clean?
Is the analog display range correct?
Are the instrument (RS-232C connector)
and PC connected with a RS-232C cable
properly?
Are the instrument (USB port) and PC con-
nected with a USB cable properly?
If it is dirty, wipe it with a soft dry cloth or
lens cleaning paper.
Set the correct range.
Connect them properly.
Connect them properly.
Turn the power OFF, and then turn it ON
again. If this symptom still occurs, the in-
strument has broken down.
Turn the power OFF, and then turn it ON
again. If this symptom still occurs, the in-
strument has broken down.
105
68
84
86
29
29
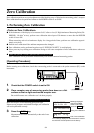
Is the ambient temperature stable?
If the ambient temperature has changed,
perform zero calibration.
34
Was user calibration performed correctly? Perform user calibration again.
50
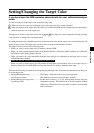
Was the target color set correctly? Set the correct target color.
(Perform user calibration, set the RGB
emission characteristic for the display’s
analyzer mode or set/change the target color
correctly.)
50
58
61
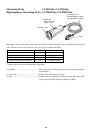
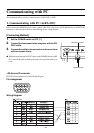
Is pin assignment of the RS-232C cable
correct?
A RS-232C cable with correct pin assign-
ment must be used.
84
Is the correct RS-232C baud rate set? Make sure that the RS-232C baud rate set
on PC matches that on the instrument.
85
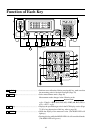
Check whether the instrument is in remote
OFF mode (i.e. the REMOTE LED is not
lit).
Are the communication settings correct?
Press the REMOTE key to turn ON re-
mote mode (i.e. the REMOTE LED lights
up).
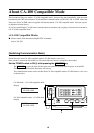
To use the CA-SDK, select CA-200 mode.
To use CA-100-based communication en-
vironment, select CA-100 compatible
mode.
86
Is the created program correct?
Check it by referring to a sample program.
–
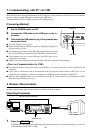
Is pin assignment of the USB cable cor-
rect?
A USB cable with correct pin assignment
must be used.
86
Check whether the instrument is in remote
OFF mode (i.e. the REMOTE LED is not
lit).
Press the REMOTE key to turn ON re-
mote mode (i.e. the REMOTE LED lights
up).
86
Is the created program correct?
Is the instrument in CA-100 compatible
mode?
Check it by referring to a sample program.
Set the instrument in CA-100 compatible
mode.
–
86
83
90