116
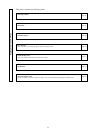
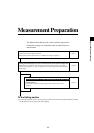
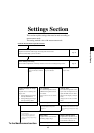
Measurement/Quick Guide
Before starting measurement, perform necessary preparations as explained in the Installation/Connection section (page 23).
Measurement Preparation Pages 33 to 44
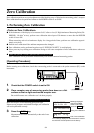
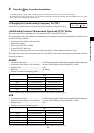
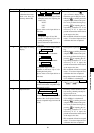
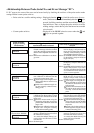
<Zero Calibration> Page 34
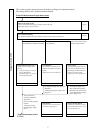
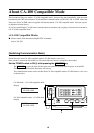
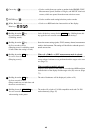
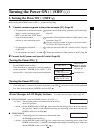
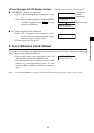
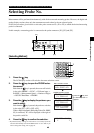
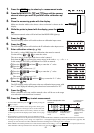
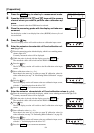
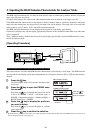
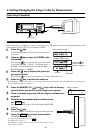
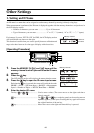
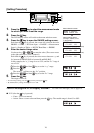
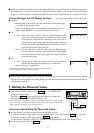
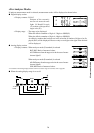
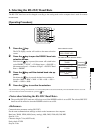
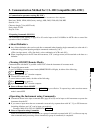
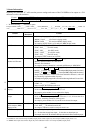
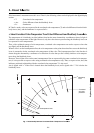
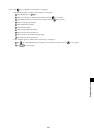
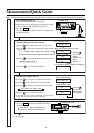
1.Check that the POWER switch is set to ON.
2.Place receptor area of measuring probe face down on a flat
surface so that no light reaches the receptor area.
3.Press the 0-CAL key.
The digital and analog display sections will light up and
measurement starts.
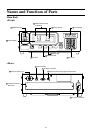
POWER switch
0-CAL key
To the next page
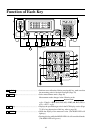
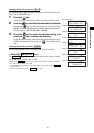
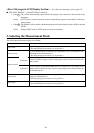
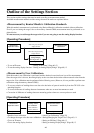
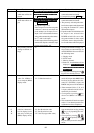
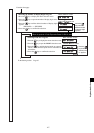
<Selecting SYNC Mode> Page 38
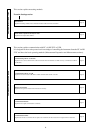
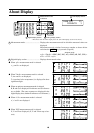
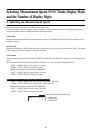
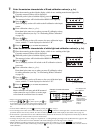
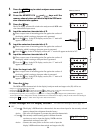
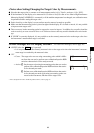
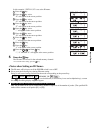
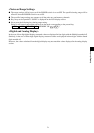
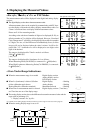
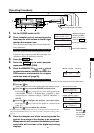
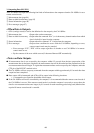
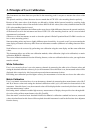
1.Press the key to display the menu selection screen.
2.Press the key to open the SYNC selection screen.
3.Press the key until the desired SYNC mode appears.
4. Press the key to confirm the selection.
* To use EXT mode, the vertical synchronizing signal used for the
display must be input to the instrument. (Page 28)
EXT→UNIV→INT→NTSC→PAL
Menu selection screen
Press the
key until the
desired SYNC
mode appears.
SYNC selection screen
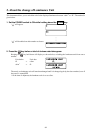
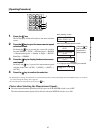
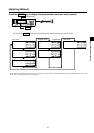
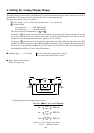
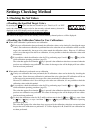
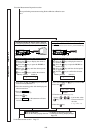
<Selecting Measurement Mode> Page 40
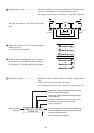
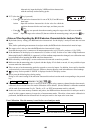
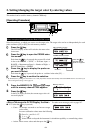
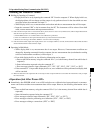
1. Press the MODE key until the desired measurement
mode appears.
xyLv→T∆uvLv→Analyzer (G standard)
XYZ←u'v'Lv←Analyzer (R standard)
Measurement mode
Mode key
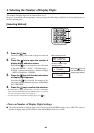
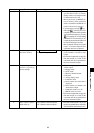
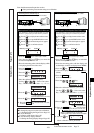
<Selecting Measurement Speed> Page 36
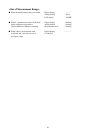
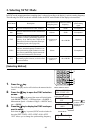
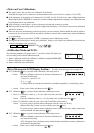
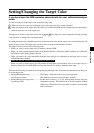
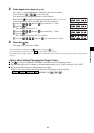
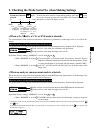
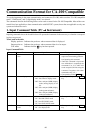
1.Press the key to display the menu selection screen.
2.Press the key to open the measurement speed selection
screen.
PROBE→SYNC→ID Name input→RANGE
RS232C Baud Rate→Number of Digits→Measurement Speed
3.Press the key to display the desired measurement speed.
AUTO→SLOW→FAST
4. Press the key to confirm the selection.
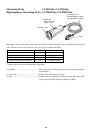
Press the
key until the
desired
measurement
speed
appears.
Menu selection screen
“F” is displayed when the [FAST] was selected.
Measurement speed selection screen
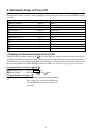
1
MENU : SELECT
PUSH SPACE KEY
SELECT : SYNC.
EXT
SELECT : SYNC.
UNIV
MENU : SELECT
PUSH SPACE KEY
SELECT : M-SPD
AUTO
SELECT : M-SPD
SLOW
SELECT : M-SPD
FAST
CH00 EXT Fd P1
[ ]
1
3
2