DMA Operations Guide External SIP Peer
126 Polycom, Inc.
See also:
“External SIP Peer” on page 108
“Add External SIP Peer Dialog Box” on page 109
“Edit External SIP Peer Dialog Box” on page 114
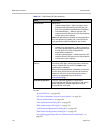
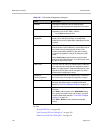
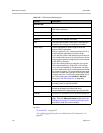
Table 5-22 Edit Outbound Registration dialog box
Field Description
Enabled Clearing this check box lets you stop using this
registration without deleting the registration information.
Address of record The AOR with which the system registers (see
registration rules in RFC 3261), such as:
sip:1000@dma.polycom.com
Territory to perform
registration
Responsibility for registering must be assigned to a
territory, thus making the primary or backup DMA
cluster for the territory responsible, depending on which
is active.
Contact address format Select IP or DNS to specify that the contact header
should use the virtual IP address or virtual DNS name of
the cluster currently managing the territory. If the
territory responsibility switches to the other cluster, it
re-sends the registration using its IP address or DNS
name.
Select Free Form to specify that the contact header
should use the FQDN you enter. The external peer must
be able to resolve this FQDN.
User name The user name to use for the authentication credentials
if the external peer challenges the registration request.
Note: The authentication credentials specified here are
specific to this SIP peer and are not tied to any other
authentication configuration values.
Password
Confirm password
The password to use for the authentication credentials if
the external peer challenges the registration request.
Request-URI The Request-URI to include when registering with this
SIP peer, specified using the variables (#delimited)
defined in “Free Form Template Variables” on page 121.
Other headers Additional headers to include when registering with this
SIP peer.
Click Add to add a header. In the Add Header dialog
box, specify the header name and value(s), using the
variables (#delimited) defined in “Free Form Template
Variables” on page 121.
Click Edit or Delete to edit or delete the selected
header.


