Unpacking
10 UDA2182 Universal Dual Analyzer Product Manual January 2009
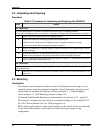
3.2 Unpacking and Preparing
Procedure
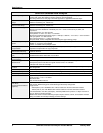
Table 3-1 Procedure for Unpacking and Preparing the UDA2182
Step Action
ATTENTION
For prolonged storage or for shipment, the instrument should be kept in its shipping container.
Do not remove shipping clamps or covers. Store in a suitable environment only (see specifications in Section 2).
1
Carefully remove the instrument from the shipping container.
2
Compare the contents of the shipping container with the packing list.
• Notify the carrier and Honeywell immediately if there is equipment damage or shortage.
• Do not return goods without contacting Honeywell in advance.
3
Remove any shipping ties or packing material. Follow the instructions on any attached tags, and then
remove such tags.
4
All UDA2182 Analyzers are calibrated and tested at the factory prior to shipment. Examine the model
number on the nameplate to verify that the instrument has the correct optional features.
5
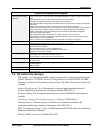
Select an installation location that meets the specifications in Section 2. The UDA2182 can be panel-
, wall-, or pipe-mounted (see Section 3.3).
ATTENTION
Pipe mounting is not recommended if the pipe is subject to severe vibration. Excessive vibration may affect
system performance.
6
If extremely hot or cold objects are near the installation location, provide radiant heat shielding for the
instrument.
3.3 Mounting
Introduction
The Analyzer can be mounted on either a vertical or tilted panel or can be pipe or wall
mounted (option) using the mounting kit supplied. Overall dimensions and panel cutout
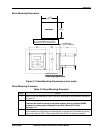
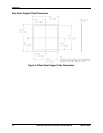
requirements for mounting the analyzer are shown in Figure 3-1. Pipe mounting is
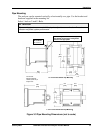
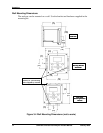
shown in Figure 3-3. Wall Mounting is shown in Figure 3-4.
For Sample Tap Electrode Mounting recommendations, See Section 15.15 – page 229.
The analyzer’s mounting enclosure must be grounded according to CSA standard C22.2
No. 0.4 or Factory Mutual Class No. 3820 paragraph 6.1.5.
Before mounting the analyzer, refer to the nameplate on the outside of the case and make
a note of the model number. It will help later when selecting the proper wiring
configuration.


