


112
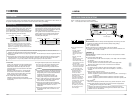
[AUTO EDIT] button
[ENTRY] button
[IN]
button
[SHIFT]
button
Jog dial
M
H
F
S
REC
MENU
PLAY
PAUSE / STILL
REW
STOP
FF
EJECT
SET
HOLD
PB
PB/EE
COUNTER
UB
CONDITION
RESET
VCON
REMOTE
TOP VIDEO AUDIO
OTHERSON SCREENTIME CODESERVO/SYS
USER
INSERT
STAND BY
PLAYER
SEARCH
VAR
P.PLAY
DA3
DA2
DA1VIDEO
ASSEM
IN
ENTRY
OUT
CANCEL
SHIFT
REVIEW
PREVIEW
AUTO EDIT
PREROLL
TC
RECORDER
DA4
STILL
X-1
REV
FWD
X1
PULL
RELEASE
CTL
P.READ
AUTO
OFF
V.VAR
REMOTE
PB/EE
16:9
TC
UB
DF
SERVO
GENCF
AP
525
625
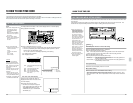
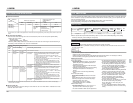
11-4 AUDIO SPLIT EDITING
11 EDITING
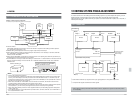
This function allows you to specify the audio edit IN point independently of the video edit IN point (in ordinary
editing, audio and video signals have the same edit point). This enables independent insertion of audio and video.
• Audio split editing is possible only in the Insert Edit mode.
• It is not possible to set the audio edit IN point separately for each channel (DA1/DA2/DA3/DA4).
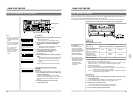
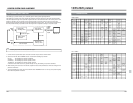
Video IN point
Video signal
Recorder
Audio IN point
OUT point
Audio signal
Direction for delay
Direction for advance
Insert
buttons
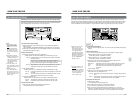
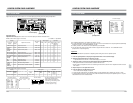
Procedure
1. Engage the Insert Edit mode.
Press the insert mode buttons ([VIDEO], [DA1], [DA2], [DA3], [DA4] buttons] as
required.
*Press the [VIDEO] button and at least one of the audio channels ([DA1], [DA2],
[DA3] or [DA4] ).
2. Enter the edit IN point for both player and recorder.
The entered edit IN point is used as the edit IN point for video.
3. Search the recorder’s audio edit IN point with the search or jog dial operation
and engage the Still mode.
4. Enter the audio edit IN point by pressing the [ENTRY] button while pressing the
[SHIFT] and [IN] buttons.
[ The selected audio insert button blinks, showing that the audio
IN point has been entered.
5. Enter the edit OUT point for the player or recorder.
The edit OUT point is set at the same point for audio and video.
6. Press the [AUTO EDIT] button. Editing starts automatically.
Ⅲ Disengaging the Audio Split mode
• Press the [CANCEL] button while pressing the [SHIFT] and [IN]
buttons.
[The audio insert button lights, showing that the Audio Split
Edit mode has been disengaged.
• Correcting the audio edit IN
point
Turn the jog dial while
pressing the [SHIFT] and
[IN] buttons to correct the
audio edit IN point in
frames.
IN
ENTRY
SHIFT
IN
CANCEL
SHIFT
R:SHTL STIL
DUR.
P:STOP
CTL
CTL
0:01:48:00
SPLIT
- :15:01
V•A1•A2•A3•A4•TC
P
IN '
OUT
R
IN '
OUT'
:43:04
-0:00:51:03
0:01:48:00
0:01:31:04
0:00:00:00
0:00:43:04
EF
113
11 EDITING
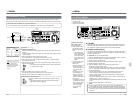
Additional editing functions available with the BR-D95U include:
• Last edit function
• Variable-motion editing
• Motion memory function
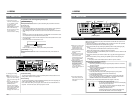
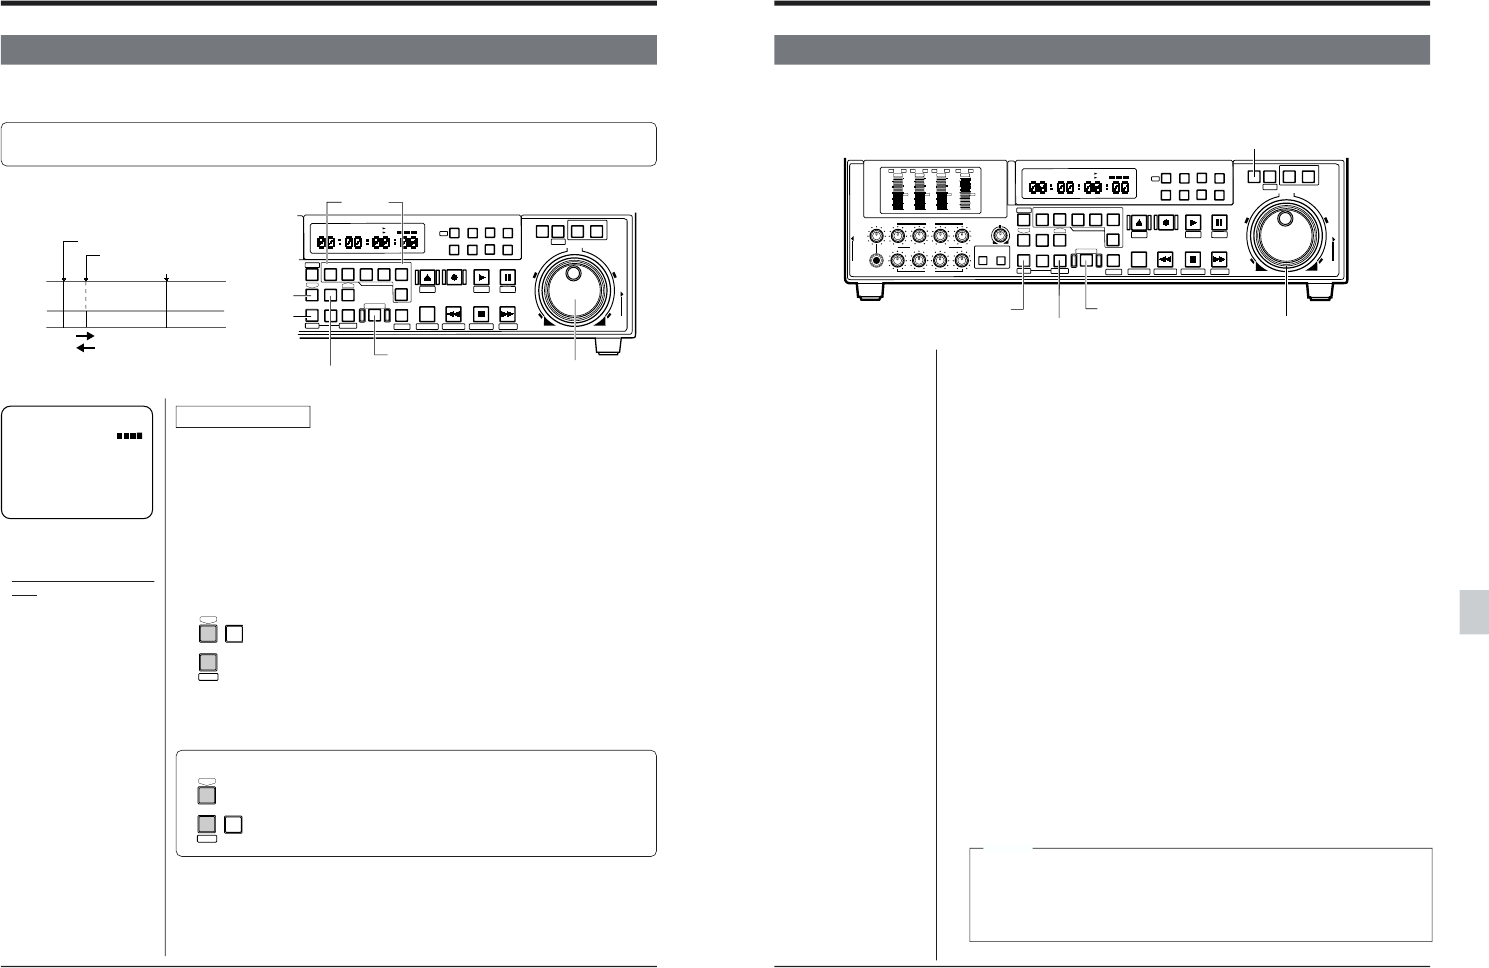
[SEARCH] button
[AUTO EDIT] button
[PREVIEW] button
Search dial
[SHIFT] button
M
H
F
S
REC
MENU
PLAY
PAUSE / STILL
REW
STOP
FF
EJECT
PHONES
CH1
CH2
CH3
CH4
REC
PLAY
PULL FOR VARIABLE
TRACKING
CH1
CH2
CH3
CH4/
TRACKING
SET
HOLD
PB
PB/EE
COUNTER
UB
CONDITION
PULL
RELEASE
RESET
VCON
REMOTE
TOP VIDEO AUDIO
OTHERSON SCREENTIME CODESERVO/SYS
USER
INSERT
STAND BY
PLAYER
SEARCH
VAR
P.PLAY
DA3
DA2
DA1VIDEO
ASSEM
IN
ENTRY
OUT
CANCEL
SHIFT
REVIEW
METER MODE
TRACKING
FINE
PREVIEW
AUTO EDIT
PREROLL
TC
RECORDER
DA4
STILL
X-1
REV
FWD
X1
PULL
RELEASE
CTL
P.READ
AUTO
OFF
V.VAR
REMOTE
PB/EE
16:9
TC
UB
DF
SERVO
GENCF
AP
525
OVER
–60
–2
–4
+2
+4
0
–40
–30
–20
–10
0
dB
dB
R
P
OVER
–60
–2
–4
+2
+4
0
–40
–30
–20
–10
0
dB
dB
R
P
OVER
–60
–2
–4
+2
+4
0
–40
–30
–20
–10
0
dB
dB
R
P
OVER
–60
–2
–4
+2
+4
0
–40
–30
–20
–10
0
dB
dB
R P
625
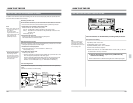
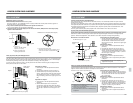
Ⅲ Last edit:
Once editing has been completed, the last edit can be recalled and executed.
Press the [AUTO EDIT] button while pressing the [SHIFT] button. Each time
this operation is repeated, the last edit and current edit are switched.
Ⅲ Variable-motion editing
The BR-D95U’s Variable-Motion editing mode allows you to play back tapes on
the player at variable speed (-2x to 3x). This is ideal for variable-motion editing
and other special effects.
● Operation
: On the recorder (BR-D95U)
1. Press the [RECORDER] button to set the VCR operation mode to “recorder”.
2. Select the recorder’s editing mode (insert or assemble).
3. Register the recorder’s edit points.
4. Press the [PLAYER] button to set the VCR operation mode to “player”.
5. Register the player’s edit IN point.
6. Press the [SEARCH] button while pressing the [SHIFT] button.
The player enters the Variable mode.
To release the Variable mode, press the [STOP], [FF] , [REW] or [SEARCH]
button. To engage the Variable mode again, execute the operation in step 6.
7. Set the playback speed.
• The player plays back the tape at the specified speed (from -2x to 3x).
Speed is set by the direction and angle of the search dial rotation.
• Press the [SET] button to register the variable-motion initial speed value.
Refer to the left column.
• The player’s playback speed is shown on the recorder’s counter display in
percentages (e.g. -200%: -2x, 300%: 3x ).
Playback speed can also be determined automatically by setting all four edit
points.
8. Press the [AUTO EDIT] button to start editing.
11-5 OTHER FUNCTION
Variable-motion initial
speed value setting
Setting procedure
1. In the Variable mode,
turn the search dial to
select the initial speed
value.
[ The initial speed
value is determined
by the rotation angle
of the search dial
and is shown on the
screen and counter
display.
2. Press the [SET] button
to define the initial
speed value.
•After this operation, the
initial speed value
does not change even
if the search dial is
turned.
•To change this value,
press the [STOP]
button to release the
Variable mode, then
select the initial speed
value again.
•If the [STOP] button is
not pressed, the initial
speed value is called
when the Variable
mode is engaged
again after being
released.
Notes:
●Use the variable speed value for the player shown on the BR-D95U’s
counter display as a guide. Actual playback speed depends on the player.
●Use a variable speed within the range -1x through 1x. When the BR-D95U
is used as a player, out-of-range variable speed will distort the picture and/
or sound.