


16
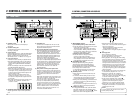
2-1 FRONT PANEL
2 CONTROLS, CONNECTORS AND DISPLAYS
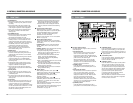
Ⅲ [PAUSE/STILL]
● Engages the Pause mode when pressed during
recording. Press the [PLAY] button to resume
recording.
● Engages the Still mode when pressed in the
Play, Search or Stop (Standby On/Off) modes.
Press the [PLAY] button to resume playback.
● Audio menu switch items are displayed when
this button is pressed in the Menu Switch
Setting mode.
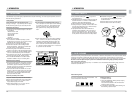
Ⅲ [STANDBY] button
● Switches the Standby mode between ON and
OFF in the Stop mode. The button is
illuminated in the Standby On mode.
● The head drum continues to rotate when the
Standby mode is on. This enables the unit to
quickly switch modes when another function is
engaged. The head drum does not rotate when
the Standby mode is off. This protects the
cassette tape and heads from damage.
● Servo and system menu switch items are
displayed when this button is pressed in the
Menu Switch Setting mode.
Ⅲ [REW] button
● Press this button to rewind the tape. The
maximum rewind speed during rewind can be
selected with menu switch No. 319 <FF/REW
MAX SPEED>.
● Output mode during rewinding can be selected
with menu switch No. 314 <PB/EE MODE>
(with the [PB PB/EE] button set to PB/EE Auto
Switching mode).
● Pressing this button together with the [PLAY]
button during playback slows playback speed
slightly to 0.93 times normal speed.
● Time code menu switch items are displayed
when this button is pressed in the Menu Switch
Setting mode.
Ⅲ [STOP] button
● Press this button to stop any operation. The
Output mode in this state can be selected with
[PB PB/EE] button.
● On-screen menu switch items are displayed
when this button is pressed in the Menu Switch
Setting mode.
Ⅲ [FF] button
● Press this button to fast-forward the tape. The
maximum fast-forward speed can be selected
with menu switch No. 319 <FF/REW MAX
SPEED>. The Output mode during fast-forward
can be selected with menu switch No. 314 <PB/
EE MODE> (with the [PB PB/EE] button set to
PB/EE Auto Switching mode).
● Pressing this button together with the [PLAY]
button during playback increases playback
speed slightly to 1.07 times normal speed.
● The drum hour meter is displayed when this
button is pressed in the Menu Switch Setting
mode.
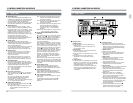
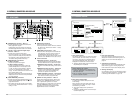
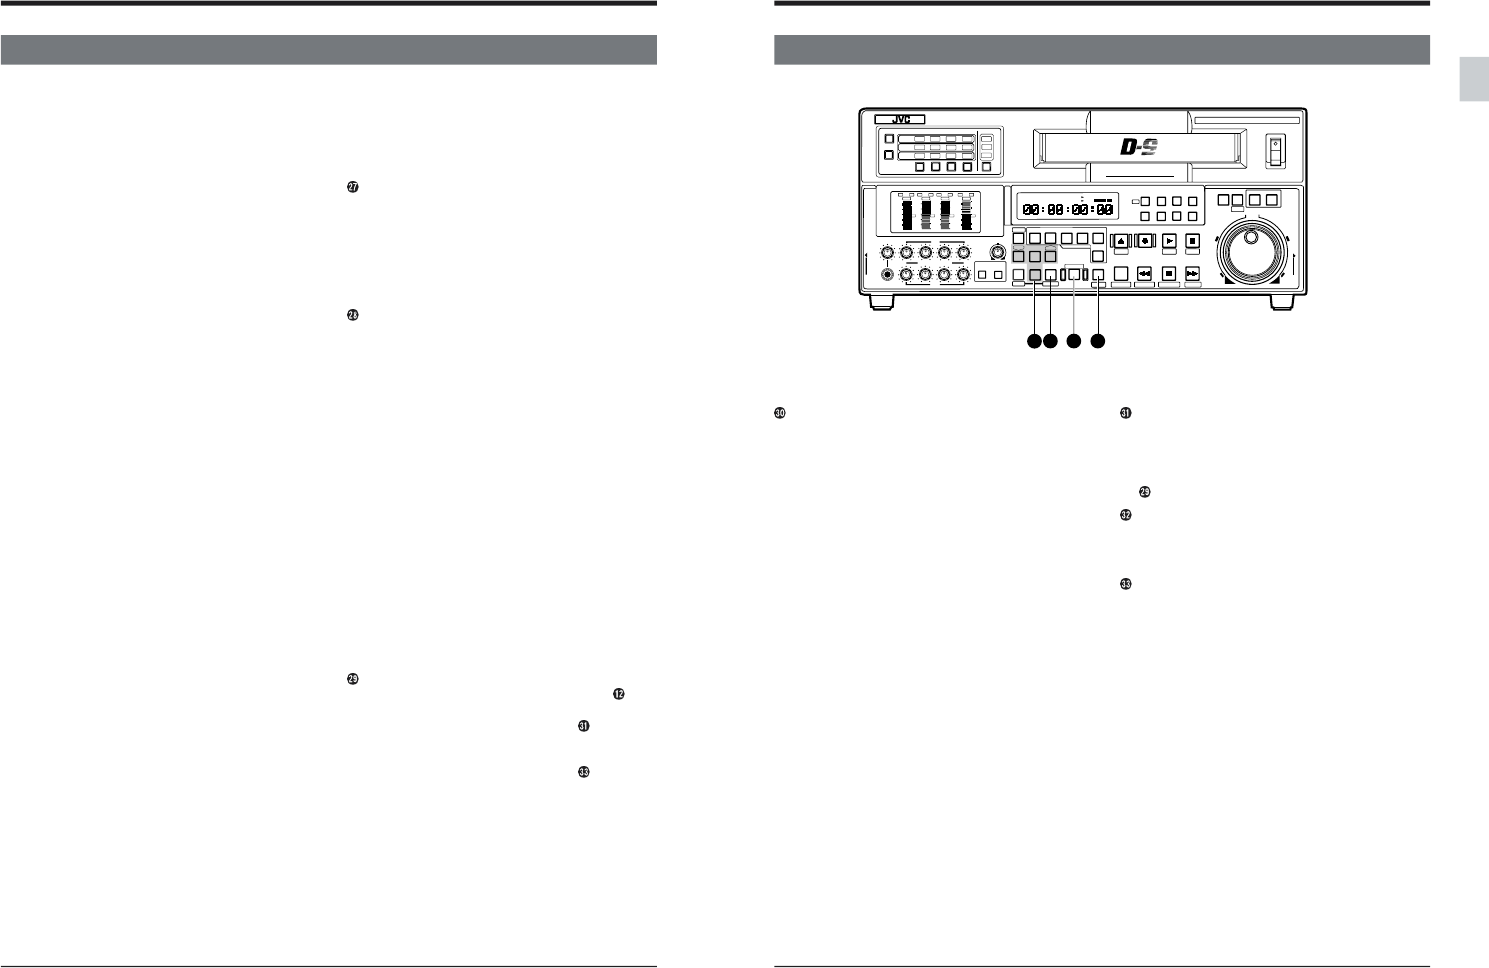
Player/recorder select button
Selects the player or recorder in swap editing.
Press the [PLAYER] button to operate the player
and the [RECORDER] button to operate the
recorder. The button corresponding to the
selected unit will be illuminated.
(Refer to menu switch No. 372 <P+R AT SWAP
MODE> on page 58.)
Editing mode select buttons
Use to select assemble editing or insert editing
(VIDEO, DA-1 to DA4, TC). Set before preview or
actual editing.
[ASSEM] button: Press to execute assemble
editing. VIDEO, DA1 to DA4 and TC are all
recorded.
[INSERT] buttons: Press these buttons according
to the signal(s) you want to insert.
● A signal corresponding with an illuminated
button is “ON”. A signal corresponding with a
non-illuminated buttons is “OFF”.
● You cannot select both assemble and insert
editing. Pressing the [ASSEM] button
automatically switches OFF the [INSERT]
button and vice versa.
● Each of the [INSERT] buttons can be set to ON/
OFF during insert editing.
● The [DA1] to [DA4] audio insert buttons blink
when the audio edit IN point for the audio split
editing has been registered.
● The [ASSEM] button cannot be set to ON/OFF
during assemble editing.
[SHIFT] button
While pressing this button down, press the
[VAR/P.PLAY] button to start program playback.
While pressing this button, press the
[PREVIEW] button to execute the review
operation of editing.
While pressing this button, press the
[PREROLL] button to execute the fixed time cue
up operation. For details, refer to “Fixed Time
Cue Up” on page 91.
Press the [AUTO EDIT] button while pressing this
button to execute a “last edit”.
For other operation button combinations using the
[SHIFT] button, refer to “Operation button
combinations” on page 148.
17
Edit point setting buttons
Use these buttons to register, erase, correct and
check edit points.
Ⅲ [IN] edit IN button
Use this button to enter the edit IN point and
show it on the counter display. Press this
button and the [OUT] button simultaneously to
display the duration of an edit. When the edit IN
point is entered, this button lights.
While pressing this button, turn the jog dial
clockwise to shift the IN point in the forward
direction or turn it counterclockwise to shift the
IN point in the reverse direction.
Ⅲ [ENTRY] button
Press this button while pressing the [IN] or
[OUT] button to enter the edit IN point or OUT
point.
Ⅲ [OUT] edit OUT button
Use this button to enter the edit OUT point and
show it on the counter display. Press this
button and the [IN] button simultaneously to
display the duration of an edit. When the edit
OUT point is entered, this button lights.
While pressing this button, turn the jog dial
clockwise to shift the OUT point in the forward
direction or turn it counterclockwise to shift the
OUT point in the reverse direction.
Ⅲ [CANCEL] button
Press this button while pressing the [IN] or
[OUT] button to cancel the edit IN or OUT point.
[PREVIEW] button
Press to start editing rehearsal. this button will
light. During preview editing, you can press this
button again if you want to restart the preview. To
review an edit, press this button together with the
[SHIFT] button.
[AUTO EDIT] button
Press to start auto editing. This button will light.
Press this button while pressing the [SHIFT]
button to execute a last edit.
[PREROLL] button
Press this button when the tape is at the position
where you want recording to start after preroll.
The tape will be rewound from the point where
you press this button for the preroll duration set
with the menu switch No.320 “PREROLL TIME”.
During preroll operation, this button lights and
goes out when the preroll operation ends.
If an edit IN point has been already entered,
preroll is based on the edit IN point.
When this button is pressed in the Menu Switch
Setting mode, the menu switch items registered
for the user menu are shown.
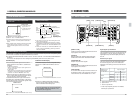
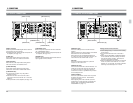
2-1 FRONT PANEL
2 CONTROLS, CONNECTORS AND DISPLAYS
POWER
ON
I
OFF
O
M
H
F
S
REC
MENU
PLAY
PAUSE /STILL
REW
STOP
FF
EJECT
PHONES
CH1
CH2
CH3
CH4
REC
PLAY
PULL FOR VARIABLE
TRACKING
CH1
CH1
CH2
CH3
CH4/
TRACKING
SET
HOLD
PB
PB/EE
COUNTER
UB
CONDITION
AUDIO
INPUT
VIDEO
INPUT
AUDIO
MONITOR
PULL
RELEASE
RESET
VCON
REMOTE
TOP VIDEO AUDIO
OTHERSON SCREENTIME CODESERVO/SYS
USER
INSERT
STAND BY
PLAYER
SEARCH
VAR
P.PLAY
DA3
DA2
DA1VIDEO
ASSEM
IN
ENTRY
OUT
CANCEL
SHIFT
REVIEW
METER MODE
TRACKING
FINE
PREVIEW
AUTO EDIT
PREROLL
TC
RECORDER
DA4
VIDEO CASSETTE RECORDER
BR-D95U
STILL
X-1
REV
FWD
X1
CH2
CH3
CH4
CH1
CH2
CH3
CH4
CH1
CH2
CH3
CH4
SIF
SDI
AES/EBU
AUDIO INPUT / AUDIO MONITOR SELECT
LINE
CPN
L
ANALOG
R
PULL
RELEASE
CTL
P.READ
AUTO
OFF
V.VAR
REMOTE
PB/EE
16:9
TC
UB
DF
SERVO
GENCF
AP
525
OVER
–60
–2
–4
+2
+4
0
–40
–30
–20
–10
0
dB
dB
R
P
OVER
–60
–2
–4
+2
+4
0
–40
–30
–20
–10
0
dB
dB
R
P
OVER
–60
–2
–4
+2
+4
0
–40
–30
–20
–10
0
dB
dB
R
P
OVER
–60
–2
–4
+2
+4
0
–40
–30
–20
–10
0
dB
dB
R
P
625
Variable Motion
COMPONENT DIGITAL
31
32
33
30