English 13
3 INSTALLATION AND CONNECTIONS
This section describes how to connect the digital video recorder to video cameras and other devices. Be sure to read the instruction
manuals for each connected device.
z Improper connections may result in malfunction or smoke emission.
z A separate power supply is required for operation of each camera.
z Manage power for all expansion units with a single power source. Otherwise, data may be lost.
DSR-5716P
Only nine cameras can be connected to the DSR-5709P.
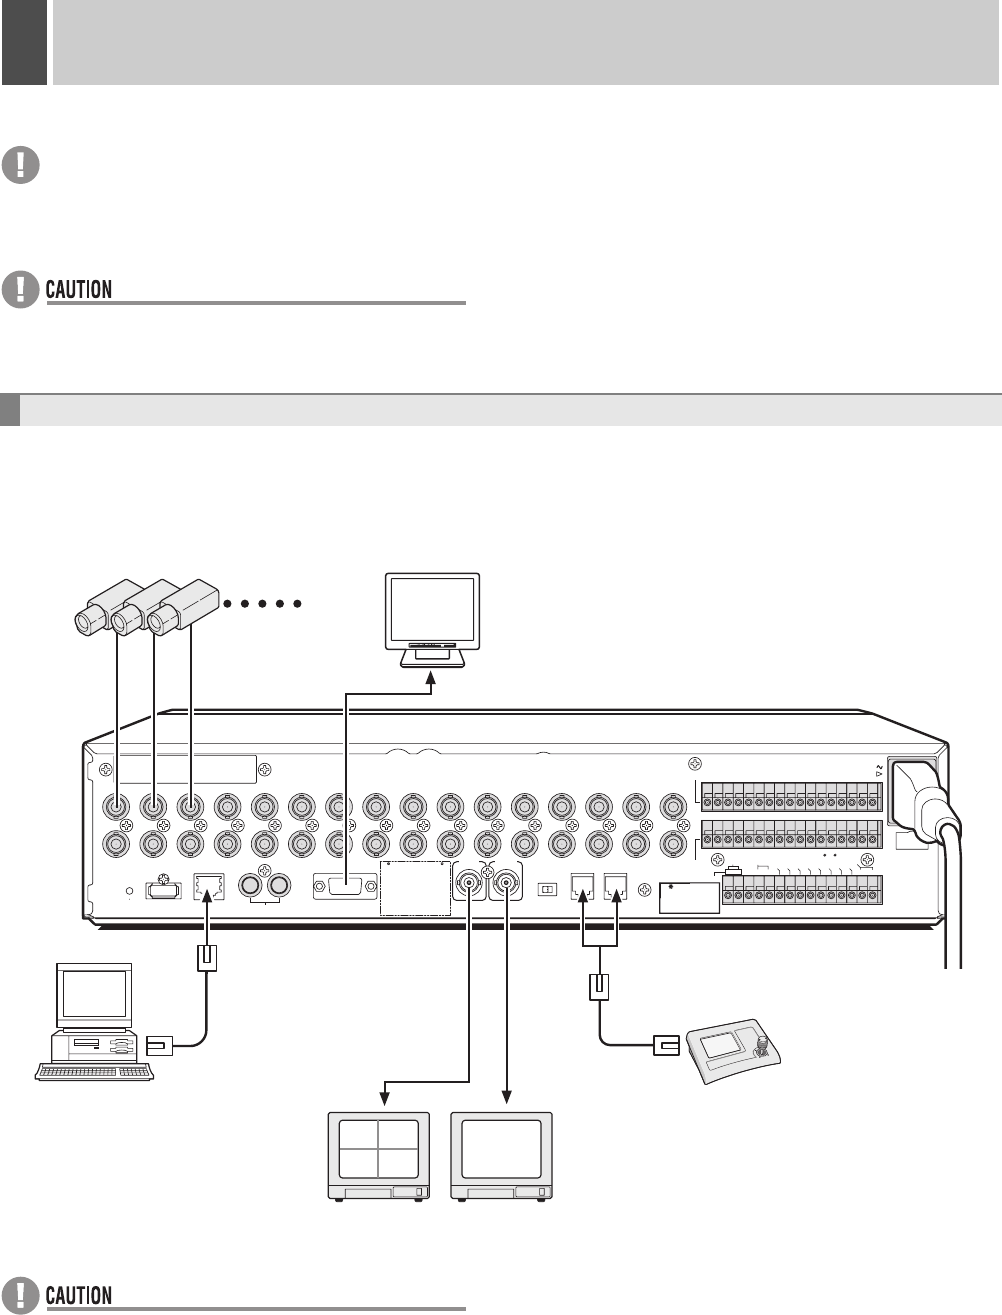
The following diagram shows the connections for cameras, monitors, a PC and a system controller.
z If you connect an outdoor camera to the digital video
recorder, make sure to establish a ground for the shielded
portion of the connection cable.
z Make sure to use a wall socket with ground fault protection.
The digital video recorder shall be installed by qualified service technician only.
Basic connections
IN
OUT
ALL
RESET
USB LAN IN OUT
VGA OUT
MONITOR OUT
DO NOT CONNECT TO PHONE LINE
AB
MAIN
MON2
AUDIO
12345678910111213141516
ALARM IN
SENSOR
ALARM OUT
SELECTABLE
OUTPUT 1 :
NON REC OUT/VIDEO LOSS
OUTPUT 2 :
ARACHIVE FULL/TIMER REC OUT
AC IN
CONTROL
2ND
RS-485/422
EXCEPT SANYO SSP
REMOTE
CLOCK IN
CLOCK OUT
ALARM RESET
WARNING OUT
FULL
ALARM
OUTPUT 1
OUTPUT 2
EXT TIMER IN
OUT
AB
C
C 1 2 3 4 5 6 7 8 9 10 11 12 13 14 15 16
R1R2
C
RS-485
SANYO SSP
RS-485
TERMINATE
OFF ON
0201
0403
POWERMODEAUTOMENU
Video input
terminal
PC
(commercially-available)
Monitor
(sold separately)
Video input
terminal
Monitor 2
(sold separately)
120 V – 240 V AC
(50/60 Hz)
Cameras
(sold separately)
1 - 16
System controller
(sold separately)
The RS-485 connector is
connected to A or B according
to the type of cable.
VGA monitor
(sold separately)


