


PREPARING FOR USE1
English 21
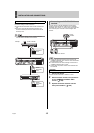
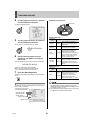
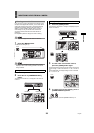
4 Turn the jog dial to select “01” and then
turn the shuttle dial clockwise.
“01” flashes (indicating the day).
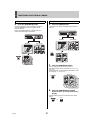
5 Turn the jog dial to select “26” and then
turn the shuttle dial clockwise.
The day is set to “26” and the month “01” flashes.
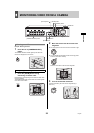
6 Use the same procedure to set the
month (01), year (2007), hour (08) and
minute (30).
When the minutes are set, the cursor moves to the next item.
z The day of the week is set automatically.
z The clock stops during date and time settings.
z The clock starts counting from 00 seconds.
7 Press the [EXIT/OSD] button.
The setting is completed and the display returns to the normal
screen.
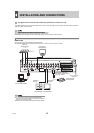
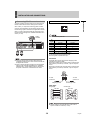
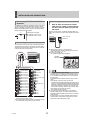
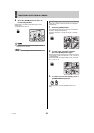
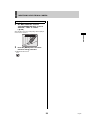
The hard disk contains a recording area and an archive area.
Refer to P.82 for operations.
Hard disk recording areas
[A] Recording area
[B] Archive area
z If the memory allocations for the hard disk recording areas
are changed after recording, all stored recordings are
deleted and the hard disk is initialized; accordingly, special
care should be taken. (JP.82)
z The total hard disk capacity displayed on the menu screen
may differ from the actual hard disk capacity.
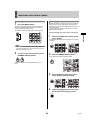
Hard disk archive area
<LANGUAGE/LANGUE/SPRACHE/IDIOMA> [KEY]
ENGLISH
<CLOCK SET>
01-01-2007 MON 00:00:00
<SUMMER TIME SET>
MODE : USE
WEEK MONTH TIME
ON LST-SUN 03 02:00
OFF LST-SUN 10 02:00
<EXT.CLOCK SET>
ADJUST. TIME 01:00
26-01-2007 FRI 00:00:00
26-01-2007 FRI 08:30:00
EXIT/OSD
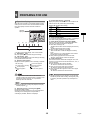
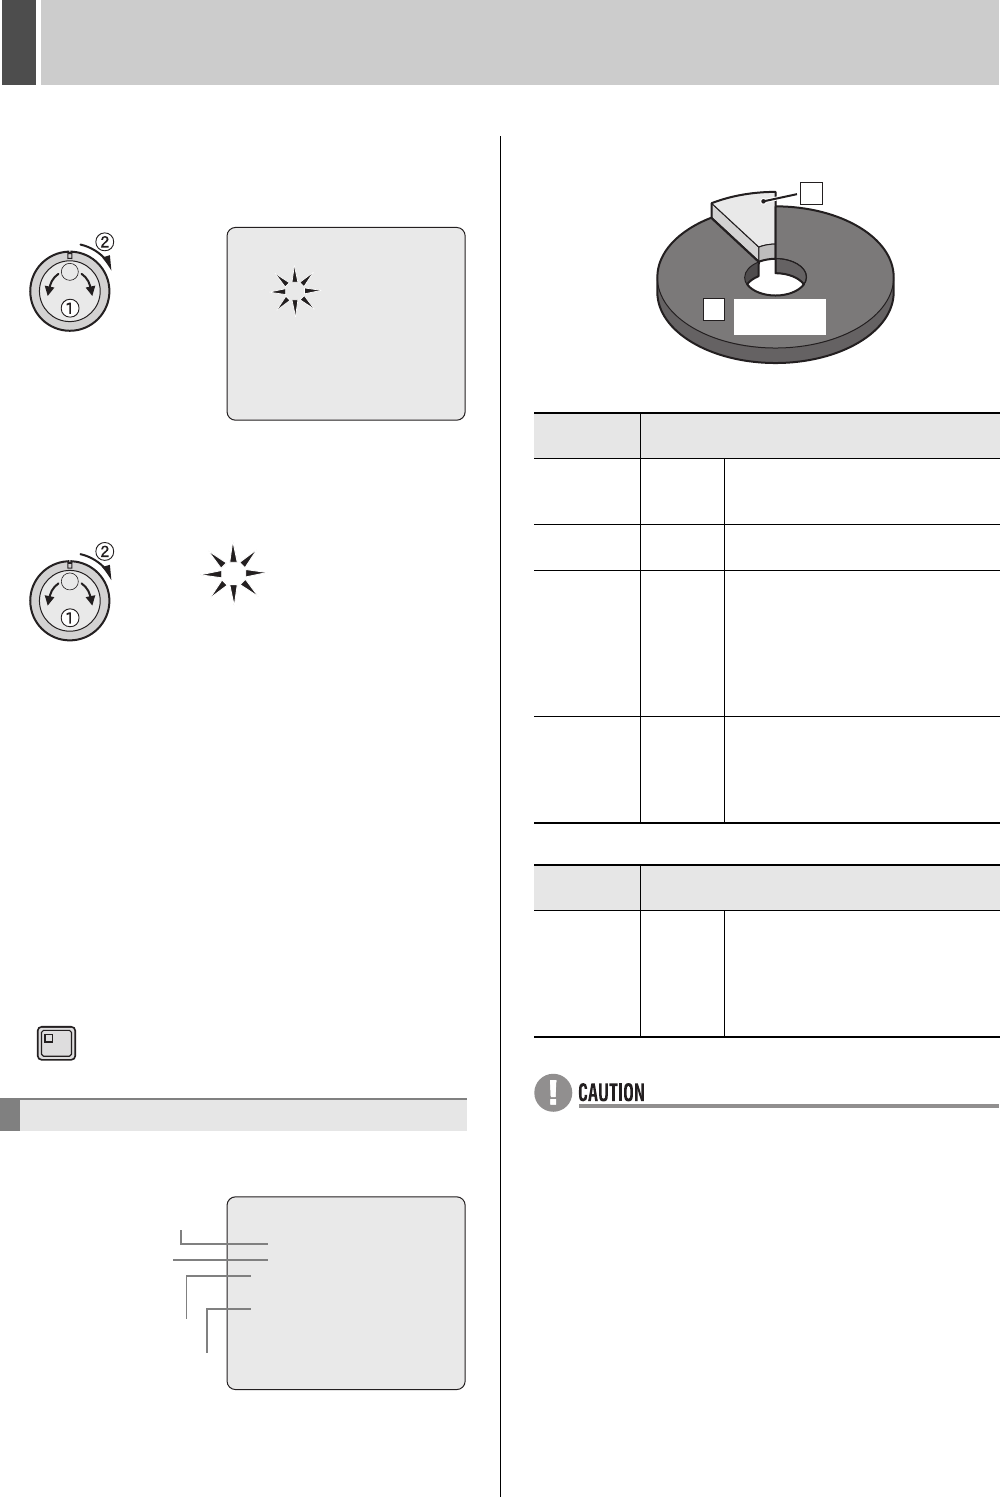
<RECORDING AREA SET>
TOTAL CAPACITY : 1500GB
INTERNAL HDD : 500GB
EXTERNAL HDD : 1000GB
RECORDING AREA : 80 %
AREA FULL RESET ->
ARCHIVE AREA : 20 %
AREA FULL RESET ->
CAUTION: WHEN THE AREA SETTING IS CHANGED,
THE WHOLE AREA WILL BE INITIALIZED !
[B] Archive area
[A] Recording area
Hard disk recorder internal
hard disk capacity display
Hard disk recorder
external hard disk
capacity display
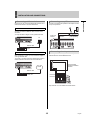
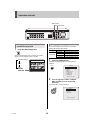
Recording
mode
Recording method
Normal
recording
Manual
When monitoring, recording is
performed by pressing the [REC/
STOP] button.
Timer
recording
Automatic
Recording is carried out in
accordance with timer settings.
Alarm
recording
Automatic
Recording is carried out when alarm
recording is set to “ENABLED”.
Alarm images are recorded in
response to either the operation of a
switch connected to an ALARM IN
terminal or to the detection of an
intruder via motion sensors.
Pre-alarm
recording
Automatic
When pre-alarm recording is set to
“ON”, it is possible to record video
from before the occurrence of an
alarm based on the corresponding
settings.
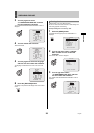
Recording
mode
Recording method
Copy
Manual
or
Automatic
This area is used to store important
video data copied from the normal
recording area and/or alarm
recording area. Changes can be
made to the recording area to
determine the capacity. (1% - 99% )
A
B
80%
80%
80%
20
20
20%
Recording
area
Archive area