


180 English
INTRODUCTION SETTINGS NETWORK
CONTROL
NETWORK
OPERATION
NETWORK
SETTINGS
OTHEROPERATION
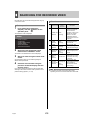
4 SAVING (COPYING) RECORDED VIDEO
Use the following procedures to copy recorded images to the
archive area on the hard disk or to download images to a PC
or the like.
These functions can be used to save important images from
the recording areas.
z In certain cases where network-busy is detected as a result
of the operating environment, the network may be forcibly
disconnected in order to protect DVR recording operations.
Furthermore, the network is forcibly disconnected in
response to commands to send a large amount of data in a
single operation (in particular, when 100 images or more
are to be saved), and in this case, the number of images
should be limited based on the hardware configuration in
question.
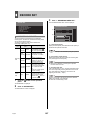
z When the archive area becomes full of images, download
these images to a USB memory or other storage media
and click [AREA FULL RESET] from the recording area
settings on the “MAIN MENU”. (JP.187)
z Can only save in full screen display. Cannot save for quad-
screen or multi screen display.
z Copied data is stored one image at a time. Moving images
can be copied by setting the number of images required
from the first copied image.
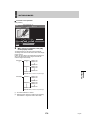
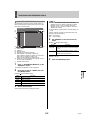
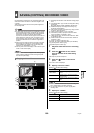
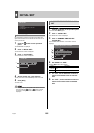
(1) Recording date and time of the video that is being played
back.
(2) PLAYBACK AREA: Type of video recording that is being
played back.
z ALARM z PRE ALARM z NORMAL z ARCHIVE
(3) MESSAGE: Displays a message when starting copy.
(Example: PLEASE WAIT!)
(4) UNIT: Select a method to specify the copy range (number
of pictures, time and events).
(5) AUDIO: Specify whether or not to copy audio.
(6) PICTURES (1-40000): Specify the number of sheets
when “PICTURES” is specified in “UNIT”.
(7) TIME: Specify hours, minutes and seconds when “TIME”
is specified in “UNIT”.
(8) EVNETS: Enter the number of events when “EVENT” is
specified in “UNIT”.
(9) COPY CH: Select a channel to copy.
(10) COPY TO: Fixed to “ARCHIVE AREA” (not selectable).
(11) [START] button: Starts copying.
(12) [CANCEL] button: Aborts copy.
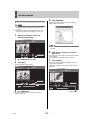
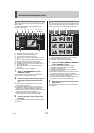
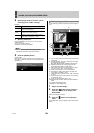
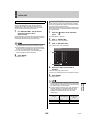
1 Play back video stored in the recording
area.
2 Click the button on the control
panel at the start of the video being
copied.
Video stops to provide a still picture.
3 Click the button on the control
panel.
The “COPY” screen is displayed.
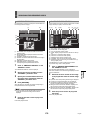
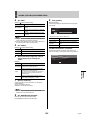
4 Specify a value for “UNIT”.
[Settings] ( indicates default setting)
z An event means a continuous record (or a recording unit
set by “DURATION” for the alarm recording).
z You can select “EVENTS” only when copying alarm
recording video.
5 Specify for “AUDIO”.
[Settings] ( indicates default setting)
Copying to the archive area
(1)
(2)
(10)
(3)
(4)
(5)
(9)
(11) (12)
(7) (8)
(6)
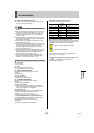
Setting Description
PICTURES
Specifies the copy range as the number of
pictures.
TIME
Specifies the copy range as time (hours/
minutes/seconds).
EVENTS
Specifies the copy range as the number of
events.
Setting Description
ON Also copies audio.
OFF Does not copy audio.