


RECORD SET3
English 191
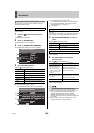
Use the following procedure to set timer operation duration and timer recording conditions on a day-specific basis.
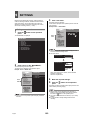
1 Click the button on the operation
panel.
The “MAIN MENU” is displayed.
2 Click “2. RECORD SET”.
The “RECORD SET” screen is displayed.
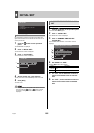
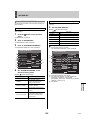
3 Click “5. TIMER SET”.
The “TIMER SET” screen is displayed.
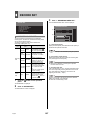
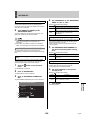
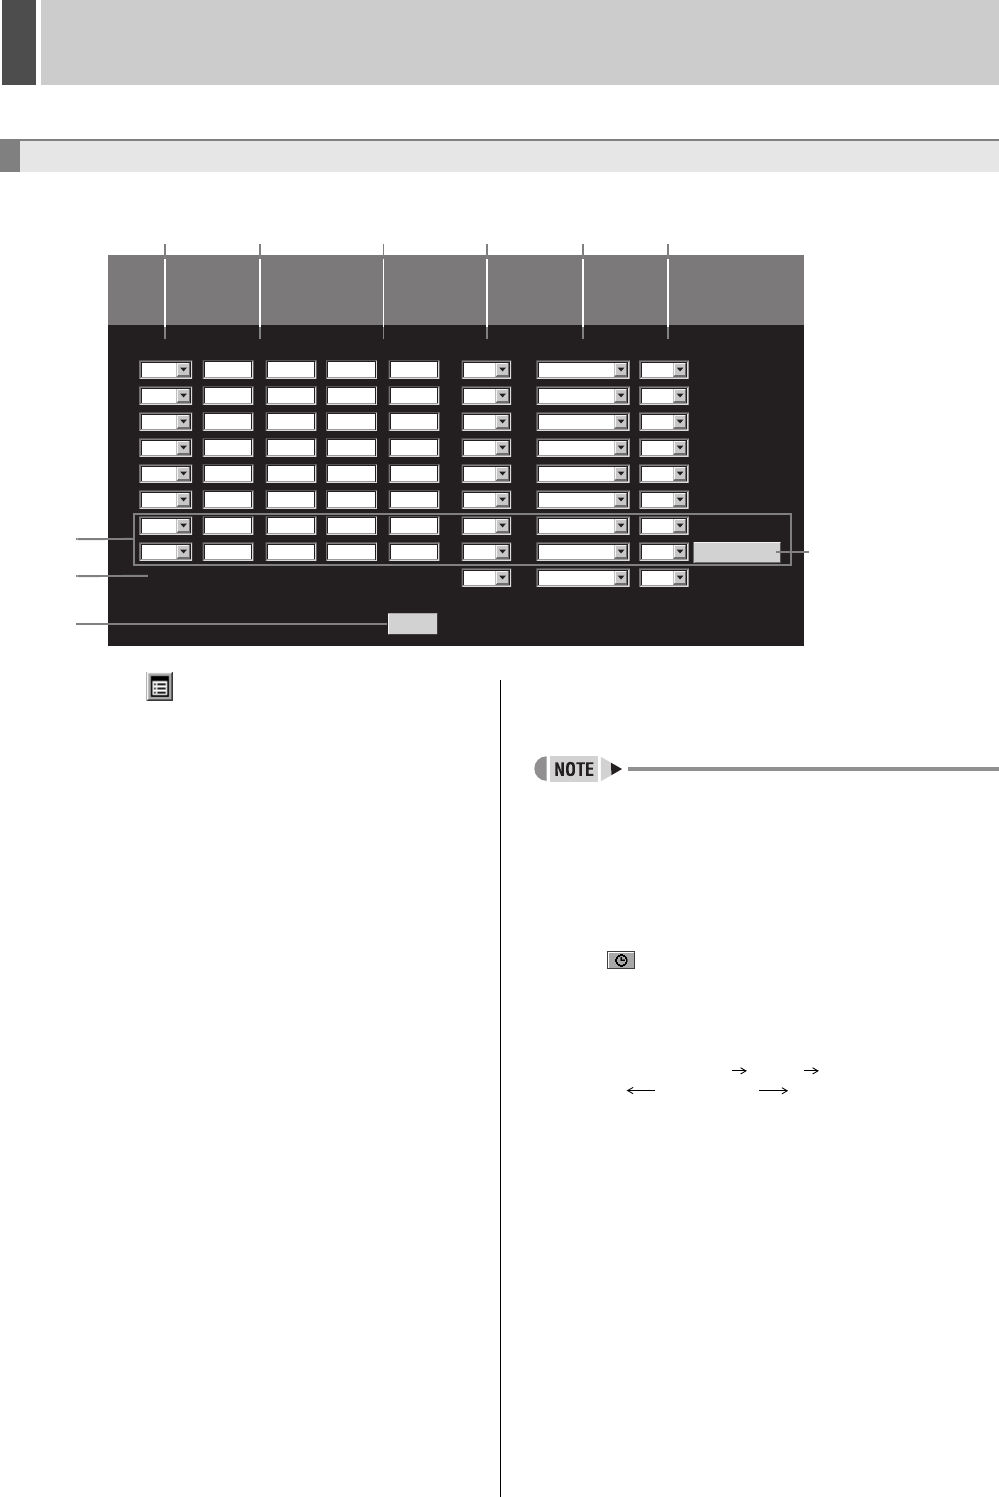
4 Set timer recording conditions for
different days of the week.
(1) WEEK
Specifies the days of the week for timer recording. By using
multiple setting rows, it is possible to set up timer recording for
a number of different times during a single day.
(2) START
Specifies the time at which to start timer recording.
(3) STOP
Specifies the time at which to stop timer recording.
(4) PROGRAM
Specifies the program (P-1 through P-4) for program
recording. (JP.190)
(5) FPS
Specifies the recording rate. (JP.189)
Set to “***” for program recording.
“***” is displayed automatically when program recording is set
and [SAVE] is clicked.
(6) SET
Set to “ON” to enable timer recording.
Set to “OFF” to disable timer recording.
(7) DLY
Set the start and stop times, program, and recording rate and
set “SET” to “ON” to enable timer recording over the same
period each day.
(8) EXT
Displays details set by an external timer. (These are not start
and stop time settings.)
z If “DLY” is set for any other day, all rows use this setting.
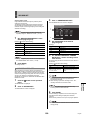
5 Click [SAVE].
The setting is saved.
Performing timer recording
Click the button on the operation panel. (JP.165)
Overlapping of timer reservation times
z If timer settings overlap, recording is performed in the
following priority order.
Individual reservations “DLY” “EXT”
(High) Priority (Low)
z If a reservation for a particular day or a daily reservation
overlaps with each other, priority is given to that with the
earliest start time. If both have the same start time, priority
is given to that with the highest setting position in the
menu.
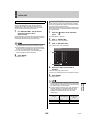
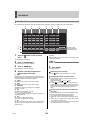
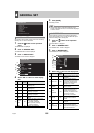
Setting a timer for over 24-hours continuous
recording
The bottom two lines (SAT, DLY) of the TIMER SET screen
are used to make settings for this type of recording.
(1) Click [OVER 24H] to switch the setting format.
(2) Set the day and time for the start of recording in the top
row.
(3) Set the day, time, program and recording rate for the end
of recording in the bottom row.
(4) Select “ON” for “SET” on the bottom row to specify timer
recording extending for over 24 hours.
5. TIMER SET
TIMER SET
WEEK
EXT ** * ** ** * **
SUN -- : -- -- : --
-- : -- -- : --
-- : -- -- : --
-- : -- -- : --
-- : -- -- : --
-- : -- -- : --
-- : -- -- : --
-- : -- -- : --
MON
TUE
WED
THU
FRI
SAT
DLY
START STOP FPS
A 12.5 FPS
A 12.5 FPS
A 12.5 FPS
A 12.5 FPS
A 12.5 FPS
A 12.5 FPS
A 12.5 FPS
A 12.5 FPS
A 12.5 FPS
OFF
OFF
OFF
OFF
OFF
OFF
OFF
OFF
OFF
OFF
OFF
OFF
OFF
OFF
OFF
OFF
OFF
OFF
SETPROGRAM
TIMER SET
SAVE
OVER 24H
(1) (3) (4) (6)
(7)
For setting timer
recording spanning
more than 24 hours
(2) (5)
5
(8)