


D-160 Owner's manual (SETUP mode)
156
<Notes>
* The re-chase window of the D-160 is fixed at 10 frames. This means that when the time
difference(offset)between a master machine and the slave D-160 becomes larger than 10
frames, the D-160 will recognize it is out of chase lock and re-chase the position again. The D-
160 will mute its audio during the re-chasing process. However, if the difference between
two machines is less than 10 frames, the slave D160 will ignore the difference and run it as it
is.
* The digital signal used with the Slave Mode is solely for sync lock. If you want to record a
digital signal, follow the procedure as described in sections “2-15. Digital Input Track Setting”.
For your information, the digital signal you set with the “2-15. Digital Input Track Setting”
for recording will override and be prioritized over the external sync signal which you have
chosen this mode.
* The Vari Pitch function will be automatically OFF if you set the Slave Mode to ON.
* The D-160 will mute audio for about two seconds when it locks/unlocks the external sync
source if you have chosen the slave type to “SPDIF” or “adat”.
To avoid this problem, supply a reliable and stable digital source signal to the D-160.
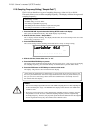
2-14. Record Protect Setting (“Rec Protect?”)
The D-160 carries a record prohibit function.
This function works as if you had removed the Record Protect tag from a conventional
compact cassette tape. This mode allows you to choose either the ON or OFF function.
* Initial setting : Off
* Available setting : Off, On
* This setting is applicable song by song.
* This setting can be saved or loaded as a part of the song data.
* The setting is memorized even when the power is off.
*
Make sure you choose the right program before setting up this mode.
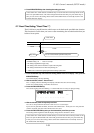
1. Press the DISP SEL key and choose the flashing SETUP mode on the display. Then, press the
EXECUTE/YES key.
The SETUP display will stop flashing.
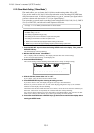
2. With the JOG dial, choose “Rec Protect?”.
The “?” display will start flashing.
3. Press the EXECUTE/YES key.
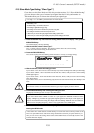
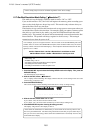
The display will start flashing either “Off” or “On” of current setting.
In the case of the initial setting, it will display “Off”.
4. Choose either On or Off with the JOG dial.
If you choose “Off”, there is no protection and you can record, paste, erase, etc. over it.
If you choose “On”, there is protection and you cannot record, paste, erase, etc. over it.
5. Press the EXECUTE/YES key again to proceed.
* Press either the STOP button or EXIT/NO key to return from the second step menu to the
first or to quit the SETUP mode. The menu will go backwards each time you press either key
so that you can correct the setting, choose some other SETUP mode or eventually return to
the normal time base display.
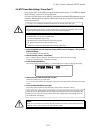
<Note>
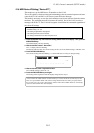
If you set this mode to record protect, the D-160 will not perform such functions as recording,
pasting or erasing. And it will show “Disable REC” on the display for one second as a warning
message. Change the protect mode setting to “OFF” in this situation.
44.1kHz
SETUP
91011121314151687654321
42
OL
0
30
24
18
12
9
6
3
∞
_